
What a fab day we have had today
We spent the day in one of Essex's (UK) Amazing Churches for the annual Thaxted Craft Fair.
The weather was fab, as was the refreshments, and the organisation was perfect.
We sold some of our handmade doorstops, loads of our handmade cards and gift tags,
And even better was the first Christmas Card purchases and orders!!
The first of our Christmas Stamp Camps took place this week too
Yes the Festive Season is sweeping down on us rapidly now
Today I have more glitter, glimmer and sparkle for you
With another helping of
AN OPEN HEART STAMP SET
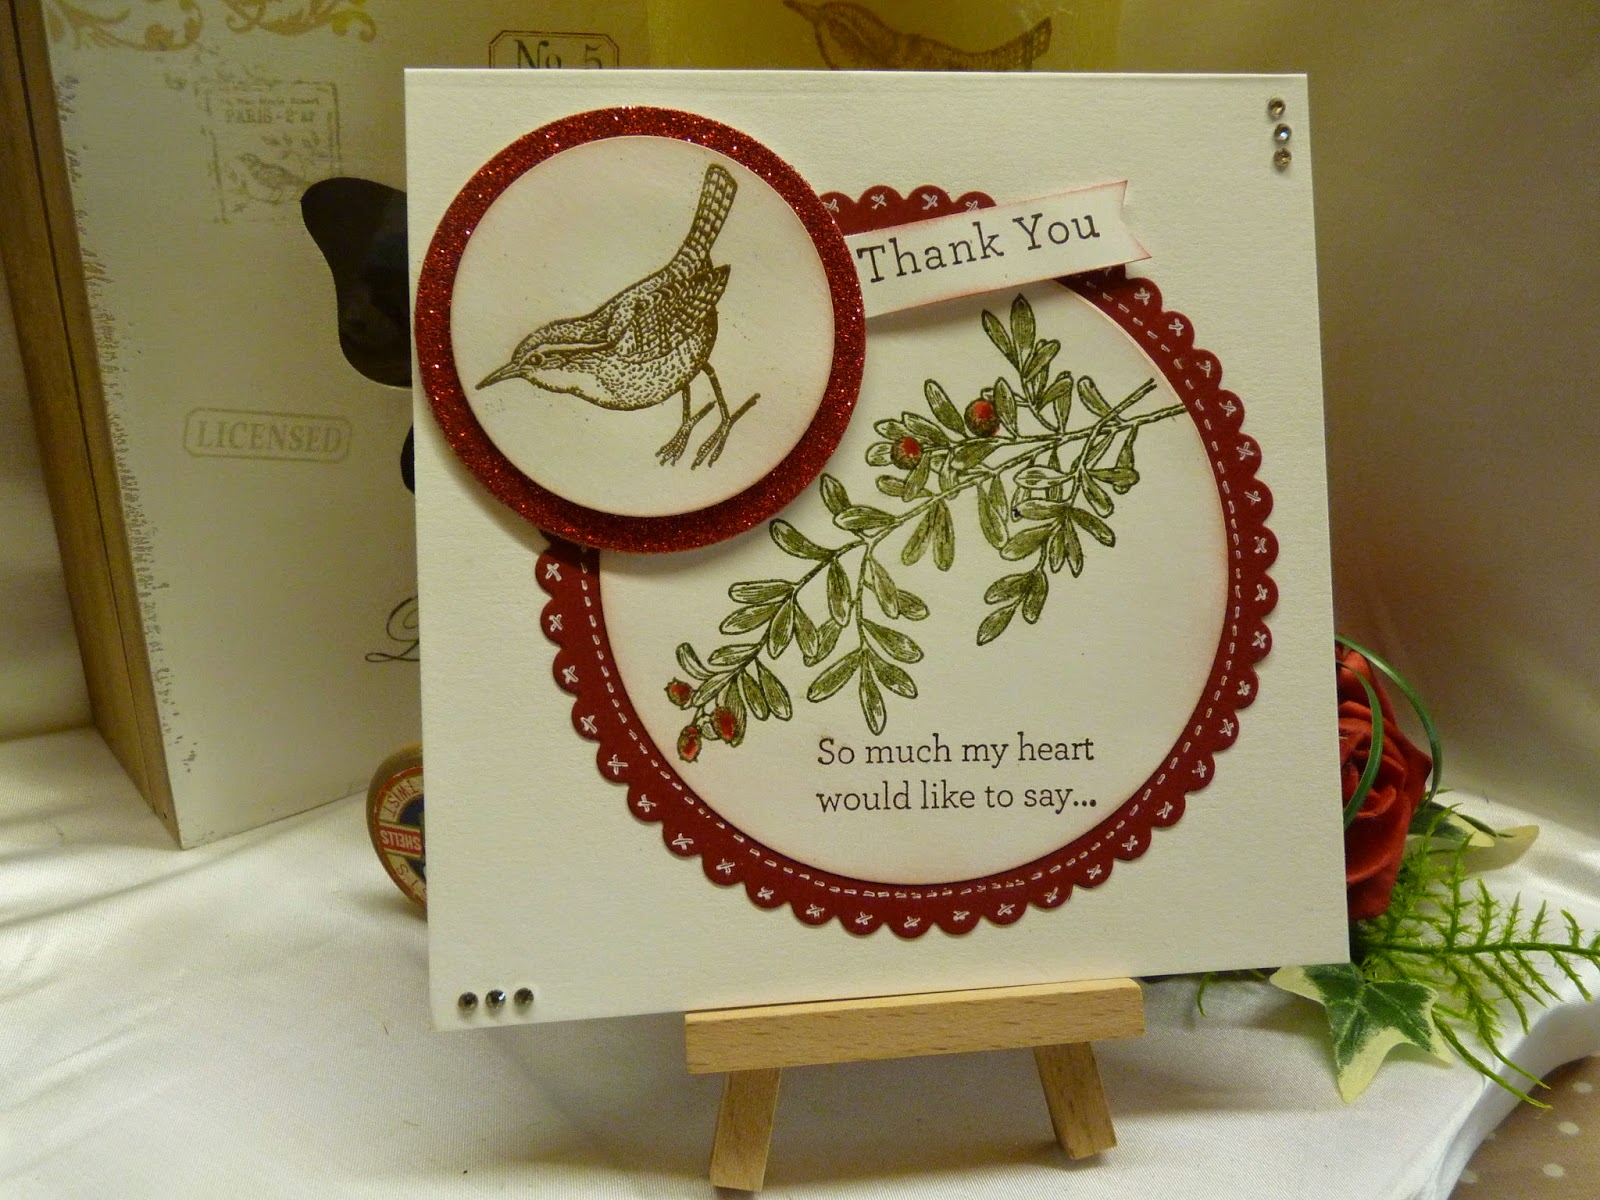
Todays card has turned those mistleberries into cherry cobbler holly berries, and a little more hand finished accents using the Unibal White Gel Pen
And to create todays card, you need to begin, as always, with the card blank.
Trim a piece of Whisper White cardstock to 15cms x 30cms.
Score the long side at 15cms.
Fold and burnish the score line with your bone folder.
Next you need the Circles Framelits & Die Cut the large scallop circle Framelit from Cherry Cobbler cardstock.
Next select the next size down circle framelit and die cut using a piece of Whisper White cardstock.
Stamp this with your leaf stamp, and also your Sentiment first with Versamark, and without stamping, ink the stamps with Always Artichoke ink. Sprinkle with clear embossing powder, Tap off the excess oder and heat with your heat tool until the embossing powder has melted. Avoid the temptation to waggle the heat tool, as there is no need, I promise!

Now stamp the bird in Soft Suede ink onto Whisper White cardstock. Die cut from the best fitting circle framelit,
Then die cut a piece of Red Glimmer cardstock in the next size up circle framelit.
Colour in the berries in Cherry Cobbler, using either a blender pen with the Cherry Cobbler ink pad, or the Cherry Cobbler Blendabilities assortment of alcohol pens.
Now for the layering.
Beging by layering the leaf circle onto the cherry cobbler Scallop Circle. Add faux stitching using the white Unibal Gel pen (a running stitch and then cross stitch)
Adhere the card to the card blank.
Then mount the bird circle onto the red Glimmer cardstock. Mount the layered bird onto the card blank using Stampin Dimensionals.
Finally, if you wish, stamp an additional sentiment and cut a banner end. Mount on the card. Add a few Dimensionals ...
Now it is over to you!

If you would like
to ask any questions on techniques or products, or anything else related to my
blog posts, please feel free to ask away
Happy Stamping
Kim xxx
Contact me to
order:
Telephone/Txt:
07759587004
Email: kim@stampinupatthewarren.com
Or Order
Online 24/7
Or Click on the
image of the products used below and it will take you straight to my online
store
 |  |  |  |  |
 |  |  |  |  |
 |  |  |  |  |
 |  |  |  |  |
 |
Table built using Product Table Builder by The Crafty Owl - Independent Stampin' Up! Demonstrator.


No comments:
Post a Comment