google-site-verification: google70410e9e92d4fda2.html

Friday, 3 July 2015

Floral Wings Hostess Stamp Set with Chrystal Effects

Yes, I know, I am late posting today
But sometimes, lots of blocks are put in the way of my usual OCD routines
And Yes, today was one of those days

And rather than wittering on as usual today, I am going to cut straight to the chase

The card I am sharing with you today is another butterfly creation. 
This time I am using one of the new Hostess Stamp Sets, and I had to wait for it to dry before I could photograph it, since I gave the Butterfly the Chrystal Effect treatment that has left this enamelled look to the butterfly


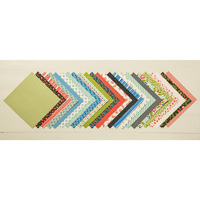
And quite unusually for my, I have also used one of the new Designer Series Paper Stacks, and you will be pleased to know, that rather than the old 5" x 7" stacks, all the new stacks are 6" x 6"
Now this doesn't include the Colour Collection Stacks and the Designer Series Papers,They are still 12" x 12" ..... OK, let that breath out you were holding, and BREATH!!
The stack I have used here is
the PRETTY PETALS Stack

And I went for this beautiful Mint MAcaron Striped Background, and I co-ordinated that with the light floral paper. This I overstamped the wispy leaf stamp using Pear Pizzazz ink
I stamped several of these over the floral paper.

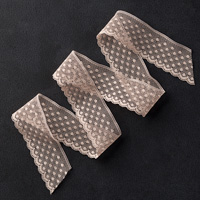
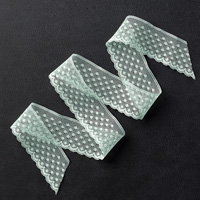
Next, I wrapped a piece of Mint Macaron Dotty Lace Trim around this panel and tied an elegant bow.
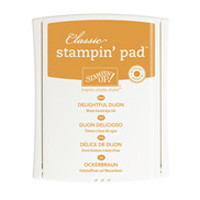
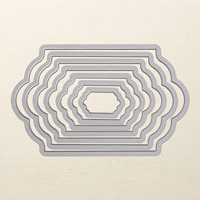
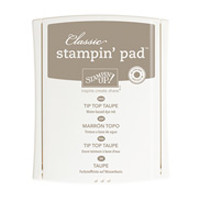
The next step was to stamp the sentiment onto a piece of Whisper White Cardstock using Tip Top Taupe classic ink Pad, onto a scrap of Whisper White Cardstock. This was punched out using the new new Washi Label Punch .... which I LOVE!
I punched two more of these tags from Tip Top Taupe cardstock and cut each in half (one vertically and the other horizontally.
I then used these pieces to mat (layer) the tag, using tiny amounts of Tombow Multi-Purpose Liquid Glue.

And below you will find images of the products used today
Simply click on the images to view them in more detail.

Table built using Product Table Builder by The Crafty Owl - Independent Stampin' Up! Demonstrator.


Now for the butterfly
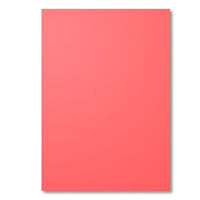
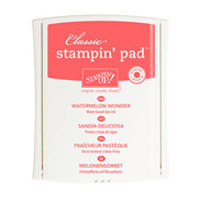
I stamped the butterfly using Calypso Coral Classic Ink Pad onto Whisper White Cardstock, having stamped off some of the ink onto my grid paper (you could use scrap paper)

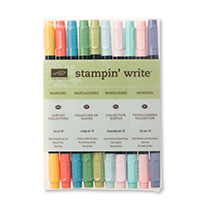
I then took the small 3 flowered stamp, and inked it up using a combination of Pear Pizzaz & So Saffron Stampin Write Markers, and stamped these onto each of the lower butterfly wings,
Then I changed the stamp for the single small flower, and stamped that using So Saffron Marker in the centre of each of the upper wings.
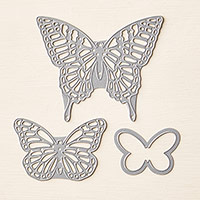
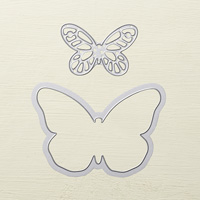
The next step was to Die Cut the butterfly using the Bold Butterfly Thinlets Dies,
Once the inks had dried, I applied a layer of Chrystal Effects over the front of the butterfly
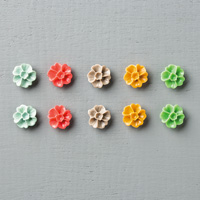
And finished by adding an In Colour Blossom Accent to the centre of the butterfly. LEave to dry overnight.

Once Dry, use a Stampin Dimensional to mount the butterfly onto a Whisper White Card Base


Thursday, 2 July 2015

Feel Goods meets Work of Art

What do you think of my new Logo?
I designed it myself, as I wanted something a little fresher looking.
I hope you like it?

You may have noticed that there are a couple of changes to my blog this week. 
I hope it will make navigating the site easier, with easier access to my Demonstrator Website, where you can shop for your favourite Stampin Up! Products, link at the current promotions, see my Creative Projects that I hope will give you inspiration, and finally, you can easily Join My Team as a Stampin Up Demonstrator
And because I take mentoring and training my Team Members seriously (years of mentoring student nurses), you will be supported as your business grows.


I have a lovely, simple and quick card to share with you today, and it is really easy to make.
The focus of this card is on the large sentiment, from Stampin Up! Feel Good Clear Mount Stamp Set

& I have used 2 other stamp sets to create the background:
World of Dreams
&Work of Art


Scroll down for the Tutorial

Here are the products I have used in today's card
Click on the images to see them in more detail.

Table built using Product Table Builder by The Crafty Owl - Independent Stampin' Up! Demonstrator.


And now to the Tutorial
Begin by making your 15 cms (6") Square card base, using Stampin Up!s new A4 Thicker Cardstock
Use the scoring blade on your trimmer to give a nice crisp fold

Next trim a a piece of Whisper White cardstock to 12 x 12 cms
Use the Work of Art stamp set and the 2015-17 In Colour Classic Ink Pads, using the Stampin Off technique from yesterdays  blog, to give a less intense colour, to the left side of this panel.
Overstamp this using the Grass stamp from World of Dreams, stamp over the stamped cardstock 

Now wrap a piece of the Tip Top Taupe Dotty Lace around the stamped panel and tie a neat knot on the right hand edge
Add an In Colour Blossom Accent beneath the knot using Chrystal Effects as an adhesive.

Next stamp your sentiment of choice from the Feel Goods Stamp Set, and die cut it out using the new Lots of Labels Framelits Dies, Apply Stampin Dimensionals to the reverse and mount on your card front, overlapping the lace trim a little.
Apply a couple of strips of Fast Fuse Adhesive to the back and mount onto your Card Base.

Simple as that
Now it is over to you
Happy Stamping
Kim xxx
Would like to JOIN  my Pinterest Community Board?
 where you will be able to post your own Stampin Up! Makes?
If the answer is YES please email me via


If you have any questions on techniques, orders, products
OR
 Joining my Team as an Independent Stampin Up!  Demonstrator
contact me via:-

Text: 07759587004 

Order Online 34/7

Wednesday, 1 July 2015

Grungy Watercolour Wings Birthday

Before I share today's card with you
I want to to take time and familiarise yourselves with the new layout of my blog

At the top Right you will find the monthly HOSTESS Code
Be sure to add this code when placing orders via my online store
(you will be prompted to enter this during the checkout process)

Below that you will find all the important information about Stampin Up, their Products & Promotions

Make sure you check that side bar regularly  as I will be keeping it up to date with all the latest news
To read all about the promotion, product, deals etc, just click on the image 

I decided to make these changes, so that I can concentrate on my daily card & other Creations without the distraction of updating you before getting to the crafting.

If there is an important message from Stampin Up! then I will still put that at the beginning of my Blog Post

So enough of that ..
Lets get to the crafting shall we?

Todays card was a very quick make when my 5 year old Grandson informed me that he needed a card for his friend, and that he needed it within the hour, as he was going off to his friends Birthday Card. He wasn't sure if she was having her 8th or 9th Birthday, so I had to leave the numbers off the card


Since she was a young girl, I figured Butterflies ... because I have never yet met a girl, or woman for that matter, that doesn't like butterflies
And because I struggle with leaving 'White Space' on a card, I used some light splatter with the assistance of my faithful Gorgeous Grunge Stamp Set onto Whisper White Cardstock

I went with Melon Mambo Cardstock &classic ink pad, plus Bermuda Bay classic ink pad

I went with one of the new Hostess Stamp Sets (Happy Birthday Everyone) for the Birthday Sentiment, and stamped this using Chocolate Chip Classic Ink Pad.
The Sprinkles on Top sentiment comes from the Remembering Your Birthday Stamp Set & was also stamped with Choc Chip ink


Now for the butterflies
I have used the Watercolour Wings Photopolymer Stamp Set
And boy is Photopolymer a godsend for 2 or 3 step Stamp Sets, as you can see through the acrylic blocks and precisely place your different step stamps without the use of Masking or Stamp A Ma Jigs!.

And the stamps have a little tab so you can line up each stamp. Plus the printed acetate sheet that comes with the stamp set includes number for the recommended order that you use the stamps. Generally, you start with the lightest colour, and the darkest at the top, but play around with the order of stamping to see what effects you can create,

This one is a 3 step stamp, and although it appears I have used different colours to create the images, I have only used 2 ... Melon Mambo and Bermuda Bay
The tonal effect of this card. To get this effect, I used the 'Stamping Off'' technique for the first two steps of each butterfly
Finish your butterfly, die cut it using the Bold Butterfly Framelits Dies & Butterfly Thinlets Dies

TECHNIQUE TIP
Stamping Off is a technique used to remove some of the ink from a stamp, before stamping onto your project.
It is really simple to do ...
Step One - Ink Up your stamp
Stamp Two, Gently stamp onto your grid paper or scrap paper to remove some of the ink
Step 3 Stamp onto your project

And here are the products used in today's card,
Click on the Product Icon to view it in more detail

Table built using Product Table Builder by The Crafty Owl - Independent Stampin' Up! Demonstrator.

Happy Stamping
Kim xxx


Would like to JOIN  my Pinterest Community Board?
 where you will be able to post your own Stampin Up! Makes?
If the answer is YES please email me via

If you have any questions on techniques, orders, products
OR
 Joining my Team as an Independent Stampin Up!  Demonstrator
contact me via:-
Text: 07759587004