google-site-verification: google70410e9e92d4fda2.html

Wednesday 29 June 2016

Watercolour Wash Vintage Styled Card using In This World Stamp Set from Stampin' Up! UK

  
Now, if you have been following my blog over the past 5 years, you will know that I am a Vintage Girl at heart! I have to fight my natural inclination to make everything vintage styled. So I have learnt, that people like to see all kinds of cards & 3D projects.

But for today, I am feeding my love of the vintage Style he he

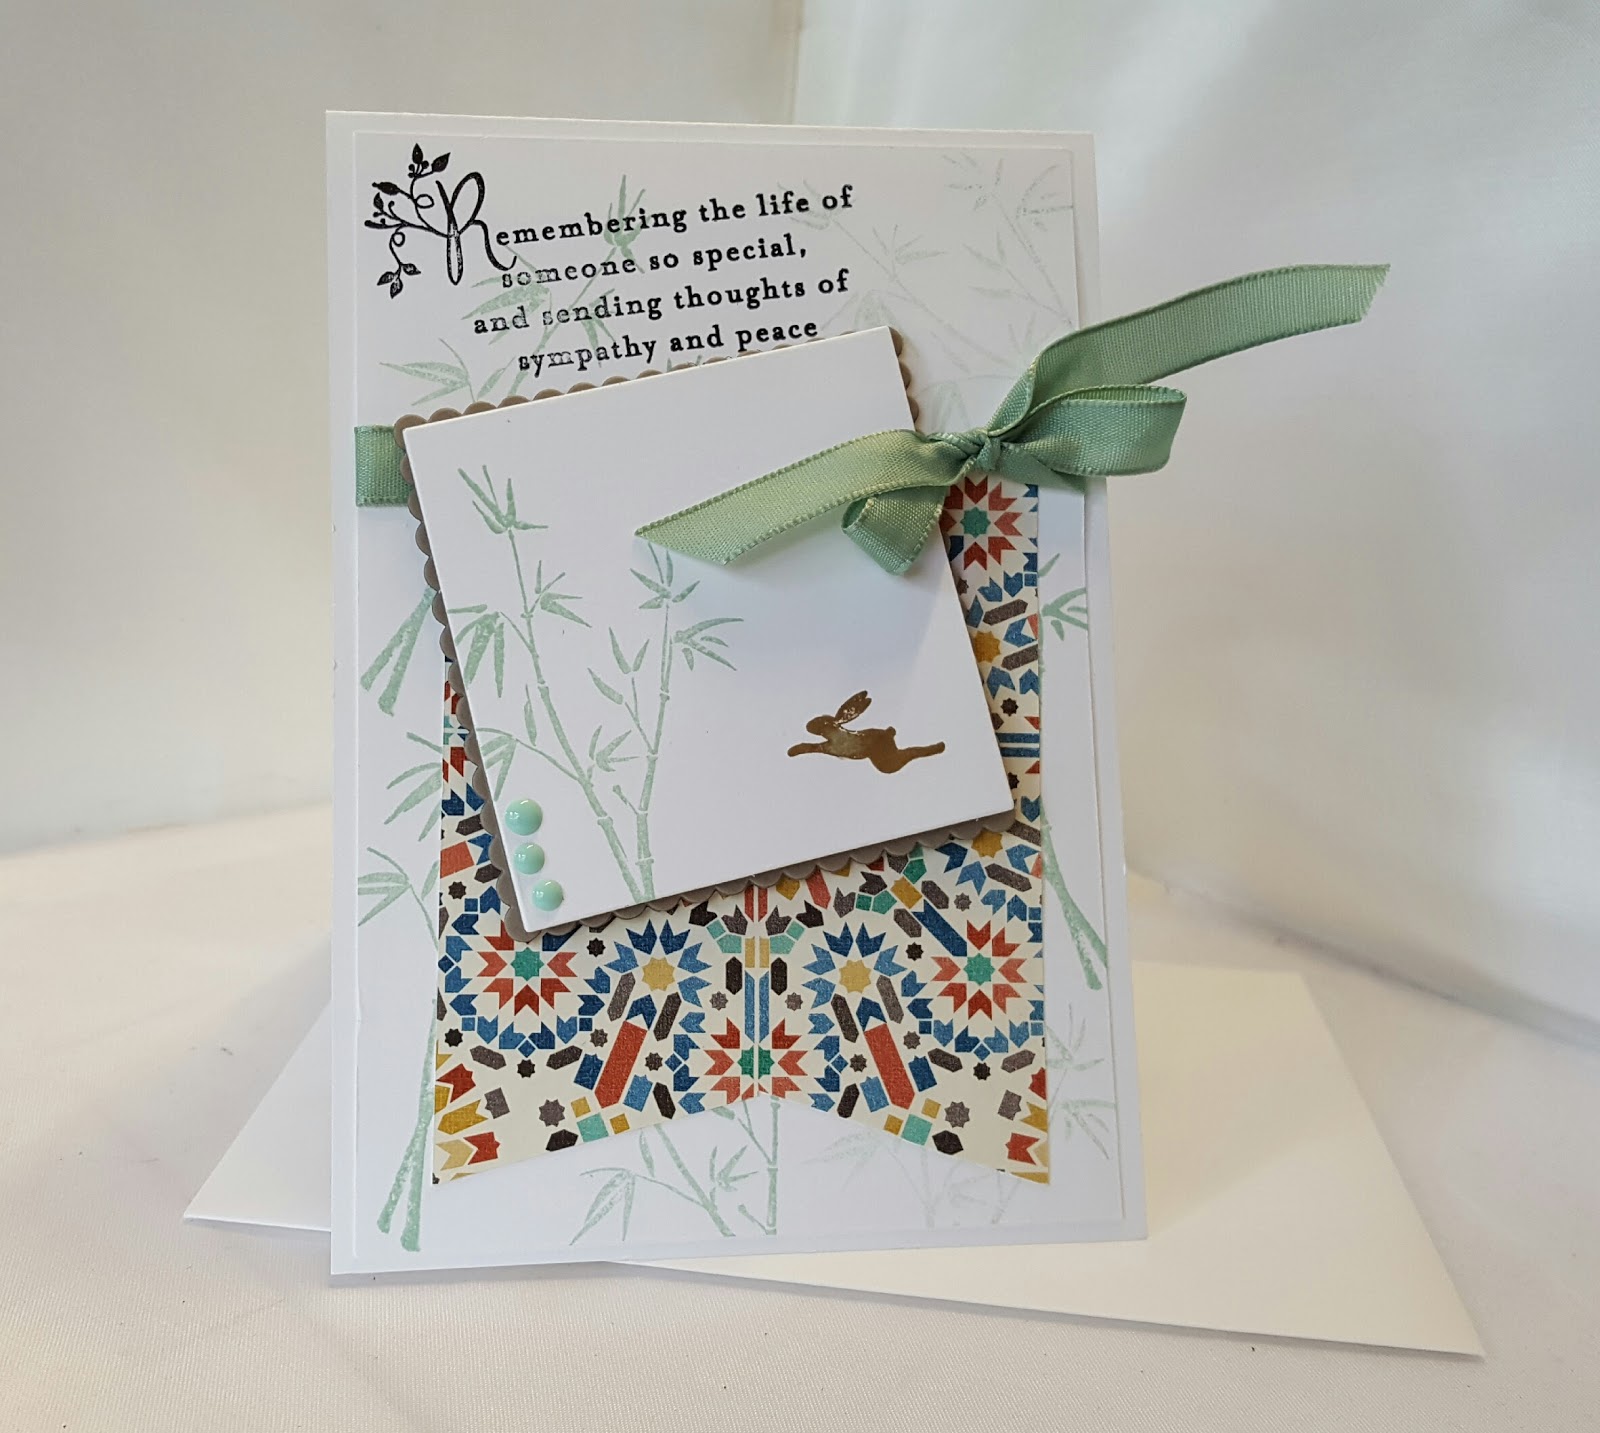
The In This World Stamp Set is how I have achieved this.
This is one of the New Stamp Sets to the Stampin' Up! Catalogue
So if you have fallen in love at first sight of this stamp set, like me, you will have to have it.
That is easy to to, just click the link below this photo, and you will be transported to my on-line Demonstrator Store, where you can purchase this little lovely ...
Stampin' Up! also brought out a new vintage lace, so of course I just HAD to have that too!

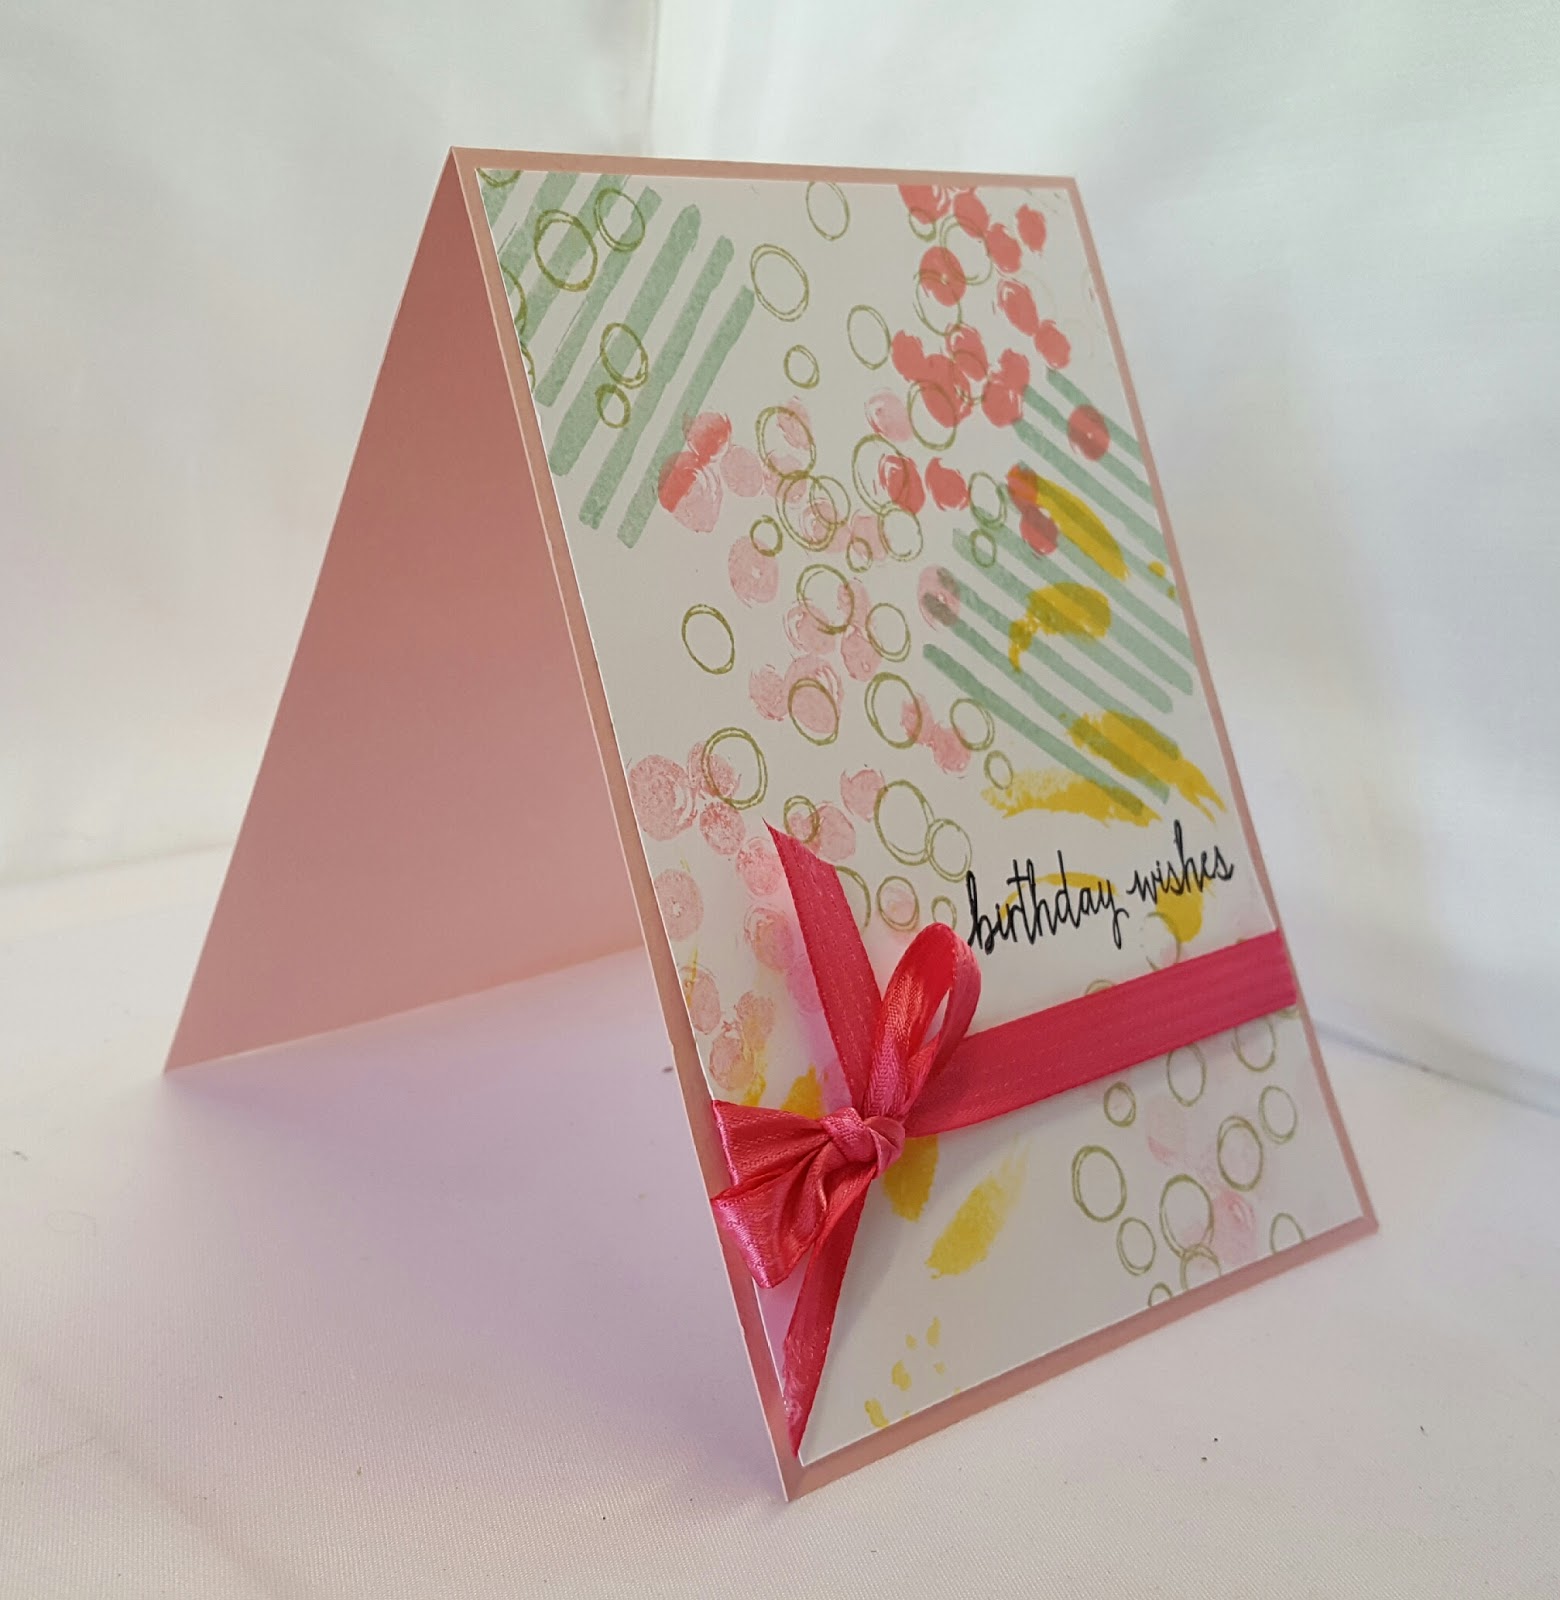
The card Base was made using Watermelon Wonder Cardstock,.
The main panel is Watercolour Paper which I created a 3 colour watercolour wash background. This was stamped one dry, and an extra Butterfly was stamped and Fussy Cut out., some coils of Gold thread added and mounted onto the card front with Stampin Dimensionals to Pop it up.

Feel free to CASE any of my creative projects (Copy & Paste Everything)


STAMP SET
IN THIS WORLD

CARDSTOCK
WATERMELON WONDER
WATERCOLOUR PAPER

INK PADS
ARCHIVAL BLACK
MINT MACARON
WATERMELON WONDER
TIP TOP TAUPE

ACCESSORIES
VERY VANILLA LACE TRIM
GOLD THREAD

TOOLS
STAMPIN TRIMMER
AQUAPAINTER
PAPER SNIPS
BONE FOLDER

ADHESIVES
TOMBOW MULTIPURPOSE LIQUID GLUE
STAMPIN DIMENSIONALS
Tutorial

  1. Trim a piece of Watermelon Wonder Cardstock to 30 x 10.5 cms; score at 14.9 cms; fold & Burnish
  2. Trim a piece of Watercolour Paper to 14.4 x 10.1 cms; apply some drops of water onto the paper and spread over the surface of the cardstock, without going right to the edge
  3. Transfer some ink from the ink pads to the "well" by squishing the ink pad ... do this for the Mint Macaron; Watermelon Wonder& Tip Top Taupe ink pads
  4. Starting at the top of the panel, apply Mint Macaron ink by picking up ink from the WELL and adding it to the dampened watercolour paper; repeat with the Watermelon Wonder Ink Pad, and finally, the Tip Top Taupe Ink Pad. Allow the panel to dry completely
  5. Using Archival Black Ink Pad, stamp the left hand side of the panel with the long stamp, and then stamp the butterfly stamp 3 times, changing the angle you stamp at each time., Then stamp the sentiment of choice from the stamp set
  6. stamp a further butterfly onto a scrap of Watercolour Paper using Archival Black Ink Pad & fussy cut out using Paper Snips
  7. Coil some sloops of Gold Thread around two fingers; apply Stampin Dimensionals to the back of the Butterfly and partially attach the thread to one of the Dimensionals, & add to the card front
  8. Wrap around some Very Vanilla Lace Trim and tie a small bow
  9. Mat onto the Card base using Tombow Liquid Glue (you need this as the watercolour paper warps a little).

How to Contact or Follow Me


Kim Tolton, Independent Stampin Up Demonstrator.
Card & Papercraft Tutorials
Please feel free to comment below, and ask away with any questions. You can also find me via the links below


Blog:

Online Store:

Stamping @ The Warren Craft Forum:

Email:
kim.tolton@googlemail.com

youTube


Pinterest:

Google +

Facebook:

Twitter:

Instagram:
@kim.tolton

LinkedIn:

Monday 27 June 2016

Birthday Blooms Double Diamond Fancy Fold Card Using Stampin' Up! Products

Today I am sharing with you the basic tutorial on how to create one of these Double Diamond Cards
The other Day, I shared with you the Fairy Celebration New Home Card I made for my Daughter & Son in Law, as they were moving into their first home. 
It was a step up from today's card, as I added two square panels, that I stamped & painted with the fairies.

Some of you have said you found the instructions in that typed tutorial, a little difficult to follow from step 5, and could I do a video., So here is is


Feel free to CASE any of my creative projects (Copy & Paste Everything)

Today's Card uses the Birthday Blooms Stamp Set with Archival Black/Memento Black Ink Pad, onto Watermelon Cardstock. I tried to get a better shot of the 3D element of this card, that stamds on 3 points.It is much easier to make than is seems. If you made those peekabo games as a child where you had numbers on the flaps, and underneath was a dare; then you will be able to make these fun fold cards.


STAMP SET
BIRTHDAY BLOOMS

CARDSTOCK
WATERMELON WONDER
WHISPER WHITE

INK PAD
ARCHIVAL BLACK OR
MEMENTO BLACK

ACCESSORIES
METALIC ENAMEL SHAPES

TOOLS
STAMPIN TRIMMER
PAPER PIERCING TOOL
PAPER SNIPS

ADHESIVE
TOMBOW MULTIPURPOSE LIQUID GLUE

Watch the Video Below


Tutorial

  1. Trim a piece of Watermelon Wonder Cardstock to 20 x 20 cms (8" x 8")
  2. Randomly Stamp the Cardstock using Archival (or memnto) Black Ink Pad & the large Birthday Blooms Stamp
  3. Score at 10 cms (4"); Rotate by 45 degrees & Repeat
  4. Rotate the cardstock so it is on the diagonal, and line up with the guide on the stampin trimmer, and score; rotate by 45 degrees and repeat.
  5. Cut away the bottom right Cm (4") square & Burnish all score lines
  6. Fold in the four corners, and fold again into the centre to close the card (this leaves you with 3 points the card stamps on
  7. Place a piece of Whisper White Cardstock to the inside of the card using Tombow & stamp on the diagonal the Birthday Greeting.
  8. Add a few Metallic Enamel Shapes

How to Contact or Follow Me


Kim Tolton, Independent Stampin Up Demonstrator.
Card & Papercraft Tutorials
Please feel free to comment below, and ask away with any questions. You can also find me via the links below


Blog:

Online Store:

Stamping @ The Warren Craft Forum:

Email:
kim.tolton@googlemail.com

youTube


Pinterest:

Google +

Facebook:

Twitter:

Instagram:
@kim.tolton

LinkedIn:

Saturday 25 June 2016

A Subtle Layering Love Meets Playful Pallet using Stampin' Up! Products

Welcome back to a Stormy Saturday! At least, that is the weather her in Essex, UK ha ha

Today I have a super quick card for you in two colourway variations

The Background Collage Stamp Set is called PLAYFUL BACKGROUNDS
The sentiments come from either the BUILD A BIRTHDAY stamp set or the YOU'VE GOT THIS Stamp Set. 

The First Card has been made using the Subtles Collection Ink Pads

And the Pink Colourway is using  the 2016-2018 In Colour Collection. 
The lush Melon Mambo Stitched ribbon, has now retired, but there are other colours in this ribbon that can be substituted. The other card is using Elegant Eggplant Solid Bakers Twine, and I LOVE it!
I hope you will too?


STAMP SETS
PLAYFUL BACKGROUNDS
YOU'VE GOT THIS
BUILD A BIRTHDAY

INK PADS
SUBTLES COLLECTION
2016 - 2018 IN cOLOUR cOLLECTION
ARCHIVAL BLACK

CARDSTOCK
BLUSHING BRIDE
WISTERIEA WONDER
WHISPER WHITE

ACCESSORIES
STITCHED SATIN RIBBON
WLWGANT EGGPLANT SOLID BAKERS TWINE

TOOLS
STAMPIN TRIMMER
ACRYLIC BLOCK BUNDLE
BONE FOLDER
PAPER SNIPS

ADHESIVES
TOMBOW MULTI-PURPOSE LIQUID GLUE


Feel free to CASE any of my creative projects (Copy & Paste Everything)

Watch the Video Below

Tutorial

  1. CARD BASE - Trim a piece of A4 Wisteria Wonder or Blushing Bride Cardstock to 30 x 10.5cms; score at 14.9 cms; fold & burnish
  2. trim a piece of Whisper White Cardstock to 14 x 10.1 cms
  3. Randomly Stamp the 4 stamps from Playful Backgrounds in the Colourway of your choice (4 different colours)
  4. Using Archival Black ink pad, stamp the sentiment of choice from one of the stamp sets listed
  5. Wrap around a piece of Stitched Satin Ribbon, or Solid Bakers Twine to co-ordinate with your card.
  6. Mount onto your Card Base using Tombow

How to Contact or Follow Me


Kim Tolton, Independent Stampin Up Demonstrator.
Card & Papercraft Tutorials
Please feel free to comment below, and ask away with any questions. You can also find me via the links below


Blog:

Online Store:

Stamping @ The Warren Craft Forum:

Email:
kim.tolton@googlemail.com

youTube


Pinterest:

Google +

Facebook:

Twitter:

Instagram:
@kim.tolton

LinkedIn:

Friday 24 June 2016

A Moroccan Heartfelt Sympathy Card using Stampin' Up! Products UK

Well, yesterday was a sad day. We had to say goodbye to a good friend.
She was my mentor, when learning about Rabbit Coat Colour Genetics, and without her, I wouldn't have the wide range of colours available in rabbits. She was a stoic lady who I admired greatly.
But each evening, I look up into our beautiful night sky, and remember all those I have lost and miss.
Anne will take her place up there, as well as in my heart, until we meet again.

The sentiment from the Heartfelt Sympathy Stamp Set from Stampin' Up! says it all


STAMP SETS
HEARTFELT SYMPATHY
ARTISTICALLY ASIAN

CARDSTOCK
THICKER WHISPER WHITE
WHISPER WHITE
TIP TOP TAUPE

INK PADS
ARCHIVAL BASIC BLACK
MINT MACARON

DESIGNER SERIES PAPER
MOROCCAN

FRAMELITS DIES
LAYERING SQUARES

ACCESSORIES
MINT MACARON SHEET LINEN RIBBON
SUBTLES ENAMEL SHAPES

TOOLS
STAMPIN TRIMMER
PAPER SNIPS
BIG SHOT
MAGNETIC PLATFORM

ADHESIVES
TOMBOW MULTI-PURPOSE LIQUID GLUE
STAMPIN DIMENSIONALS


Feel free to CASE any of my creative projects (Copy & Paste Everything)

Tutorial

    1. A6 CARD BASE - Trim a piece of Thicker Whisper White Cardstock to 30 x 10.5 cms; score at 14.9 cms; fold & burnish
    2. Trim a piece of regular Whisper White Cardstock to 14.4 x 10.1 cms
    3. Using Mint Macaron  Classic Ink Pad, randomly stamp the Whisper White Cardstock using the Bamboo leaf stamp, with First & Second Generation Stamping Technique
    4. Stamp the sentiment of your choice from the Heartfelt Sympathy stamp set in the top left of the panel, using Archival Black Ink Pad. 
    5. Trim a piece of Moroccan Designer Series Paper to 12 x 9.7 cms; using paper snips, cut a wide banner at the bottom, and adhere to the card front.; wrap around a piece of the Mint Macaron sheer linen ribbon, and tie a bow to one side
    6. Die Cut a square of Whisper White Cardstock using the Layering Squares Framelits Dies, and stamp once with the Bamboo Stamp in Mint Macaron Ink; Die cut the corresponding Scallop Square using Tip Top Taupe Cardstock, Mat the die cut square, onto the scallop square using Stampin Dimensionals & mount onto the card front
    7. Finish by adding some Enamel Shapes to the die cut square,

How to Contact or Follow Me


Kim Tolton, Independent Stampin Up Demonstrator.
Card & Papercraft Tutorials
Please feel free to comment below, and ask away with any questions. You can also find me via the links below


Blog:

Online Store:

Stamping @ The Warren Craft Forum:

Email:
kim.tolton@googlemail.com

youTube


Pinterest:

Google +

Facebook:

Twitter:

Instagram:
@kim.tolton

LinkedIn:

Thursday 23 June 2016

Touches of Texture with a little Layering Love & Layering squares using Stampin' Up! Products

This is the first time I have played with this gloriously ME stamp set he he.
I do love grungy collage stamp sets, but I guess most of you already know that. But it doesn't mean that such a stamp set, cannot be transformed in to a clean, crisp card that is bang on trend.
The list of products you need is not huge either
making this a cost effective card to make.

I have used some retired Melon Mambo Stitched Satin ribbon, as I do hate waste, but this beautiful ribbon is available in other colours, including Real Red, which would work really well with this project.

CLICK HERE TO VIEW OR ORDER THE PRODUCTS USED TO CREATE TODAY'S 
CLICK HER TO VIEW OR ORDER PRODUCTS

STAMP SETS
TOUCHES OF TEXTURE
LAYERING LOVE

CARDSTOCK
WHISPER WHITE
MINT MACRON

INK PADS
ARCHIVAL BLACK
FLIRTY FLAMINGO

FRAMELITS
LAYERING SQUARES

ACCESSORIES
STITCHED SATIN RIBBON

TOOLS
ACRYLIC BLOCKS
BIG SHOT & MAGNETIC PLATFORM
STAMPIN TRIMMER
BONE FOLDER
PAPER SNIPS

ADHESIVES
TOMBOW MULTIPURPOSE LIQUID GLUE
STAMPIN DIMENSIONALS
MINI GLUE DOTS


Feel free to CASE any of my creative projects (Copy & Paste Everything)

Tutorial

  1. CARD BASE - Trim a piece of Mint Macaron Cardstock to 30 x 10.5 cms; score at 14.9 cms; fold & Burnish
  2. BACKGROUND - Trim a piece of Whisper White Cardstock to  14.4 x 10.1 cms; randomly stamp the panel using stamping off technique (i.e. before stamping onto the cardstock,, remove some of the ink by lightly stamping onto a piece of scrap paper, & then stamp the cardstock)
  3. onto some scrap Whisper white Cardstock, stamp a couple of flowers using Flirty Flamingo Ink Pad, and a leaf using Emerald Envy Ink Pad, Die Cut 2 flowers and a leaf using the Layering Squares Framelits Dies, and mat these onto die cut scallop squares using the same framelits dies.. Layer up the die cuts using Stampin Dimensionals on the back of each layer 
  4. Using the Archival Black Ink Pad, Stamp your sentiment from the Layering Love stamp set
  5. wrap around some Stitched Satin Ribbon & tie a bow to one side 
  6. Mount your Die Cut Toppers onto the card front

How to Contact or Follow Me


Kim Tolton, Independent Stampin Up Demonstrator.
Card & Papercraft Tutorials
Please feel free to comment below, and ask away with any questions. You can also find me via the links below


Blog:

Online Store:

Stamping @ The Warren Craft Forum:

Email:
kim.tolton@googlemail.com

youTube


Pinterest:

Google +

Facebook:

Twitter:

Instagram:
@kim.tolton

LinkedIn: