google-site-verification: google70410e9e92d4fda2.html

Sunday 30 November 2014

Stamp Set Showcase Week 20 (7) Lovely As A Tree

Good Morning for the final day of 

LOVELY AS A TREE

And todays card combines just a tiny tad of Holiday Home with Santa and his sleigh
And a LOT of Dazzling Dianmonds!
In keeping with my favourite things, todays card will require a 6" (15 cm) Whisper White Square Card Blank


Trim a piece of Night of Navy cardstock to 14.5 cms x 14.5 cms and attach to the card blank using a tiny amount of Tombow Multi-Purpose Glue.
Next, you want to die cut a large scallop circle using the Circle Collection Framelits using Dazzling Diamonds Glimmer Paper
Apply Stampin Dimensionals to the reverse side and mount in the centre of the card blank
Now die cut a circle of Night of Navy cardstock and die cut using the largest of the circles collection, circles.


Next, using Versamark, stamp the 4 trees stamp in the Lovely As A Tree stamp set, plus the santa and his sleigh from the Holiday Home stamp set as you can see in the photo's.
Sprinkle with White Embossing Powder, remove the excess by rapping the back of the cardstock just once, and heat set with your Heat Tool.
Next, randomly stamp the teeny stars stamp (also from the Holiday Home stamp set) using Versamark, but this time, heat emboss the images using Silver Embossing powder, just as you have above.
Apply Stampin Dimensionals to the reverse and mount on top of  the scallop circle.

Finish  by stamping your sentiment onto a 1.5 cm strip of Whisper White cardstock.
Use the banner punch to create the banner ends to your tag. STOP!!!

before trying to make your banner ends, you need to know that instead of punching a tag in the usual way, if you did that here, you would just shorted the tag. Instead, you need to insert the stamped label strip of card into the punch from the top. carefully slotting the cardstock between the cutting blades until you get one end the right length. Repeat this process for the opposite end of the label. 
Apply Stampin Dimensionals to the reverse of the tag and attach to the top right corner of the card.
And there you have it!!
If you would like to join my community board on my Pinterest account to post your own photo's
ping me your email address and I will add you

kim@stampinupatthewarren.com


If you would like to ask any questions on techniques or products, or anything else related to my blog posts, please feel free to ask away

Happy Stamping
Kim xxx

Contact me to order:
Telephone/Txt: 07759587004
Email: kim@stampinupatthewarren.com

Or Order Online 24/7

Or Click on the image of the products used below and it will take you straight to my online store
Table built using Product Table Builder by The Crafty Owl - Independent Stampin' Up! Demonstrator.


FOR ONE WEEK ONLY!


EXTRA SAVINGS AND EARNINGS WHEN YOU JOIN THIS WEEK


Saturday 29 November 2014

Stamp Set Showcase Week 20 (6) Lovely As A Tree

WEll what a mad day we have had today!

I have been preparing for this weekends Craft Fair.
In trying to get prepared, and chop up all the goat, rabbit and guinea pig food into containers so it is easy for us to feed them in the mornings and evening, and managed to throw a whole container of finely chopped vegetables all over the floor, in the fridge and some even got into the freezer and couldn't shut the freezer door ,,,
Yes I know ... More Haste Less Speed!! humph!

I have now calmed down, my hubby has pri\wd the carrots out of the freezer door and all is well with the world again he he

So I am now ready to type up todays blog post.

LOVELY AS A TREE

There is some sponging and some stamping and that is about it
So a nice quick card to make
AND it uses my most Favorite Specialty Designer Series Paper from the seasonal Catalogue
Under The Tree


Begin with a 6" (15 CMS)  Square Whisper White Card Blank

Trim a piece of Under The Tree DSP to 14.5 cms x 13.5 cms.
Ink the edges of this panel with Silver Memento Ink
Adhere to the card blank using teeny amounts of Tombow Multi-Purpose Glue.

Next, trim a piece of Whisper White cardstock to 12 cms x 12 cms

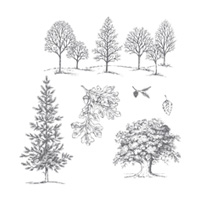
First stamp the four tree stamp from the Lovely As A Tree stamp to the top half of the Whisper White panel using Smokey Slate Ink.
Then ink the  conifer stamp with Versamark and then before stamping, ink the stamp with Mossy Meadow ink. Stamp Centrally on the cardstock.
Dust with Clear embossing powder, remove the excess powder and heat set with your Heat Tool.

Now make a snow drift mask from scrap card, and using a Stampin Sponge and Soft Sky Ink, sponge some snow drifts by moving the mask several times. Begin with the base of the conifer and work from there.
Stamp your sentiment in the bottom right of the cardstock.
Mat (layer) this panel onto the reverse side of the Under The Tree DSP you used earlier measuring 12.5 cms x 12.5 cms. 
Ink the edges with Silver Memento ink, Adhere the stamped panel onto this one with a little Tombow Multi-Purpose Glue.


Apply Stampin Dimensionals to the reverse and adhere to the card front.
And there you have it. Do share your own creations as I love to see them :)


If you would like to join my community board on my Pinterest account to post your own photo's
ping me your email address and I will add you

kim@stampinupatthewarren.com


If you would like to ask any questions on techniques or products, or anything else related to my blog posts, please feel free to ask away

Happy Stamping
Kim xxx

Contact me to order:
Telephone/Txt: 07759587004
Email: kim@stampinupatthewarren.com

Or Order Online 24/7

Or Click on the image of the products used below and it will take you straight to my online store
If you would like to join my community board on my Pinterest account to post your own photo's ping me your email address and I will add you kim@stampinupatthewarren.com If you would like to ask any questions on techniques or products, or anything else related to my blog posts, please feel free to ask away Happy Stamping Kim xxx Contact me to order: Telephone/Txt: 07759587004 Email: kim@stampinupatthewarren.com Or Order Online 24/7 http://www.stampinupatthewarren.stampinup.net Or Click on the image of the products used below and it will take you straight to my online store

FOR ONE WEEK ONLY


EXTRA SAVINGS AND EARNINGS WHEN YOU JOIN THIS WEEK

http://www.stampinup.net/esuite/home/stampinupatthewarren/jointhefun


Stamp Set Showcase Week 20 (5) Lovely As A Tree

Today I have a fab technique for you. I know I have used it a couple of times before, but it is such a fab technique and leaves the room smelling glorious, so I decided to have a go as a Christmas Card.
My colleague, Pippa Jones (Paper Piskies blogspot) first taught this technique and it involves
the cheapest of cheap SHAVING FOAM ... yes, you heard me right ... shaving foam.

so here is todays LOVELY AS A TREE Card and I hope you are ready for a bit of Messy Foam?


You are going to need 6" square (15cms) Whisper White Card Blank
Begin by trimming a piece of Black Cardstock to 14.5 cms x 14.5 cms
Create an Aperture in the centre of the Black cardstock using one of the Window Framelits
Select the next  two largest Window Framelits and place the two framelits onto the magnetic platform (with the usual sandwich of cutting plates or Tab 1 of your Big Shot, placing the smaller framelit inside the other, and die cut using Dazzling Diamonds Glimmer Paper to create a sparkling frame for the aperture.


No2 trim two pieces of glossy photo paper to 12cms x 12 cms.
Place one piece of glossy paper face up on a piece of Grid Paper of a few sheets of Kitchen Towel.
Spray a large blob of the cheapest of  cheap Shaving foam onto the glossy card.
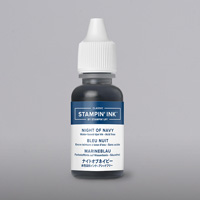
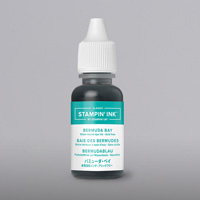
Place 3 drops of the following Re-Inkers onto the top of the shaving foam 
Night of Navy
Bermuda Bay
Pool Party
Using a wooden skewer or similar, swirl the shaving foam, but don't over do it.
Next place the other piece of glossy paper, glossy side down, on top of the shaving foam
And here is the messy bot. Press the top piece of glossy paper onto the bottom piece, you will get lots of foam leaking out the sides, but do not worry.
Lift off the top piece of glossy paper and discard the rest . Wipe the excess foam off the top piece of glossy paper. Once dry, stamp the 4 trees in Black Memento ink  onto the now, ink marked piece of glossy paper, Apply Stampin Dimensionals to the four corners of the glossy paper and adhere to the back of the aperture on the black layer of cardstock.Apply Stampin Dimensionals to the reverse of the Black Layer of cardstock and attach to the card blank.
Make a layered label by stamping your sentiment onto a scrap piece of Whisper White cardstock and punch out using the Word Window. Layer this onto a punched Modern Label using Dazzling Diamonds glimmer paper. Layer up the labels using Stampin Dimensionals and attach to card front.
To Finish, use a few Basic Rhinestones, and a few Frosted Sequins and the card is made ready for someone special this Christmas.


If you would like to join my community board on my Pinterest account to post your own photo's
ping me your email address and I will add you

kim@stampinupatthewarren.com


If you would like to ask any questions on techniques or products, or anything else related to my blog posts, please feel free to ask away

Happy Stamping
Kim xxx

Contact me to order:
Telephone/Txt: 07759587004
Email: kim@stampinupatthewarren.com

Or Order Online 24/7

Or Click on the image of the products used below and it will take you straight to my online store
Table built using Product Table Builder by The Crafty Owl - Independent Stampin' Up! Demonstrator.


FOR ONE WEEK ONLY!

EXTRA SAVINGS AND EARNINGS WHEN YOU JOIN THIS WEEK

For one week only (25 November – 2 December), you can join Stampin’ Up! as a new demonstrator for some great deals! Get a 25 percent discount on the Starter Kit with all the same great products included AND five percent cash back on all commissionable orders you place in December.