
I bet you are wondering how we have moved from subtle pinks and blues to gold?
yes, you are quite right I did say there would be a graduation of one colour into the next. And I have ... as loose as it may be, yesterdays card's Sentiment was Gold embossed ... tenuous maybe, but a definite link lol
And here is how I made todays Triple Stamping Technique All Gold card
Now, i have been banging on about making your card blanks for weeks now, so if you are unfamiliar with how to make your own card blank (which is much cheaper than buying them), just check out any of my recent blogposts. You need a 6" (15cms) square card blank for todays card/
Now the key to this card is preparation and having all your layers preped ready to go, so here we go ...

In Soft Suede card you need the following layers:
Layer 1: 14.5 x 14.5cms
Layer 2: 13.5 x 13.5cms
Layer 3: 12.5 x 12.5cms
Ink the edges of all your Soft Suede cardstock with Gold Encore ink using a sponge dauber
And your Whisper White layers are:
Layer 1: 14 x 14 cms
Layer 2: 13 x 13 cms
Layer 3: 12 x 12 cms
Ink the edges of all your Whisper White layers with Gold Encore ink using a sponge dauber again
Put your Soft Suede layers to one side
You now need to layer your Whisper White layers, but to help them stay in position without the help of baby wipes, I have a tip for you.
Put a small strip of snail adhesive on the back of the Whisper White layers 2& 3
Now keep tapping the adhesive until most of the stickiness has gone, leaving it just a little tacky. It will not matter if a teeny amount of card comes away afterwards as your are going to be layering this card up well and truly
Place your white layers one on top of the other from the largest to the smallest.
Mount up your Many Merry Stars and get stamping, taking care not to move the cardstock as the encore ink tends to stick a little ... just a little
Do not panic when you see that there is a small gap between the inked image and the next layer of cardstock. I promise you this will disappear once the Soft Suede layers go in.
Do not waste ink stamping the centre of the top layer as you are going to have a sentiment there.
Before you you put your sponge dauber away, use the residual ink on the dauber to add gold to the tip layer using gentle circular motions to create a subtle foiled appearance.
Next, gently separate the layers and then using a little Tombow Multipurpose Glue, adhere each layer together in pairs, so you should end up with a soft suede layer with a whisper white layer on top. Do not worry about matching the patterns at this point.
Once you have all three pairs of layers glued, you now need to pay attention to the pattern. So match the patterns on the larges and medium layers, and adhere together with a little Tombow MP Glue.
Wrap around a piece of Gold 5/8" Satun Ribbon and tie a bow.
Then repeat the process of mounting the smallest layers on top of the medium layers.

Now the finishing touch is the sentiment layers
I have used Window Framelits as I think they work really well for Christmas creations.
I have used a sentiment stamp set that was in the Clearance Rack a few months back ... so you probably won't find it there now, but do keep an eye on the fab savings you can get on retired stock. Just follow the Promotions tab at the top of my blog.
Once you have picked your sentiment onto Whisper White cardstock, and elect the best fitting Window Framelit and die cut using your Big Shot.
Then Using Gold Glimmer Paper die cut the next size larger Window Framlit
Mount the sentiment layer into the Glimmer Paper using Stampin Dimensionals or Glue Dots (the best adhesives for glimmer paper).
Place Dimensionals on the reverse of the glimmer paper layer and attach to the centre of your triple stamped topper.
Finally, mount the topper onto your card blank.
The tutorial makes it seem complicated and lengthy, but it truly isn't. It should take no more than 20 minutes to make this card, 30 minutes topps. And once you get your head around the processes, you will realise it is very simple to make.
Be prepared, have a trial rum with scrap cardstock or printer paper, and then go for it!
And please link me in on photo's of your own take of this card, I would really love to see what you create!

If you
would like to join my community board on my Pinterest account to post your own
photo's
ping me
your email address and I will add you
kim@stampinupatthewarren.com
If you would like
to ask any questions on techniques or products, or anything else related to my
blog posts, please feel free to ask away
Happy Stamping
Kim xxx
Contact me to
order:
Telephone/Txt:
07759587004
Email: kim@stampinupatthewarren.com
Or Order
Online 24/7
Or Click on the
image of the products used below and it will take you straight to my online
store
 |  |  |  |  |
 |  |  |  |  |
 | 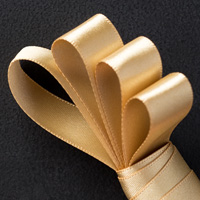 | 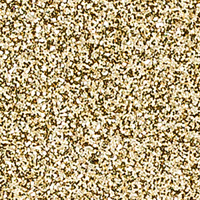 |  |  |
Table built using Product Table Builder by The Crafty Owl - Independent Stampin' Up! Demonstrator.


No comments:
Post a Comment