google-site-verification: google70410e9e92d4fda2.html
Showing posts with label blendabilites. Show all posts

Friday, 20 February 2015

Sale A Bration 2015 Week 7 Day 5

Today I have one of my most Favourite Stamp Sets from the Spring/Summer Seasonal Catalogue

FOUR FEATHERS
and of course GORGEOUS GRUNGE
And this card seems to be perfect for the combination of the two stamp sets


And here is your supplies list

Stamp Sets:
Four Feathers Stamp Set & Co-ordinating Dies Bundle
Gorgeous Grunge Stamp Set.
A Dozen Thoughts Stamp Set

Classic Ink Pads:
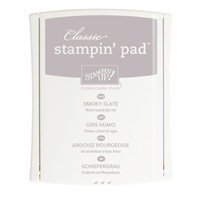
Smokey Slate
Basic Grey
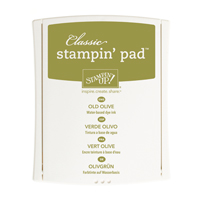
Old Olive
Crisp Cantaloupe
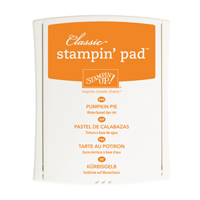
Pumpkin Pie

Cardstock:
Whisper White

Accessories:
Birthday Bash Designer Washi  Sheets

Start the Clock as you should be able t make this card in less than 15 minutes ...


Trim a sheet of Crisp Cantaloupe Birthday Bash Designer Washi Sheet to 14.5 x 10 cms.
Remove the protective sheet from the back of the Washi Sheet and attach the polka dot patterned Washi sheet to the front of an A6 White card blank.

Now trim a piece of Whisper White cardstock to 13.8 x 9.5 cms
Using the distressed line stamp in Gorgeous Grunge and Smokey Slate ink, stamp several overlapping lines across the centre of the card in landscape orientation.
Over stamp this with the small splodge stamp and Old Olive ink
And then over stamp this with the fine splatter stamp using   Pumpkin Pie ink


Now for the feathers
Onto Whisper White Cardstock, Stamp one feather in Smokey Slate, another in Pumpkin Pie, and a Third in Crisp Cantaloupe ink, 
Die cut the feathers using the co-ordinating Feather Framelits, 
Sponge the edges of the die cuts using Crisp Cantaloupe ink.
Then score along the quill of each feather so it is gently folding
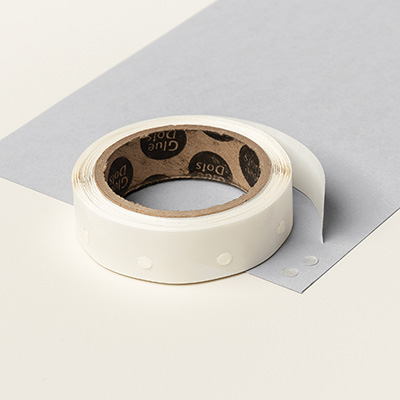
 Attach the three feathers to the card front using Glue Dots. .
Stamp your sentiment to thebottom right hand corner of the card front, and apply Stampin Dimensionals the reverse of the Card Front. Attach this to the front of your Card Blank
And that is it ... stop the clock! ... How did you do?


If you would like to join my Pinterest community board where you will be able to post your own Stampin Up creations. Simply email me and I will add you to the board
kim@stampinupatthewarren.com

If you would like to ask any questions on techniques or products, or anything else related to my blog posts, please feel free to ask away
Happy Stamping
Kim xxx

Contact me to order:
Telephone/Txt: 07759587004
Email: kim@stampinupatthewarren.com

Or Order Online 24/7
                                                                                               
Or Click on the image of the products used below and it will take you straight to my online store
Table built using Product Table Builder by The Crafty Owl - Independent Stampin' Up! Demonstrator.


Wednesday, 11 February 2015

Sale A Bration 2015 Week 6 Day 3

A Grungy Valentine is the 
the Title for todays card. Followers of my blog will be familiar with how much I like my gorgeous Grunge Stamp Set. It is one of the most versatile stamp sets in the current Stampin Up Catalogue.
You can use it for male and female cards, children, teenagers or adults just by changing the colour scheme,

Here I have created a unisex card for giving to your Valentine, enough grunge for a man and enough bling for a woman!
Before I start you must take a quick peek at this weeks promotions, 
And then come back for the tutorial


Product List for todays card:

Stamp Set 
You Plus Me
Gorgeous Grunge

Cardstock:
Whisper White

Classic Ink Pads:
Basic Black
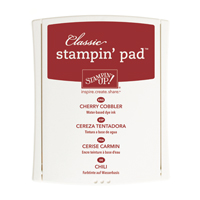
Cherry Cobbler
Rose Red

Punches:
Itty Bitty Accents Punch Pack

Accessories:
Cherry cobbler Embossing Powder
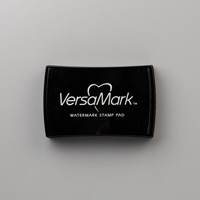
Versamark Ink Pad
Cherry Cobbler Sheer Linen Ribbon
Basic Rhinestones

Adhesives:
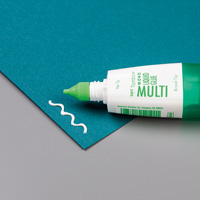
Tombow Multi-Purpose Liquid Glue
Stampin Dimensionals

Tools:
Heat Tool
Post It Notes

Begin by trimming a piece of Whisper White Cardstock to 14.3 x 40 cms
You now need to make a mask to create a void in the centre of the cardstock
To do this, you need to stamp the '&' onto a Post It Note ensuring you stamp a portion of the stamp onto the sticky strip of the Post it Note. then cut out the shape of the Stamp 
Next, using the sticky strip of the Post It Note, position the mask in the centre of the Whisper White Cardstock.
Now you can get to stamping
Begin by using the large splodge mark and rose red ink. Then add some Cherry Cobbler Ink and the small splidge mark plus the find splatter stamp.
Finish with the Straight line stamp horizontally, using Basic Black ink.
Remove the mask
Now you can stamp the '&' in the void left from the mask, using Basic Black ink.
Give the ink and cardstock a minute or two to dry, and then you can start adding your bling


Now you have a little heat embossing to do
Stamp the hash marked small heart onto Whisper White cardstock using Versamark ink, Sprinkle with Cherry Cobbler Embossing Powder, remove the excess and heat set using your Heat Tool
Punch out the heart using the heart in the Itty Bitty Accents Punch Pack
Finally, use the teemy hearts stamp in the top right corner of the card front using Cherry Cobbler Ink,
appyu Stampin Dimensionals (you will need to cut them down a little) to the reverse of the punched hearts and attach them to the card front.
Measure your Cherry Cobbler Sheer Linen Ribbon and ti a knot in the middle and attach this to the left hand side of the card front, securing on the back of the cardstock using a little Sticky Strip.
App;y Stampin Dimensionals to the reverse of the card front, and then mount this onto your Whisper White A6 Card Front,

 If you would like to join my Pinterest community board where you will be able to post your own Stampin Up creations. Simply email me and I will add you to the board
kim@stampinupatthewarren.com

If you would like to ask any questions on techniques or products, or anything else related to my blog posts, please feel free to ask away
Happy Stamping
Kim xxx

Contact me to order:
Telephone/Txt: 07759587004
Email: kim@stampinupatthewarren.com

Or Order Online 24/7
                                                                                               
Or Click on the image of the products used below and it will take you straight to my online store
Table built using Product Table Builder by The Crafty Owl - Independent Stampin' Up! Demonstrator.


Friday, 23 January 2015

Sale A Bration 2015 Week 3 Day 5

Crazy About You
Yes I am! I really really am!

And so I made you this card ... because I just want you to be you! hehe

I added in a touch of Irresistibly Yours DSP

With a combination of Pear Pizzaz, So Saffron & Chocolate Chip for the colour scheme
The Stamp Set and the Die are also available as a Bundle giving you a 15% discount on the purchase price compared to purchasing them separately.

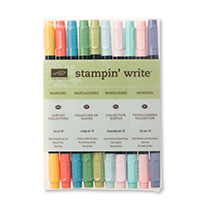
The Flower in the the stamp set co-ordinates with the new Medallion Punch, and I used a combination of Pear Pizzaz and So Saffron Stampin Write Marker Pens to ink up the Medallion stamp, allowing the colours to blend a little.


I used Stampin Sponges to sponge the DSP using Pear Pizzaz and So Saffron ink again. Remember to buff off any remaining ink where the resist pattern is. Next trim a panel of Choc Chip cardstock to the size you want and using the leaf stamp from the stamp set, and a white Kraft ink pad, stamp the choc chip panel all over. Then mat that panel onto a piece of ePear Pizzazz cardstock measuring 0.5cm larger than the choc chip panel.
Trim the sponged resist DSP to cover half of the choc chip panel. Attach using a tiny amount of Tombow Multipurpose Liquid Glue.

Die cut the YOU from Pear Pizzaz cardstock by running it through your Big Shot (go back and forward a couple of times) using the following sandwich:

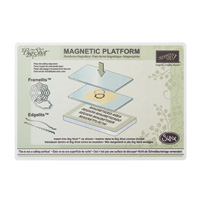
Magnetic Platform
Cutting Plate
Tumble Dryer Sheet
Cardstock
Wax Paper
Die (cutting blade down)
Cutting plate

This sandwich combo give the best final result for ease of removal of the die cut from the metal die.
Attach to the top of the circle by putting just a few tiny dots of Tombow Liquid glue. 


Die cut a couple of nested circles (pear pizzaz and Choc Chip cardstock) and emboss with the circles Woodgrain TIEF.
Mount the circles on top of each other and attach to the centre of the card front. Wrap around a piece of Sahara Sand Lace Trim & mount onto the card front.
Mount the flower onto the circle with Dimensionals.
Stamp 3 Petite Petals using the same colour inks as above and punch out with the coordinating punch. Apply Dimensionals to the reverse and attach to the card. Stamp your Sentiment onto Pear PiPizzazzardstock using Choc Chip ink and create banner ends using the Banner Punch
Mat onto Choc Chip cardstock and create banner ends again.
Now all that remains is to mount the topper onto your card blank


If you would like to join my Pinterest community board where you will be able to post your own Stampin Up creations. Simply email me and I will add you to the board


If you would like to ask any questions on techniques or products, or anything else related to my blog posts, please feel free to ask away

Happy Stamping
Kim xxx
Contact me to order:
Telephone/Txt: 07759587004

Or Order Online 24/7
                                                                                               
Or Click on the image of the products used below and it will take you straight to my online store
Table built using Product Table Builder by The Crafty Owl - Independent Stampin' Up! Demonstrator.

PRODUCT OF THE WEEK

Lotus Blossom Stamp Set #139143:
This gorgeous stamp set makes anyone feel like an artist in three quick steps. It creates a beautiful flower that looks painted, but it is amazingly easy. The individual stamps have a tab at the top to help you align them, and the tabs are numbered so you will know which part of the flower to stamp first, second, and third. Try playing around using one ink pad with the stamping off technique, or multiple different ink pads to create many different looks.