A Grungy Valentine is the
the Title for todays card. Followers of my blog will be familiar with how much I like my gorgeous Grunge Stamp Set. It is one of the most versatile stamp sets in the current Stampin Up Catalogue.
You can use it for male and female cards, children, teenagers or adults just by changing the colour scheme,
Here I have created a unisex card for giving to your Valentine, enough grunge for a man and enough bling for a woman!
Before I start you must take a quick peek at this weeks promotions,
And then come back for the tutorial
Product List for todays card:
Stamp Set
You Plus Me
Gorgeous Grunge
Cardstock:
Whisper White
Classic Ink Pads:
Basic Black
Cherry Cobbler
Rose Red
Punches:
Itty Bitty Accents Punch Pack
Accessories:
Cherry cobbler Embossing Powder
Versamark Ink Pad
Cherry Cobbler Sheer Linen Ribbon
Basic Rhinestones
Adhesives:
Tombow Multi-Purpose Liquid Glue
Stampin Dimensionals
Tools:
Heat Tool
Post It Notes

Begin by trimming a piece of Whisper White Cardstock to 14.3 x 40 cms
You now need to make a mask to create a void in the centre of the cardstock
To do this, you need to stamp the '&' onto a Post It Note ensuring you stamp a portion of the stamp onto the sticky strip of the Post it Note. then cut out the shape of the Stamp
Next, using the sticky strip of the Post It Note, position the mask in the centre of the Whisper White Cardstock.
Now you can get to stamping
Begin by using the large splodge mark and rose red ink. Then add some Cherry Cobbler Ink and the small splidge mark plus the find splatter stamp.
Finish with the Straight line stamp horizontally, using Basic Black ink.
Remove the mask
Now you can stamp the '&' in the void left from the mask, using Basic Black ink.
Give the ink and cardstock a minute or two to dry, and then you can start adding your bling

Now you have a little heat embossing to do
Stamp the hash marked small heart onto Whisper White cardstock using Versamark ink, Sprinkle with Cherry Cobbler Embossing Powder, remove the excess and heat set using your Heat Tool
Punch out the heart using the heart in the Itty Bitty Accents Punch Pack
Finally, use the teemy hearts stamp in the top right corner of the card front using Cherry Cobbler Ink,
appyu Stampin Dimensionals (you will need to cut them down a little) to the reverse of the punched hearts and attach them to the card front.
Measure your Cherry Cobbler Sheer Linen Ribbon and ti a knot in the middle and attach this to the left hand side of the card front, securing on the back of the cardstock using a little Sticky Strip.
App;y Stampin Dimensionals to the reverse of the card front, and then mount this onto your Whisper White A6 Card Front,

kim@stampinupatthewarren.com
If you would like
to ask any questions on techniques or products, or anything else related to my
blog posts, please feel free to ask away
Happy Stamping
Kim xxx
Contact me to
order:
Telephone/Txt:
07759587004
Email: kim@stampinupatthewarren.com
Or Order
Online 24/7
Or Click on the
image of the products used below and it will take you straight to my online
store
 |  |  |  |  |
 |  |  |  |  |
 |  |  |  |  |
 |  |  | 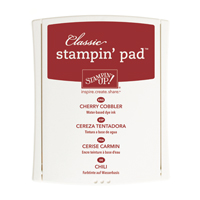 | 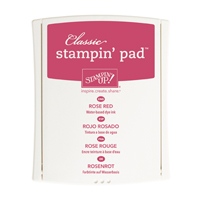 |
Table built using Product Table Builder by The Crafty Owl - Independent Stampin' Up! Demonstrator.