Today I am showing you how to create beautiful flowers using a Multi-Step Stamping Technique. It is much easier than you would think. And that is because all of Stampin Up!s Multi-Step Stamp Sets are photopolymer, and each stamp has a little tab that allows you to line up the different layers of stamping pretty accurately. It is also a great technique for trying out different colour combo's and seeing the results.. In the example above, I used Blushing Bride for the base step, and a stamping off technique for the intermediate stamp using Rose Red ink pad, and then the final layer I used the rose red ink pad again, but this time without stamping off.
If you can take time to watch the video below, you will see that I have used a different combination of colours and results in a much more subtle effect.
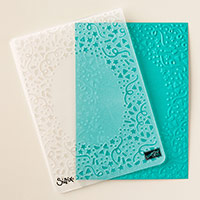
The other differences, is that the Confetti TIEF (Embossing Folder) has been used with the d-bossed side in the picture above, and in the video, I have used the Embossed side of the cardstock.
By changing things around, you can re-create the same card design with multiple end results making your craft supplies both versatile and cost effective.

________________________________________
As you scroll down
today's blog post, you will find :
·
icons of all the products used to create today's card - click on them to
visit my online store;
·
A Video Tutorial
·
& a typed tutorial
Feel free to CASE
any of my creative projects (Copy & Paste Everything)
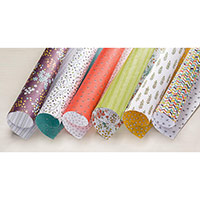
Click on the icons
below to view/order any of the products used in today's tutor
 |  |  |  |  |
 |  |  |  |  |
 |  |  |  |  |
 |  |  |  |  |
Table built using Product Table Builder by The Crafty Owl - Independent Stampin' Up! Demonstrator.
Watch the Video
Below
Tutorial
1. Trim a piece of Thicker Whisper White Cardstock to 21 x 14.8 cms; score long side at 10.5 cms; Fold & Burnish
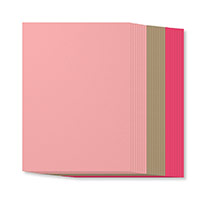
2. Trim a piece of Blushing Bride Cardstock to 14.4 x 10.1 cms & mount onto the front of your card base
3. Trim a piece of Whisper White Cardstock to 14 x 9.7 cms; Dry emboss using your Big Shot with Multi-Purpose Platform on Tab 1 with the Confetti Textured Impressions Embossing Folder (TIEF)
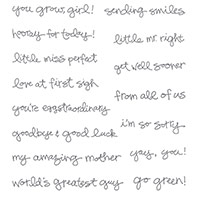
4. Stamp your sentiment in the centre of the embossed panel using a sentiment from the Suite Sayings Stamp Set & Basic Black Classic Ink Pad.; Mat (layer) onto your card front.
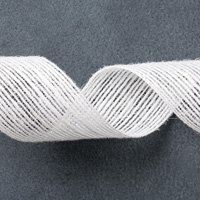
5. Trim a piece of Blushing Bride cardstock to 2 x 14.4 cms & Dry Emboss with the Woodgrain Textured Impressions Embossing Folder (TIEF), Adhere to the lower segment of your card front.
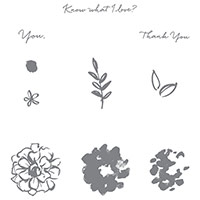
6. Onto a piece of Whisper White Cardstock, stamp 3 Step 1 Flowers from the What I Love Stamp Set, using Blushing Bride Ink Pad
5. Over-stamp the flowers with the Step 2 stamp in the set, again using Blushing Bride Ink Pad. Remember to line up the images by using the tabs on the stamps
6. Lastly, Over-stamp the flowers with the Step 3 stamps (most defined stamp) using Melon Mambo Ink Pad, lining up your stamps in the same way.
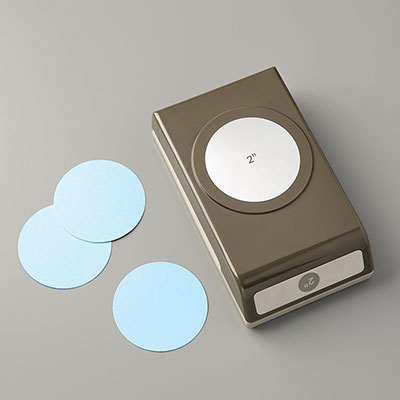
7. Using Paper Snips, Cut out the flowers & attach to your card front using Stampin Dimensionals (hexagonal sticky fixers)
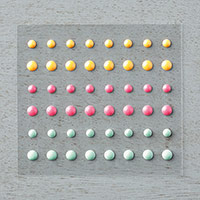
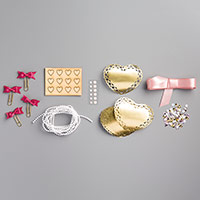
4. Finish with some embellishments in the Love Blossoms Embellishment Kit; And some Metal Rimmed Pearls for the centres of the flowers
2. Trim a piece of Blushing Bride Cardstock to 14.4 x 10.1 cms & mount onto the front of your card base
3. Trim a piece of Whisper White Cardstock to 14 x 9.7 cms; Dry emboss using your Big Shot with Multi-Purpose Platform on Tab 1 with the Confetti Textured Impressions Embossing Folder (TIEF)
4. Stamp your sentiment in the centre of the embossed panel using a sentiment from the Suite Sayings Stamp Set & Basic Black Classic Ink Pad.; Mat (layer) onto your card front.
5. Trim a piece of Blushing Bride cardstock to 2 x 14.4 cms & Dry Emboss with the Woodgrain Textured Impressions Embossing Folder (TIEF), Adhere to the lower segment of your card front.
6. Onto a piece of Whisper White Cardstock, stamp 3 Step 1 Flowers from the What I Love Stamp Set, using Blushing Bride Ink Pad
5. Over-stamp the flowers with the Step 2 stamp in the set, again using Blushing Bride Ink Pad. Remember to line up the images by using the tabs on the stamps
6. Lastly, Over-stamp the flowers with the Step 3 stamps (most defined stamp) using Melon Mambo Ink Pad, lining up your stamps in the same way.
7. Using Paper Snips, Cut out the flowers & attach to your card front using Stampin Dimensionals (hexagonal sticky fixers)
4. Finish with some embellishments in the Love Blossoms Embellishment Kit; And some Metal Rimmed Pearls for the centres of the flowers


How to Contact or
Follow Me
Kim Tolton, Independent Stampin Up Demonstrator.
Card & Papercraft Tutorials
Please feel free to comment below, and ask away with any questions. You
can also find me via the links below
Blog:
Online Store:
Stamping @ The Warren Craft Forum:
Email:
kim.tolton@googlemail.com
youTube
Pinterest:
Google +
Facebook:
Twittert:
Instagram:
@kim.tolton
LinkedIn: