google-site-verification: google70410e9e92d4fda2.html
Showing posts with label scrapbooking making. Show all posts

Wednesday, 8 June 2016

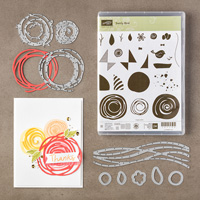
Swirly Scribbles Faux Emboss technique using Die cuts Stampin Up! UK

I hope your morning is as bright and warm as it is here in sunny Essex (UK)?
So what if we do have torrential rain and thunder storms later ... for now, all is well with my world

My first post pre-order delivery arrived yesterday, and there are some amazing products in there. I cannot wait to start playing with them !!!

If you follow my blog, you will have identified that there is always a lag between my videos tutorials and the blog posts. The reason is that it takes 2-3 days to upload one video, but I do my best to keep the images and the video synchronized.
Today we are talking Swirly Birds and Swirly Scribbles.
These super products from the New Stampin' Up! Catalogue, can be purchased separately, OR save 10% if you purchase the Stamp Set/Intricate Thinlits Die Set as a BUNDLE.
So when you browse the products I have used today (see below), I have given you the Bundle option. Click on any of the icons to view or order then via my online Store


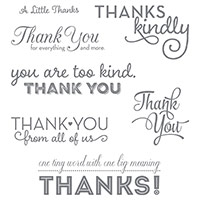
And I have given you four card examples for the price of one. I combined the Swirly Squiggles Stamp Set with the One Big Meaning Stamp Set, to create an additional four examples of today's Bundle ... all have been made using the New In Colours. You will see that there are many other stamps, including stamps to create a sail boat, a kite and much more as you can let your creativity flow!

Feel free to CASE any of my creative projects (Copy & Paste Everything)


Click on the icons below to view/order any of the products used in today's tutorial

Table built using Product Table Builder by The Crafty Owl - Independent Stampin' Up! Demonstrator.


Watch the Video Below


Tutorial
Today's tutorial is for the first card only, but use the same products to create to your hearts content

  1. Trim a piece of Mint Macaron Cardstock to 30 x 10.5 cms (A6 Card Base); Score the long side at 14.9 cms; fold & Burnish
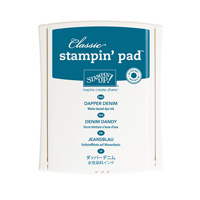
  2. Trim a piece if Whisper White Cardstock to 3 cms x 10.1 cms; using the Dapper Denim Ink Pad, stamp the Thank You sentiment from the One Big Meaning stamp set ; add a few Stampin Dimensionals to the back of the label
  3. On a scrap of of Whisper White Cardstock, stamp two of the sketched flowers and either Die Cut using the Swirly Squigles Thinlits Die OR Fussy Cut by Hand. Mount onto the sentiment lavel using a couple of Stampin Dimensionals and add a Rhinestone to each.
  4. Next, select two different sized squiggles from the stamp set, and randomly stamp the front of the card base using the Mint Macaron Ink Pad.
  5. Next, use the Big Shot to die cut 3 or four of the swirly squigles thinlits dies (best results with the Magnetic platform or the Precidion Plate.
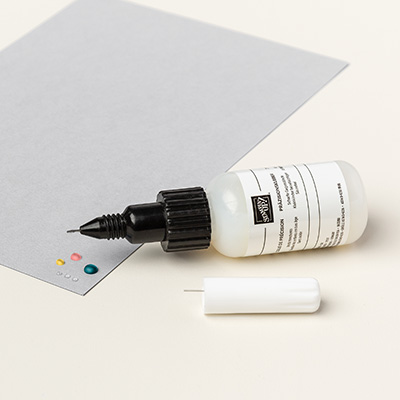
  6. Using the Fine Tip Glue Pen, apply a thinl layer of adhesive to the back of the cie cuts and attach to the card front , press firmly to vond the cardstock
  7. Next select the Thinlits Dies you want to use to create the faux embossed card front. I used 3 different sizes in a mix of Mint Macaron & Dapper Denim cardstock
  8. Mount your Sentiment Label to the top of the card base and you are all done.

How to Contact or Follow Me


Kim Tolton, Independent Stampin Up Demonstrator.
Card & Papercraft Tutorials
Please feel free to comment below, and ask away with any questions. You can also find me via the links below


Blog:

Online Store:

Stamping @ The Warren Craft Forum:

Email:
kim.tolton@googlemail.com

youTube


Pinterest:

Google +

Facebook:

Twitter:

Instagram:
@kim.tolton

LinkedIn:

Thursday, 5 May 2016

Marquee Messages Sneak Peak New In Colour Watercolour Technique Stampin Up! UK

Today I am sharing with you another Sneak Peak Stamp Set from the up-coming 2016 - 2017 Stampin Up! Catalogue.
This stamp set is called Marquee Messages, and it lends itself perfectly with watercolour techniques. And that is what I have done today. So you have a Double Sneak Peak as I am using the new In Colours, and that has produced a lovely rainbow coloured background. Using this technique, demonstrates how well, stampin up ink pads complement one another. I used Shimmery White Cardstock for the technique, rather than watercolour paper, and a blender pen for the watercolouring.
The card was finished very simply using the Gold Wink of Stella Glitter Glue Brush.

_____

Feel free to CASE any of my creative projects (Copy & Paste Everything)


Watch The Video Below

Tutorial

  1. Trim a piece of Bermuda Bay Cardstock to 24 x 12 cms; score at 12 cms; fold & Burnish
  2. Trim a piece of Shimmery White Cardstock to 10 x 11 cms
  3. Dampen the surface of the cardstock by squeezing drops of water from the Aquapainter Brush, and brush the water all over the cardstock. Pick up ink from the well of Emerald Envy ink pad and apply to the panel; repeat with each of the new In Colours, blending each ink, into it's neighbor, to create a striped rainbow effect on the cardstock. Leave to dry thoroughly
  4. Once dry, Ink up the Marquee stamp with Archival Black Ink Pad, and stamp onto the cardstock; Then stamp the It's You and Birthday sentiments in the same ink.
  5. Mat onto a piece of Mint Macaron Cardstock measuring 10.4 x 11.4 cms using Stampin Dimensionals for added lift.
  6. Mount onto the card base, again, using Stampin Dimensionals.
  7. Finish by applying a touch of gold glitter using the Gold Wink of Stella brush, for the stars and dots.


How to Contact or Follow Me


Kim Tolton, Independent Stampin Up Demonstrator.
Card & Papercraft Tutorials
Please feel free to comment below, and ask away with any questions. You can also find me via the links below


Blog:

Online Store:

Stamping @ The Warren Craft Forum:

Email:
kim.tolton@googlemail.com

youTube


Pinterest:

Google +

Facebook:

Twittert:

Instagram:
@kim.tolton

LinkedIn:


Friday, 29 April 2016

Beach Bag in a box & matching Cards using Stampin Up! Products UK

Welcome back to my blog. And today, I am sharing with you this little Beach Bag in a Box that contains four 10 cm square cards.
If you zoom in on the sentiment, you will also get a sneak peak at one of the new Thank You Stamp Sets that will be in the new Stampin Up! Catalogue when it Launches in May.
If you cannot wait until then, then pop over to my website and check out the Retiring Products section in my online store


Now I have seen many versions of the Bag in a Box, and I am not sure who originally designed this delightful little gift, but I first saw it on Caroline Hallett's  blog called Crafty Hallett

Since I am no good working in inches (unless I am dressmaking), I decided to convert the box into centimeters for the benefit of those like me. The upside of the conversion, is that one strip of 30 cm long strip of Designer Series Paper, wraps around the box with n overlap, so no infill pieces required.


And here is how I made this .... and don't forget to watch my video too, for the full tutorial. You will find all my contact and social media details at the end of this post.


  1. BAG - Trim a piece of Basic Black Cardstock to 12.5 x 6.5 cms; score all sides at 1.25 cms; fold and burnish the score lines. With one short side facing you, snip to the first score line on the right, and again on the left; Rotate by 180 degrees & repeat. Using a little Tombow Liquid Glue, join the corners of the box.
  2. Wrap a piece of Tear & Tape, all the way around the outside edges of the box base. 
  3. Trim a piece of In Colour Designer Series Paper to 9 x 30 cms
  4. Remove the outer covering of the tape; Run a strip of Tear & Tape down one edge of the designer series paper.
  5. Wrap the DSP all the way around the outside of the box base, and over lapping the two edges, sticking them together with the strip of tape at one end.
  6. Trim two pieces of Basic Black Cardstock 1 x 30 cms; apply a strip of Tear & Tape Adhesive to both pieces of cardstock. Run one around the outside base of the bag, and the other around the top of the bag.
  7. Use a hole punch to make 4 holes (two at the front of the bag, and two at the back of the bag. Make the handles of the bag using loops of Cherry Cobbler Thicker Bakers Twine.
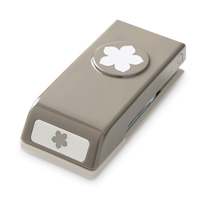
  8. Using the Petite Petals Stamp Set and Cherry Cobbler Ink Pad, stamp 3 flowers using 3rd generation stamping (the amount of times you stamp before re-inking the stamp). Punch the flowers out using the Petite Petals Punch; Attach  these to one side of the bag using a combination of Glue Dots & Stampin Dimensionals (sticky foam pads).
  9. CARDS - to make the cards, trim four pieces of Basic Black Cardstock to 10 x 20 cms; score at 10 cms; fold & Burnish
  10. Trim four pieces of In Colour Designer Series Paper to 9.6 x 9.6 cms; attach to the card bases.
  11. Stamp another 8 Petite Petal Flowers using Cherry Cobbler Ink Pad, Stamp Your Sentiment and Die Cut the label. Attach the label to the card fronts using Stampin Dimensionals; Then add the Flowers and a Cherry Cobbler Thicker Bakers Twine Bow with long tails to each card front.


How to Contact or Follow Me


Table built using Product Table Builder by The Crafty Owl - Independent Stampin' Up! Demonstrator.


Kim Tolton, Independent Stampin Up Demonstrator.
Card & Papercraft Tutorials
Please feel free to comment below, and ask away with any questions. You can also find me via the links below


Blog:

Online Store:

Stamping @ The Warren Craft Forum:

Email:
kim.tolton@googlemail.com

youTube


Pinterest:

Google +

Facebook:

Twittert:

Instagram:
@kim.tolton

LinkedIn:


Thursday, 14 April 2016

Awesomely Artistic Emboss Resist Card in Tip Top Taupe Stampin Up! UK


Before I get to today's tutorial, I feel the need to explain my leave of absence. The reason is that I have been very poorly. My hubby, Steve, has been my brick, as I have struggled through two bouts of Influenza, Pleurisy & pneumonia! Just one of these on it's own, would be enough to knock most of us back, but my challenge with the above has been a difficult and lengthy one. I cannot remember a time when I have not spent at least two full days a week in my workshop. I hadn't gone in there since my last video/blog, and earlier this week, when I decided to get my Card Swaps done for this weekends Stampin Up! On Stage Live event in Telford. It is a great event for Demonstrators across the UK, and for most of us, it is out annual chance to catch up with one another, and bring back lots of swaps, to give us fresh ideas for out own workshop events. So watch this space, as I may be sneaking in some of those swaps to share with you.

Anyway, until my health is back to normal (hopefully another couple of weeks should have me firmly back on my feet) I will stick to 3 video's a week. Thank you for sticking with me!! I really appreciate it.
________________________________________

As you scroll down today's blog post, you will find :
·        icons of all the products used to create today's card - click on them to visit my online store;
·        A Video Tutorial
·        & a typed tutorial
Feel free to CASE any of my creative projects (Copy & Paste Everything)


Click on the icons below to view/order any of the products used in today's tutor

Table built using Product Table Builder by The Crafty Owl - Independent Stampin' Up! Demonstrator.

Watch the Video Below


Tutorial

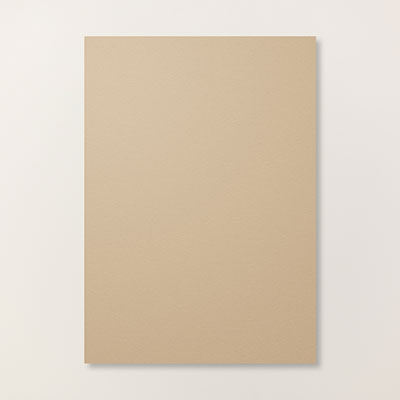
  1. Trim a piece of Crumb Cake Cardstock to 30 x 10.5 cms; Score at 14.8 cms; Fold & Burnish (Card Base)
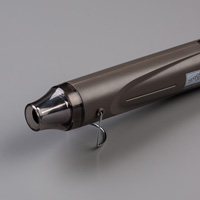
  2. Trim a piece of Shimmery White Cardstock to 10 x 10 cms; stamp two corners with the flower stamp, using the Versamark Ink Pad, dust with Clear embossing Powder & Heat Set.
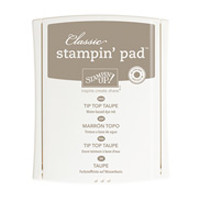
  3. Using a wedge of Stampin Sponge and the Tip Top Taupe Ink Pad, sponge the card front, with the emphasis on the embossed areas,, use a piece of tissue to wipe off any excess ink to the embossed areas.
  4. Mat onto a piece of Tip Top Taupe Cardstock measuring 10.4 x 10.4 cms
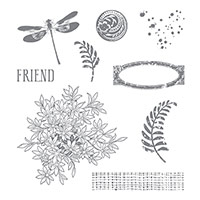
  5. Stamp the dragonfly onto a scrap of Tip Top Taupe Cardstock using Archival Basic Black Ink Pad; Cut out using your Paper snips.
  6. Stamp the FRIEND stamp in the centre of the panel, using Archival Basic Black Ink
  7. Stamp the front of your card base with the flower stamp using Tip Top Taupe Ink Pad; Mount the embossed panel onto the centre of the card base; add the Dragonfly, using a Stampin Dimensional.
  8. Finish by adding a few Basic Rhinestones, and glitter to the dragonfly using the Clear Wink of Stella Glitter glue Brush.


How to Contact or Follow Me


Kim Tolton, Independent Stampin Up Demonstrator.
Card & Papercraft Tutorials
Please feel free to comment below, and ask away with any questions. You can also find me via the links below


Blog:

Online Store:

Stamping @ The Warren Craft Forum:

Email:
kim.tolton@googlemail.com

youTube


Pinterest:

Google +

Facebook:

Twittert:

Instagram:
@kim.tolton

LinkedIn: