google-site-verification: google70410e9e92d4fda2.html

Monday 30 November 2015

Stampin Up! Christmas Greetings Framelits Dies & Holly Jolly Greetings Christmas Card

I am all too aware that time to Christmas is running out ... and fast
So today I am sharing with you another Super Simple & Quick Card to make and is suitable for all levels of Paper Crafter
I hope you enjoy having some fun with this one

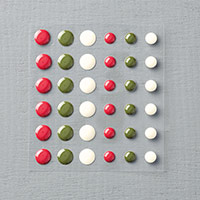
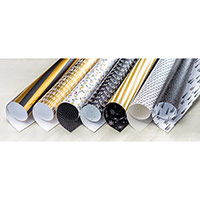
below you will find the product icons for the items I used to create today's card
Click on the icons to view or order them via my Demonstrator Website


Table built using Product Table Builder by The Crafty Owl - Independent Stampin' Up! Demonstrator.
 Watch the Video Below


  1. Make your A6 Card Base by trimming a piece of Thicker Whisper White Cardstock to 21 cms x 14.8 cms; score the long side at 10.5 cms; fold and burnish
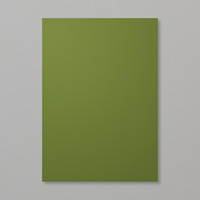
  2. Trim a piece of Mint Macaron Cardstock to 14.4 cms x 10.1 cms/ Adhere to the card base using either Fast Fuse or Tombow Adhesive
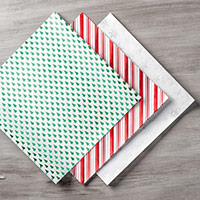
  3. Trim a piece of Winter Wonderland Designer Series Paper (DSP) to 3 cms x 14.4 cms
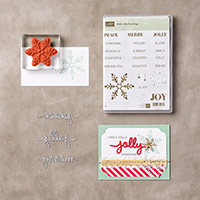
  4. Trim a piece of Whisper White Cardstock to 4 cms x 14.4 cms; die cut the MERRY greetings Thinlit die to the centre of the Whisper White Cardstock; run a strip of Tape & Tear Adhesive to the top and bottom of the back of the die cut panel
  5. Attach the Decorative Paper to the back of the top of the Die Cut Panel, and a strip of Real Red Striped Ribbon to the bottom of the same panel
  6. Adhere across the centre of the card front
  7. Die cut the Merry Greetings Thinlits Die using Gold Foiled Cardstock and using the Fine Tipped Glue Pen, adhere your gold die cut into the void in the Whisper White panel
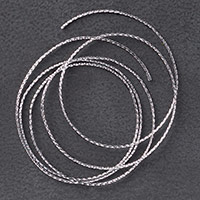
  8. Finish with a long loop of Gold Cording Trim, and tie a small bow; adhere to your card front using a Glue Dot


Kim Tolton, Independent Stampin Up Demonstrator.
Card & Papercraft Tutorials
Please feel free to comment below, and ask away with any questions. You can also find me via the links below
Blog:

Online Store:

Stamping @ The Warren Craft Forum:

Email:

Pinterest:

Google +

Facebook:

Twittert:

Instagram:
 @kim.tolton

 LinkedIn:

Sunday 29 November 2015

Stampin Up! six Sided Sampler Christmas Card in mossy Meadow and Cherry Cobbler & a bit of Bling on the side

The Card I am sharing with you today comes from Stampin Up!s current Annual Catalogue ... and it isn't in the Christmas Section,


I wanted to show you how easy it can be to look at your rubber stamps and see them in a different light. So today's card illustrates this Sampler (patchwork) stamp set, and how changing the colour of the ink pads, plus the accessories you use, can change this stamp set into one that is quintessentially Festive, I have gone with the following Classic Ink Pads - Soft Suede; Mossy Meadow, & Cherry Cobbler. Sometimes we just need to stand back and think outside the box.

Below you will find all the products I used to create today's card
Click on the product icons  to View or order them via my online store

Table built using Product Table Builder by The Crafty Owl - Independent Stampin' Up! Demonstrator.

Watch the Video Below


  1. Make your A6 Card Base by trimming a piece of Thicker Whisper White Cardstock to 21 cms x 14.8 cms; Score the long side at 10.5 cms; Fold & Burnish
  2. Trim a piece of regular Whisper White Cardstock to 14 cms x 9.7 cms
  3. Stamp the tire marks from Gorgeous Grunge Stamp Set, using Mossy Meadow 4 or 5 times without re-inking the stamp
  4. Stamp the first hexagonal stamp to the centre of the cardstock using Sift Suede Classic Ink Pad
  5. Stamp the flower hexagonal twice without re-inking, using Cherry Cobbler Classic Ink Pad
  6. Stamp the hessian hexagonal stamp using Mossy Meadow Classic Ink Pad, twice, without re-inking
  7. Stamp the 'Merry Wishes' stamp in the top left corner using Soft Suede Classic Ink Pad
  8. Mount onto a piece of Mossy Meadow Cardstock measuring 14.4 cms x 10.1 cns
  9. Trim a piece if Dazzling Diamonds Glimmer Paper to 1 cm wide and feeding the glimmer paper in through the top of the Banner Punch and between the Cutting Plates, create Banner ends to fit along the front of your card
  10. Apply some Fast Fuse Adhesive to the back of the Glimmer Paper strip, and attach some coiled loops of Gold Cording Trim to the adhesive
  11. Pop some Stampin Dimensionals on the back of the glimmer paper and attach to the front of  the card
  12. Finish with a Snowflake Element and some Basic Rhinestones

Stamping At The Warren
Kim Tolton

Independent Stampin Up! Demonstrator (UK)
Card & Paper Craft Classes & How To Tutorials
JOIN my Pinterest Community Board
 Where you will be able to post your own Stampin Up! Makes
Simply follow my Community Pinterest Board
And I will sent you an invitation to start pinning

If you have any questions on techniques, orders, products
OR
 Joining my Team as an Independent Stampin Up!  Demonstrator
contact me via:-
Text: 07759587004
Order Online 24/7


Stamping @ The Warren Craft Forum:

Pinterest:

Google +

Facebook:

Twitter:

Instagram:
@kim.tolton

LinkedIn:

Friday 27 November 2015

Stampin Up! An Open Heart Christmas Card with Loyd of Labels

Today's card, is another stamp set from the current Annual Catalogue
It is another example of how you can have a brainstorming session, and come up with a new design using a stamp set that leans heavily toward a particular sentiment. In this case, AN OPEN HEART is designed with  sympathy/thinking of you sentiments.
It is so easy to get stuck into using a stamp set for the sole reason you purchased it in the first place. But most stamp sets are much more versatile than that!
By changing the embellishment and sentiment you now have a delightful Christmas Card.

Below you will find all the products I have used to create today's card
click on the product icons to view or order them via my online store

VIEW THE VIDEO BELOW

  1. Make your Card Base by trimming a piece of Thicker Whisper White Cardstock to 30 cms x 14 cms  & score the long side  at 15 cms (12" x 6£ & score at 6"); Fold & Burnish
  2. Trim a piece of regular Whisper White Cardstock to 14 cms x 14 cms; add some Stampin Dimensionals to the back of the panel and mount it onto your Card Base
  3. Trim another piece of Whisper White Cardstock to 13 cms x 13 cms
  4. Stamp the leaf from An Open Heart Stamp Set Two or Three times using Mossy Meadow Classic Ink Pad
  5. Stamp the bird onto the same panel using Soft Suede Classic Ink Pad
  6. Using a wedge of Stampin Sponge, ink the edges of the cardstock using Mossy Meadow Ink Pad
  7. Apply Stampin Dimensionals to the back of the panel and mount onto your card base
  8. Stamp your Christmas Sentiment from the Embellished Ornaments Stamp St using Basic Black Classic Ink Pad onto a scrap of Whisper White Cardstock
  9. Die cut the sentiment using the best fitting Lots of Labels Framelits Dies
  10. Ink the edges of the die cut with the residual green ink on your sponge.
  11. Attach to your Card Front using Stampin Dimensionals
  12. Tie a bow using Silver Cording Trim, leaving long looping tails
  13. Finish with 3 Very Vanilla Home For Christmas Enamel Dots


Stamping At The Warren
Kim Tolton

Independent Stampin Up! Demonstrator (UK)
Card & Paper Craft Classes & How To Tutorials
JOIN my Pinterest Community Board
 Where you will be able to post your own Stampin Up! Makes
Simply follow my Community Pinterest Board
And I will sent you an invitation to start pinning

If you have any questions on techniques, orders, products
OR
 Joining my Team as an Independent Stampin Up!  Demonstrator
contact me via:-
Text: 07759587004
Order Online 24/7


Stamping @ The Warren Craft Forum:

Pinterest:

Google +

Facebook:

Twitter:

Instagram:
@kim.tolton

LinkedIn:


Wednesday 25 November 2015

Stampin Up!s Cozy ChristmasStamp Set with Foiled Vellum Overlay Christmas Card

Below you will find all the products used today, 
just click on the product icons to view or order them via my online store
Table built using Product Table Builder by The Crafty Owl - Independent Stampin' Up! Demonstrator.


VIEW THE VIDEO BELOW


  1. Make your card base by trimming a piece of Thicker Whisper White Cardstock to 30 cms x 15 cms; score at 15 cms;  (Imperial - 12" x 6"; score at 6")
  2. Trim a piece of Red Foil to 14 cms x 14 cms; adhere to the card base using Fast Fuse Adhesive
  3. Trim a piece of Foiled Vellum to 14.6 cms x 13.6 cms; adhere to the foiled cardstock using either a small piece of Fast Fuse or a glue Dot in each corner
  4. stamp the sentiment from the Cozy Christmas Stamp Set using mossy Meadow Classic Ink Pad, onto Whisper White Cardstock
  5. Die cut using the Tags & Labels Framelits Dies
  6. Loop some Silver Cording Trim and attach to the back of the label using a little Fast fuse
  7. Attach the label to the card front using Stampin Dimensionals
  8. Add a few Snowflake Elements using Stampin Dimensionals
  9. finish with some Basic Rhinestones for a bot more bling

Stamping At The Warren
Kim Tolton

Independent Stampin Up! Demonstrator (UK)
Card & Paper Craft Classes & How To Tutorials
JOIN my Pinterest Community Board
 Where you will be able to post your own Stampin Up! Makes
Simply follow my Community Pinterest Board
And I will sent you an invitation to start pinning

If you have any questions on techniques, orders, products
OR
 Joining my Team as an Independent Stampin Up!  Demonstrator
contact me via:-
Text: 07759587004
Order Online 24/7


Stamping @ The Warren Craft Forum:

Pinterest:

Google +

Facebook:

Twitter:

Instagram:
@kim.tolton

LinkedIn: