
I am a bit late posting today as one of our Granddaughter's was dropped off to us as she is a little poorly and unable to go to school.
Now some of you will no doubt have already seen the u Tube Tutorial that goes with today's Sparkling Christmas Card, but for those that haven't, both the video and the written tutorial can be found below, along with the one product icons that allows you to be transported to that item in my online store
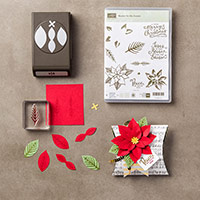
And today is ALL about Dazzling Diamonds and the Flower Builder Punch .... Enjoy!!
Below you will find the products I have used to create today's card
if you want to view or order any of the products
just click on the product icon and you will be transported to my online store
 |  |  |  |  |  |
 |  |  |  |  |  |
 |  |  |
Table built using Product Table Builder by The Crafty Owl - Independent Stampin' Up! Demonstrator.
Watch the Video Below
- Make your card base by trimming a piece of Thicker Whisper White Cardstock to 12" by 6" & Score the long side at 6" (imperial) or 30 cms x 15 cms & score the long side at 15 cms (metric) & Burnish the fold
- Trim a piece of regular Whisper White Cardstock to 12 cms x 12 cms
- Stamp the sentiment in to top right corner using the Christmas Sentiment from A Flurry of Wishes Stamp Set using the Soft Suede Classic Ink Pad.
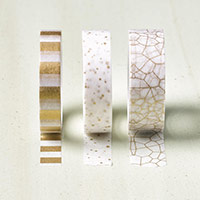
- Create a hash shape as in the photos using a combination of the three rolls of Washi Tape that come in the Wonderland Designer Series Washi Tape Pack
- Mat onto a piece of Dazzling Diamonds Glimmer Paper measuring 12.4 cms x 12.4 cms
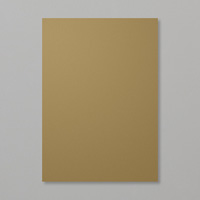
- Mat that onto a piece of Soft Suede Cardstock measuring 12.8 cms x 12.8 cms - I found Fast Fuse to be the best adhesive for sticking the Glimmer Paper.
- Punch out 6 medium petals and 6 large petals from Dazzling Diamonds Glimmer Paper.
- Using a bone folder, lightly curl each petal
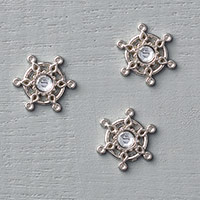
- Layer up each set of 6 petals using Glue Dots and then adhere the two flowers together using glue dots; top with a Winter Wonderland Embellishment using a Glue Dot again
- Using Fast Fuse Adhesive, attach the card front onto your card base
Stamping At The Warren
Kim Tolton
Independent Stampin Up! Demonstrator (UK)
Card & Paper Craft Classes & How To Tutorials
JOIN my Pinterest Community Board
Where you will be able to post your own
Stampin Up! Makes
Simply follow my
Community Pinterest Board
And I will sent you
an invitation to start pinning
If you have any
questions on techniques, orders, products
OR
Joining my Team as an Independent Stampin
Up! Demonstrator
contact me via:-
Email me: kim.tolton@googlemail.com
Text: 07759587004
Order Online 24/7
Stamping @ The Warren Craft Forum:
Pinterest:
Google +
Facebook:
Twitter:
Instagram:
@kim.tolton
LinkedIn:
No comments:
Post a Comment