
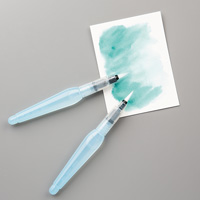
Today I am sharing with you a watercolour technique
The How To Video also gives an example comparing a blender pen Watercolour Technique, compared to the Aquapainter technique.
Personally, I like the speed with wich you can colour in a stamp using the Aquapainter, but the Blender Pen allows finer detailing of the stamp.
I haven't as yet combined the two techniques, but see no reason why this isn't possible, providing the cardstock is given time to dry between the two techniques. I would do the Aquapainter first, and then detailing with the Blender Pen.
If any of you try this before me, please let me know how you get along!
As for the Wilderness Awaits Stamp Set from Stampin Up!,
being a Country Bumpkin myself, I just LOVE it, as I did with it's predecessor, Walk in the Wild.
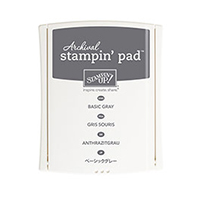
The new Archival Basic Black Classic Ink Pad is a long awaited arrival, as it means there is no longer any need to have Stazon Ink Pad, as well as the Basic Black.
The Archival ink pads allow you to use colouring techniques with the inks or the Marker Pends without the risk of the inks bleeding outside of the stamped image.

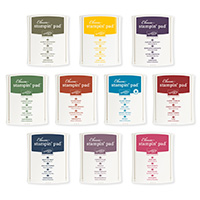
Here are the products I used for today's card
Just click on the product icons to view them in more detail, or place your order
via mu online store
 |  |  |  |
 |  |  |  |
 |  |  |  |
 |  |  |  |
 |  |  |
Table built using Product Table Builder by The Crafty Owl - Independent Stampin' Up! Demonstrator.
Watch the Video Below

- Make your card base by trimming a piece of Thicker Whisper White Cardstock to 21 cms x 14.8 cms; Score the long side at 10.5 cms; fold and burnish; put to one side
- Trim a piece of regular Whisper White Cardstock to 14 cms x 9.7 cms
- Stamp the top section of the card with the 4 tree stamp from LOVELY AS A TREE Stamp Set using Archival Basic Grey Classic Ink Pad
- Just under the trees, Stamp the Christmas Sentiment from the SIX SAYINGS hostess Stamp Set using Basic Black Classic Ink Pad
- Using the Always Artichoke Classic Ink Pad, and the Conifer Stamp from Lovely as a Tree Stamp set, to the bottom left of the cardstock, and a small part of the tree at the bottom right, again, using Always Artichoke Classic Ink Pad
- Stamp the Moose/Stag/Reindeer stamp from WILDERNESS AWAITS stamp set using the Archival Basic Black Classic Ink Pad.
- Sponge some sky using Island Indigo Classic Ink Pad, as some Crushed Curry for the setting sun, then sponge some Always Artichoke ink to the tree/ground, and gently ink up the edges of the cardstock using pieces of Stampin Sponge.
- You will need to 'squidge' the following ink pads to transfer ink into the 'wells' - Cajun Craze & Soft Suede & Sahara Sand; Open the ink pads so you can see the ink in the well.
- Squeeze a drop of water from your Aquapainter into the well of the Cajun Craze ink pad. Pick up a little ink on the brush and start colouring in the Moose. Do not over saturate the paper and allow to dry a little before working on the next colour
- Now pick up some colour from the well of the Soft Suede ink pad. This is where you are going to create depth. Add detailing just inside the lines of the stamped image, and add colour over any of the detailed shading from the stamped image. Wipe any excess colour from the brush onto some scrap paper.
- Pick up a little ink from the Sahara Sand ink well, and now you want to add shadows by adding colour around the outside edges of the Moose (give yourself an imaginary sun direction so you can visualise where the shadows will need to be .... and watch my video above.
- Allow the panel to dry and then Mat (layer) onto a piece of Always Artichoke Cardstock measuring 14.4 cms x 10.1 cms using Fast Fuse Adhesive
- Mount onto your card front using Fast Fuse or Tombow Adhesive

Stamping At The Warren
Kim Tolton
Independent Stampin Up! Demonstrator (UK)
Card & Paper Craft Classes & How To Tutorials
JOIN my Pinterest Community Board
Where you will be able to post your own
Stampin Up! Makes
Simply follow my
Community Pinterest Board
And I will sent you
an invitation to start pinning
If you have any
questions on techniques, orders, products
OR
Joining my Team as an Independent Stampin
Up! Demonstrator
contact me via:-
Email me: kim.tolton@googlemail.com
Text: 07759587004
Order Online 24/7
Stamping @ The Warren Craft Forum:
Pinterest:
Google +
Facebook:
Twitter:
Instagram:
@kim.tolton
LinkedIn:
No comments:
Post a Comment