HAPPY EASTER to you all
I hope you have a wonderful Family Weekend
Tomorrow we are having a big Easter Egg Hunt with our Grandchildren, It;s great fun as our garden is large, with lots of places to hide those chocolate eggs !
Anyway, the card I am sharing with you today, is a card I made for my Brother-in-Laws 50th Birthday
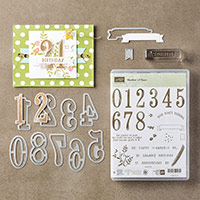
Since he is a train driver, I decided that the Traveler Stamp Set from Stampin Up! just had to be the main stamp set for this card.
However, I also used the Remembering Your Birthday stamp set, for the sentiment inside the card, plus the Number of Years Stamp Set. for the large numbers and the Sentiment Banner.
The Large Letters Dies and the Number of Years Stamp Set is available as a Bundle in the 2016 Spring/Summer Seasonal Catalogue from stampin Up, and is available via my online store, at a 15% discount
(see the bottom of today's blog post)

________________________________________
As you scroll down
today's blog post, you will find :
·
icons of all the products used to create today's card - click on them to
visit my online store;
·
A Video Tutorial
·
& a typed tutorial
Feel free to CASE
any of my creative projects (Copy & Paste Everything)
Click on the icons
below to view/order any of the products used in today's tutor
 |  |  |  |  |  |
 |  |  |  |  |  |
 |  |  |  |  |  |
 | 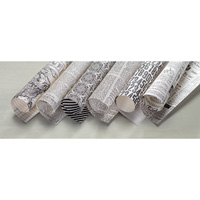 |  |  |
Table built using Product Table Builder by The Crafty Owl - Independent Stampin' Up! Demonstrator.
.
Watch the Video
Below
Tutorial
- Trim a piece of Night of Navy Cardstock to 29.8 x 10.5 cms; score the long side at 14.8 cms, fold & burnish
- trim a piece of Typeset Designer Series Paper (DSP) to 10.1 x 14 cms & adhere to the card front
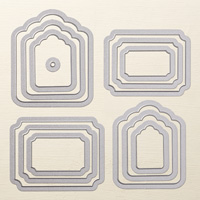
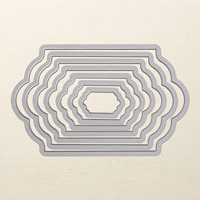
- Trim a piece of Very Vanilla Cardstock to 10.1 x 14 cms and stamp with the Train from The Traveler Stamp Set, using Night of Navy ink pad.; Die Cut using the Big Shot & Lots of Labels Framelits Dies; Sponge the edges with Night of Navy ink, and mount onto your card base using Stampin Dimensionals.
- Wrap some Linen Thread around 4 fingers, twist and tie off. Add to the card front using a couple of Glue Dots/
- Stamp the Banner from the Number of Years Stamp Set using Archival Basic Black Ink Pad, and over stamp this using the BIRTHDAY stamp from the same stamp set, lightly sponge the banner with Night of Navy ink; Die cut the Banner plus the 50 using the Large Numbers Framelits Dies & Night of Navy Cardstock
- Paint the Banner and the 50 with the Clear Wink of Stella Glitter Glue Brush .... Ye Ha! I am SO thrilled that this product is now available via Stampin Up!
- Add some cut down pieces of Stampin Dimensionals to the back of the Banner & the 50, and attach to your card front.
- Trim a piece of Very Vanilla Cardstock to 10.1 x 14 cms and stamp the sentiment of choice from the Remembering Your Birthday Stamp Set and stick the cardstock t the inside of the card.

How to Contact or
Follow Me
Kim Tolton, Independent Stampin Up Demonstrator.
Card & Papercraft Tutorials
Please feel free to comment below, and ask away with any questions. You
can also find me via the links below
Blog:
Online Store:
Stamping @ The Warren Craft Forum:
Email:
kim.tolton@googlemail.com
youTube
Pinterest:
Google +
Facebook:
Twitter:
Instagram:
@kim.tolton
LinkedIn: