google-site-verification: google70410e9e92d4fda2.html
Showing posts with label making. Show all posts

Thursday, 18 August 2016

Thoughtful Branches Bundle Handmade Die Cut & Stamped Autumnal Card using Stampin' Up! products

Firstly, my apologies for not posting a project yesterday. I woke with a really severe migraine that knocked me for six, and I just could not cope with the brightness of the computer screen.
Today is another day, and all is well

So I decided to share with you one of the projects I will be demonstrating in my next Stamp & Craft Class

It features the Thoughtful Branches Stamp Set, that I featured recently.
If you like what you see, you only have a few days left to purchase it before it is gone for good.

Today's card differs from the three cards from my last class, as these two cards are using both the the positive and negative die cuts from the co-ordinating Die Pack (you can get this offer as a 10% Bundle & Save via my online store)
The black background created a dramatic effect, and really makes the Die Cut Trees, stand out.

I also used the Thoughtful Banners with the Banner Duo Punch

Below, you will find a list of products listed below, along with the accompanying video tutorial

Enjoy


Feel free to CASE any of my creative projects (Copy & Paste Everything)


PRODUCTS USED TODAY

STAMP SET
Thoughtful Branches

FRAMELITS DIES/PUNCHES
Beautiful Branches Framelits Dies
Banner Duo Punch

INK PADS
Always Artichoke
Delightful Dijon
Cajun Craze
Tip Top Taupe
Black Memento

CARDSTOCK
Whisper White
Basic Black

ADHESIVES
Tombow Multi-Purpose Liquid Glue
Stampin Dimensionals

TOOLS
Big Shot Die Cutting machine
Magnetic Platform
Stampin Trimmer
Acrylic Blocks
Paper Snips
Bone Folder

Watch the Video Below

Tutorial

CARDBASE -  Basic Black 30 x 10.5 cms; score long side at 14.9 cms; fold & burnish

PANEL FOR THE INSIDE OF THE CARD BASE- Whisper White Panel - 14.4 X 10.1 CMS

PANEL ONE - Basic Black Cardstock measuring 14.4 x 10.1 cms
PANEL TWO - Whisper White measuring 14 x 9.7 cms


How to Contact or Follow Me


Kim Tolton, Independent Stampin Up Demonstrator.
Card & Papercraft Tutorials
Please feel free to comment below, and ask away with any questions. You can also find me via the links below


Blog:

Online Store:

Stamping @ The Warren Craft Forum:

Email:
kim.tolton@googlemail.com

youTube


Pinterest:

Google +

Facebook:

Twitter:

Instagram:
@kim.tolton

LinkedIn:

Thursday, 11 August 2016

Awesome Decorative Label Grateful Bunch Rubber Stamped Handmade Card Using Stampin' Up! Products UK

So why is this card so awesome?
It is awesome as it was made by my 6 year old Granddaughter .... she picked the ink pads, cardstock, rubber stamps and everything you see. The only things she needed help with, was the ribbon and the punch. She began her crafting journey with belly painting, then she moved onto hand painting, and then onto rubber stamping.
The occasion was her Daddies Birthday ... nothing I said was going to convince her to have even the slightest bit of masculinity added into her creation.
Even the envelope got the same treatment as the card he he

I hope you find her creation just as awesome as I do?

The Stamp Set is

GRATEFUL BUNCH

From Stampin' Up!

I had completely overlooked this stamp set amongst my vast collection of stamps, but no more lol

A list of products is listed below, along with the link to my online store, should you want to browse the Catalogue, or place an order


Feel free to CASE any of my creative projects (Copy & Paste Everything)


STAMP SET
Grateful Bunch

INK PADS
Melon Mambo
old olive
Rich Razzelberry
Memento Black

CARDSTOCK

DESIGNER SERIES PAPER
Pop of Pink

PUNCHES
Blossom
Decorative Label

ACCESORIES
Melon Mambo Stitched Satin Ribbon

TOOLS
Stampin Trimmer
Paper Snips
Bone Folder
Acrylic Blocks

ADHESIVES
Tombow Multipurpose Liquid Glue
Stampin Dimensionals


How to Contact or Follow Me


Kim Tolton, Independent Stampin Up Demonstrator.
Card & Papercraft Tutorials
Please feel free to comment below, and ask away with any questions. You can also find me via the links below


Blog:

Online Store:

Stamping @ The Warren Craft Forum:

Email:
kim.tolton@googlemail.com

youTube


Pinterest:

Google +

Facebook:

Twitter:

Instagram:
@kim.tolton

LinkedIn:

Friday, 5 August 2016

Brushstrokes Flourishing phrases & Embellished Ornaments Handmade Christmas Card Stampin' Up! UK


Can you believe it is Saturday again? The weeks are flying past, and I am starting to think on the designs I will be using for this years Christmas Cards ... I Know, I can hear you groaning from here.
And for this card, I need feedback from you, my faithful followers please?

 The two cards in the photo, differ, and I want to know if you prefer the design with the leaves? or the one without the leaves?

For this design, I wanted to keep it clean, crisp, and simple 

The colour-scheme was kept equally simple, using ink pads from the Brights Colour Collection

Daffodil Delight
Old Olive
& Real Red
With Cherry Cobbler for the Card base 

It does mean I have used three stamp sets, but for me it is worth it
The background uses the Brushstrokes Stamp Set
The Flower & leaves are from the Flourishing Phrases Stamp Set
& the festive sentiment is from the Delicate Ornaments Stamp Set
Embellishment was kept equally simple with Basic Rhinestones for that Festive Twinkle.


Feel free to CASE any of my creative projects (Copy & Paste Everything)


PRODUCTS USED TODAY

STAMP SETS
BRUSHSTROKES
DELICATE ORNAMENTS
FLOURISHING PHRASES

CARDSTOCK
CHERRY COBBLER
WHISPER WHITE

INK PADS
ARCHIVAL OR MEMENTO BLACK
DAFFODIL DELIGHT
OLD OLIVE
REAL RED

ACCESSORIES
BASIC RHINESTONES

TOOLS
ACRYLIC BLOCK BUNDLE
STAMPIN TRIMMER
BONE FOLDER

ADHESIVES
TOMBOW MULTI-PURPOSE LIQUID GLUE


Tutorial

  1. CARD BASE - Trim a piece of Cherry Cobbler Cardstock to 30 x 10.5 cms; score long side at 14.9 cms; fold & Burnish
  2. Trim two pieces of Whisper White Cardstock to 14.4 x 10.1 cms; adhere one piece inside the card base for writing/stamping your greeting, I used Tombow Liquid Glue
  3. The other Whisper White Panel, begin by using the Brushstrokes Stamp Set with Daffodil Delight and stamp so the lines are horizontal to the cardstock
  4. Over stamp this with the Large flower stamp from the Flourishing Phrases Stamp Set; Stamp one using Old Olive Ink Pad, and another using the Real Red Ink Pad.
  5.  If you prefer the design with the leaves, add these in now
  6. Stamp the Sentiment from the Delicate Ornaments Stamp Set, using Archival or Memento Black
  7. Mat (layer) onto your card base and embellish with  some small Basic Rhinestones.

How to Contact or Follow Me

Kim Tolton, Independent Stampin Up Demonstrator.
Card & Papercraft Tutorials
Please feel free to comment below, and ask away with any questions. You can also find me via the links below


Blog:

Online Store:

Stamping @ The Warren Craft Forum:

Email:
kim.tolton@googlemail.com

youTube


Pinterest:

Google +

Facebook:

Twitter:

Instagram:
@kim.tolton

LinkedIn:

Thursday, 24 March 2016

Weekly Deals
This weeks Deals are offering great savings. To find out more 

Banner Banter Clear Mount Stamp Set


Build A Banner Kit


Everyday Chic Designer Washi Tape

Hexagonal Hive Thinlets Die

Wednesday, 27 January 2016

Sale A Bration Free Stamp Set The Sky's The Limit with a World Map Masculine Card Stampin Up! UK


  • As you scroll down today's blog post, you will find :
  • icons of all the products used to create today's card - click on them to visit my online store;
  • A Video Tutorial
  • & a typed tutorial
Feel free to CASE any of my creative projects (Copy & Paste Everything)


Click on the icons below to view/order any of the products used in today's tutorial

Table built using Product Table Builder by The Crafty Owl - Independent Stampin' Up! Demonstrator.

Watch the Video Below

Tutorial

1.    Trim a piece of Thicker Whisper Cardstock to 21 x 14.8 cms; score long sde at 10.5 cms; fold & Burnish

2.  Trim a piece of Crumb Cake Cardstock to 14.4 x 4 cms

3.  Trim a piece of Soft Sky Perfectly Artistic Designer Series Paper (DSP) to 14 cms x 4.
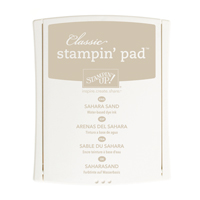
  4 cms; tear the edges of the DSP and Ink distress the edge by sponging s using Sahara Sand Classic Ink Pad; Over-stamp with the Bi Plane & Heart Loop the Loop Stamps using the Chocolate Chip Classic Ink Pad

5.  Trim a piece of Tip Top Taupe Perfectly Artistic DSP to 6 x 14 x 6 cms & over-stamp with the World Map Background stamp , using the Chocolate Chip Classic Ink Pad; Tear the edges of the bottom of the DSP and distress all edges by sponging with the Sahara Sand Classic Ink Pad.

6.  Mat onto the lower section of the Crumb Cake Panel you trimmed to size above

7.  Adhere the Plane stamped DSP onto the upper section of the Crumb Cake Mat Layer

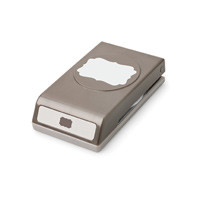
8.  Stamp your sentiment onto a scrap of Whisper white Cardstock using Chocolate Chip Classic Ink Pad. Punch out using the Decorative Label Punch, Mount onto the card front using Stampin Dimensionals'

9.  Mount onto your Thicker whisper White Card Base
 
How to Contact or Follow Me


Kim Tolton, Independent Stampin Up Demonstrator.
Card & Papercraft Tutorials
Please feel free to comment below, and ask away with any questions. You can also find me via the links below


Blog:


Online Store:

Stamping @ The Warren Craft Forum:

Email:
kim.tolton@googlemail.com

youTube


Pinterest:

Google +

Facebook:

Twittert:

Instagram:
@kim.tolton

LinkedIn: