
I am keeping todays blogpost short and sweet, but I wanted to share with you all the final installment in my Extra Large Keepsake Box.
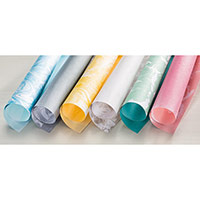
I wanted something special in the centre of the box to place the gifts for my Mum in the centre of the box. So I used some Timeless Elegance Designer Series Paper, sponged with delightful Dijon Ink to keep the project coordinated.

You can find the full tutorials by watching Watching the Videos below


- icons of all the products used to create today's card - click on them to visit my online store;
- A Video Tutorial
- & a typed tutorial
Feel free to CASE any of my creative projects (Copy & Paste Everything)
Click on the icons below to view/order any of the products used in today's tutor
 |  |  |  |  |
 |  |  |  |  |
 |  |  |  |  |
 |  |  |  |  |
 |  |
Tutorial
1. LID Trim a piece of cardstock to 15 x 15 cms; score on all sides at 2.5 cms; Fold & Burnish all score lines; Notch out 4 corners notch out the 4 corners & adhere kid corners using Tombow Liquid Glue; Trim Designer Series Paper to:
- Four pieces measuring 9.5 x 2 cms
- One piece measuring 9.5 x 9.5 cms; & adhere to lid.
1. 2. LARGE LAYER - Trim a piece of 12" cardstock to 30 x 30 cms (12" x 12"); score at 10 & 20 cms; rotate by 45 degrees and score again at 10 & 20 cms; using Kraft Scissors, remove the four outer corners, following the score lines, so you are left with a cross shaped piece of cardstock; fold & burnish all the score lines;
3. MIDDLE LAYER - Trim a piece of cardstock to 27 x 27 cms; score at 9 & 18 cms; Rotate by 45 degrees & score at 9 & 18 cms fold & Burnish; Cut out the 4 corners to create a cross shape; Trim the following pieces of Designer Series Paper:
- Four pieces measuring 8.5 x 8.5
- Four pieces measuring 8.5 x 8.5 (contrast) & adhere to the middle layer.
4. SMALL LAYER - Trim a piece of Cardstock to 24 x 24 cms; score at 8 & 16 cms; Rotate by 45 degrees and score at 8 & 16 cms; cut out the 4 outside corners
Fold & Burnish & attach to the cardstock Trim the following pieces of Designer Series Paper to;
- Five pieces measuring 5.5 x 5.5 cms
- Four pieces measuring 5.5 x 5.5 cms (contrast)

No comments:
Post a Comment