
Welcome back to my blog. And today, I am sharing with you this little Beach Bag in a Box that contains four 10 cm square cards.
If you zoom in on the sentiment, you will also get a sneak peak at one of the new Thank You Stamp Sets that will be in the new Stampin Up! Catalogue when it Launches in May.
If you cannot wait until then, then pop over to my website and check out the Retiring Products section in my online store
Now I have seen many versions of the Bag in a Box, and I am not sure who originally designed this delightful little gift, but I first saw it on Caroline Hallett's blog called Crafty Hallett
Since I am no good working in inches (unless I am dressmaking), I decided to convert the box into centimeters for the benefit of those like me. The upside of the conversion, is that one strip of 30 cm long strip of Designer Series Paper, wraps around the box with n overlap, so no infill pieces required.

And here is how I made this .... and don't forget to watch my video too, for the full tutorial. You will find all my contact and social media details at the end of this post.
- BAG - Trim a piece of Basic Black Cardstock to 12.5 x 6.5 cms; score all sides at 1.25 cms; fold and burnish the score lines. With one short side facing you, snip to the first score line on the right, and again on the left; Rotate by 180 degrees & repeat. Using a little Tombow Liquid Glue, join the corners of the box.
- Wrap a piece of Tear & Tape, all the way around the outside edges of the box base.
- Trim a piece of In Colour Designer Series Paper to 9 x 30 cms
- Remove the outer covering of the tape; Run a strip of Tear & Tape down one edge of the designer series paper.
- Wrap the DSP all the way around the outside of the box base, and over lapping the two edges, sticking them together with the strip of tape at one end.
- Trim two pieces of Basic Black Cardstock 1 x 30 cms; apply a strip of Tear & Tape Adhesive to both pieces of cardstock. Run one around the outside base of the bag, and the other around the top of the bag.
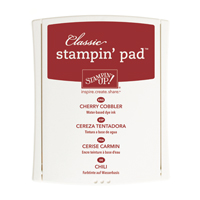
- Use a hole punch to make 4 holes (two at the front of the bag, and two at the back of the bag. Make the handles of the bag using loops of Cherry Cobbler Thicker Bakers Twine.
- Using the Petite Petals Stamp Set and Cherry Cobbler Ink Pad, stamp 3 flowers using 3rd generation stamping (the amount of times you stamp before re-inking the stamp). Punch the flowers out using the Petite Petals Punch; Attach these to one side of the bag using a combination of Glue Dots & Stampin Dimensionals (sticky foam pads).
- CARDS - to make the cards, trim four pieces of Basic Black Cardstock to 10 x 20 cms; score at 10 cms; fold & Burnish
- Trim four pieces of In Colour Designer Series Paper to 9.6 x 9.6 cms; attach to the card bases.
- Stamp another 8 Petite Petal Flowers using Cherry Cobbler Ink Pad, Stamp Your Sentiment and Die Cut the label. Attach the label to the card fronts using Stampin Dimensionals; Then add the Flowers and a Cherry Cobbler Thicker Bakers Twine Bow with long tails to each card front.

How to Contact or Follow Me
 |  |  |  |  |  |  |
 |  |  |  |  |  |  |
 |  |  |  |  |  |  |
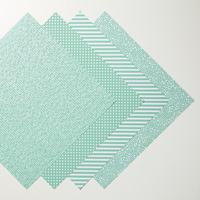 |
Table built using Product Table Builder by The Crafty Owl - Independent Stampin' Up! Demonstrator.
Kim Tolton, Independent Stampin Up Demonstrator.
Card & Papercraft Tutorials
Please feel free to comment below, and ask away with any questions. You
can also find me via the links below
Blog:
Online Store:
Stamping @ The Warren Craft Forum:
Email:
kim.tolton@googlemail.com
youTube
Pinterest:
Google +
Facebook:
Twittert:
Instagram:
@kim.tolton
LinkedIn:
No comments:
Post a Comment