google-site-verification: google70410e9e92d4fda2.html
Showing posts with label rubber. Show all posts

Monday, 23 May 2016

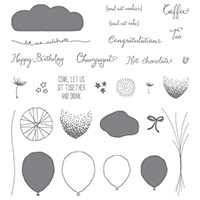
Rubber Stamped Pool Party Balloon Celebration CASE Card Stampin' UP! UK

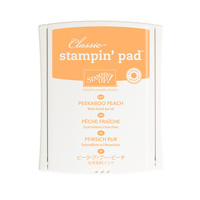
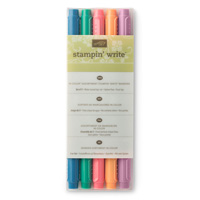
Today I am sharing with you a card I have CASED from the many creative ideas contained within the New Stampin' Up! Catalogue that launchest 1st June. But the good news, is that with the exception of the Peekaboo Peach Stampin Write Marker and Classic Ink Pad, you can reproduce this card now as the Balloon Celebration Stamp Set and co-ordinating Balloon Punch are rolling over into the new catalogue. So all you need to do is replace the Peekaboo Peach marker and ink pad with another Orange/yellow based marker such as Delighful Dijon, Crushed curry. Pumpkin Pie, Calypso Coral, or Daffodil Delight.

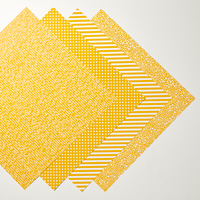
The Designer Series Paper, comes from the Regals Colour Collection 12" x 12" Stack, and picked the Night of Navy Dotty pattern, and used the Peekaboo Peach Marker with the brush tip, to colour in the dots.
The card base was made using Soft Sky and randomly stamped the smaller stamps in the set using Pool Party ink.
The sentiment was stamped using Night of Navy Ink and highlighted the Champagne wording using the Peekaboo Peach Marker.
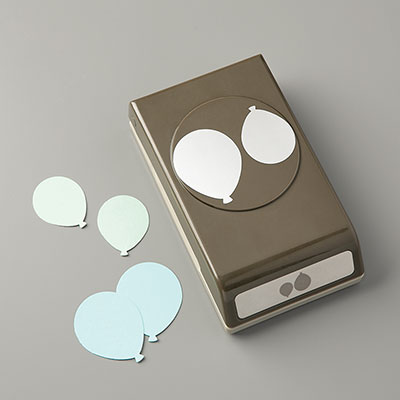
I used just the dots stamp from the this Multi-Step Stamp Set, using Peekaboo Peach ink onto Whisper White Cardstock and punched out the balloon, popped it up using a Stampin Dimensional and popped at the top of the balloon string

My 9 year old grandson made one of these for his Sisters Birthday, and had great fun doing it, whilst I made our granddaughters card.
We have 3 grandchildren, and they all love crafting time with me, and they never cease to amaze me with their creativity!


Feel free to CASE any of my creative projects (Copy & Paste Everything)


Click on the icons below to view/order any of the products used in today's tutor

Table built using Product Table Builder by The Crafty Owl - Independent Stampin' Up! Demonstrator.
  1. Trim a piece of Soft Sky Cardstock to 21 x 14.8 cms; score ar 10.5 cms;
  2. Using the smaller stamps in the Balloon Celebration Stamp Set (seed heads, dotty circle, stars), randomly stamp the from of the cardstock using Poo; Party Classic Ink Pad
  3. Trim a piece of Regals Designer Series Paper (dotty) to 14.4 x 5 cms and using the Peekaboo Peach Stampin Write Marker with the brush tip, colour in the white dots. Attach to the card front.
  4. Using the Night of Navy Classic Ink Pad, stamp the Balloon String, bow & Sentiment onto the card front.
  5. Stamp the shading dotty balloon stamp using Peekaboo Peach ink & punch ou using the balloon punch; Add a Stampin Dimensional to the back of the balloon and position onto the card front.
  6. Finish by using the marker to add highlights to the sentiment; fold and Burnish.


How to Contact or Follow Me

Kim Tolton, Independent Stampin Up Demonstrator.
Card & Papercraft Tutorials
Please feel free to comment below, and ask away with any questions. You can also find me via the links below


Blog:

Online Store:

Stamping @ The Warren Craft Forum:

Email:
kim.tolton@googlemail.com

youTube


Pinterest:

Google +

Facebook:

Twittert:

Instagram:
@kim.tolton

LinkedIn:


Thursday, 5 May 2016

Marquee Messages Sneak Peak New In Colour Watercolour Technique Stampin Up! UK

Today I am sharing with you another Sneak Peak Stamp Set from the up-coming 2016 - 2017 Stampin Up! Catalogue.
This stamp set is called Marquee Messages, and it lends itself perfectly with watercolour techniques. And that is what I have done today. So you have a Double Sneak Peak as I am using the new In Colours, and that has produced a lovely rainbow coloured background. Using this technique, demonstrates how well, stampin up ink pads complement one another. I used Shimmery White Cardstock for the technique, rather than watercolour paper, and a blender pen for the watercolouring.
The card was finished very simply using the Gold Wink of Stella Glitter Glue Brush.

_____

Feel free to CASE any of my creative projects (Copy & Paste Everything)


Watch The Video Below

Tutorial

  1. Trim a piece of Bermuda Bay Cardstock to 24 x 12 cms; score at 12 cms; fold & Burnish
  2. Trim a piece of Shimmery White Cardstock to 10 x 11 cms
  3. Dampen the surface of the cardstock by squeezing drops of water from the Aquapainter Brush, and brush the water all over the cardstock. Pick up ink from the well of Emerald Envy ink pad and apply to the panel; repeat with each of the new In Colours, blending each ink, into it's neighbor, to create a striped rainbow effect on the cardstock. Leave to dry thoroughly
  4. Once dry, Ink up the Marquee stamp with Archival Black Ink Pad, and stamp onto the cardstock; Then stamp the It's You and Birthday sentiments in the same ink.
  5. Mat onto a piece of Mint Macaron Cardstock measuring 10.4 x 11.4 cms using Stampin Dimensionals for added lift.
  6. Mount onto the card base, again, using Stampin Dimensionals.
  7. Finish by applying a touch of gold glitter using the Gold Wink of Stella brush, for the stars and dots.


How to Contact or Follow Me


Kim Tolton, Independent Stampin Up Demonstrator.
Card & Papercraft Tutorials
Please feel free to comment below, and ask away with any questions. You can also find me via the links below


Blog:

Online Store:

Stamping @ The Warren Craft Forum:

Email:
kim.tolton@googlemail.com

youTube


Pinterest:

Google +

Facebook:

Twittert:

Instagram:
@kim.tolton

LinkedIn:


Tuesday, 3 May 2016

Beautiful Bunch Tissue Box Cover Using the New In Colours From Stampin Up! UK

I was scratching my brains trying to think of an artistic way to to share with you all the new In Colours that will be in the new Stampin Up! Catalogue.
And what I really wanted to demonstrate, is how well these colours work together to give both a complimentary and contrasting effect with one another.
I decided that a 6" square Tissue Box Cover would work really well. So here is is.
As always there is a Video that accompanies the tutorial, and you will find it further down today's blog post.


________________________________________


Feel free to CASE any of my creative projects (Copy & Paste Everything)


Click on the icons below to view/order any of the products used in today's tutor

Table built using Product Table Builder by The Crafty Owl - Independent Stampin' Up! Demonstrator.


Watch the Video Below

Tutorial

  1. BASE - Trim two pieces of Thicker Whisper White Cardstock to 12 x 24 cms; With the Long side at the top of the Metric Scoring Board, score at 1 & 11.5 cms
  2. TOP - Trim a piece of Thicker Whisper White Cardstock to 17 x 17 cms; Score all sides ar 2.5 cms
  3. STAMP - all pieces using the 5 new In Colours )2016 - 2018) with a combination of five of the rubber stamps from the Beautiful Bunch Stamp Set
  4. On the back of the Lid, mark a cross in the centre and die cut an aperture. You will need to fold in the two sides for it to fit through the Big Shot
  5. Fold & Burnish the score lines on the lid; Cut two tabs to the first score line on one edge. Rotate the cardstock by 180 degrees and repeat; Use Tombow Liquid Glue to form the 4 corners of the lid.
  6. BASE - Fold and Burnish the score lines on the two base pieces, and run a strip of tear & tape adhesive along the two 1cm fold lines. Removing backing tape and join the two pieces of Cardstock together to create the four sides (WATCH THE VIDEO)

How to Contact or Follow Me

Kim Tolton, Independent Stampin Up Demonstrator.
Card & Papercraft Tutorials
Please feel free to comment below, and ask away with any questions. You can also find me via the links below


Blog:

Online Store:

Stamping @ The Warren Craft Forum:

Email:
kim.tolton@googlemail.com

youTube


Pinterest:

Google +

Facebook:

Twittert:

Instagram:
@kim.tolton

LinkedIn:


Thursday, 17 March 2016

Hostess Happy Birthday Everyone with Flowering Flourishes Stampin Up! UK

For a few weeks, I am having to reduce how often I can do my blogs and videos, as we continue to have repeated disruption to our internet connections. I feel at a loss, but I would rather do this, and make sure the internet is reliable again, rather than letting you guys down.

So today I have a super quick and super easy feminine Birthday Card for you ... I am participating with a Hashtag  Project,  #imbringingbackbirthdays

This is a campaign to get us all posting birthday cards via the Royal Mail, rather than posting digitally.

So, if you would like to receive a blank handmade birthday card, then send me a message with your name and address, and I will get them out to you.

The one thing I ask, is that you direct 5 people to my blog, Facebook page YouTube channel etc, and let them know I will send them cards too, if they would like one. So feel free to pass the message on!
You will find all my details at the bottom of today's blog post or on the Contact Me Tab on this blog
_______________________________________________________________________________


As you scroll down today's blog post, you will find :
  • icons of all the products used to create today's card - click on them to visit my 
  • online store;
  • A Video Tutorial
  • & a typed tutorial

Feel free to CASE any of my creative projects (Copy & Paste Everything)

Click on the icons below to view/order any of the products used in today's tutorial
Table built using Product Table Builder by The Crafty Owl - Independent Stampin' Up! Demonstrator.


Watch The Video Below


Tutorial

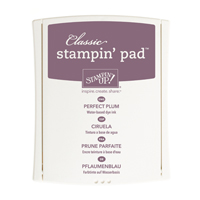
  • Trim a piece of Perfect Plumb Cardstock to 21 x 10.5 cms; Score the long side at 10.5 cms; fold and burnish
  • Trim a piece  of Whisper White Cardstock to 14.4 x 10.1 cms
  • Using the Flowering Flourish' Stamp Set, and the Perfect Plum Ink Pad, stamp a flourish in one corner, using the Stamping Off The Page Technique in the Video
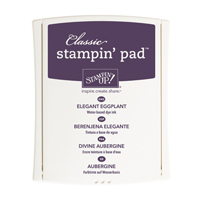
  • Repeat this with the opposite corner using Elegant Eggplant Ink Pad this time.
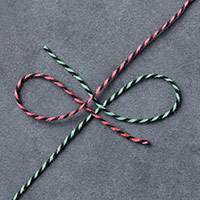
  • Wrap around Bakers Twine a couple of times and tie a loopy bow
  •  (I used the Bakers Twine Combo from the Spring/Summer Catalogue)
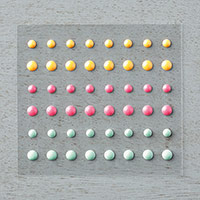
  • Embellish with some of the It's My Party Enamel Dots
  • Mat onto your card base

How to Contact or Follow Me


Kim Tolton, Independent Stampin Up Demonstrator.
Card & Papercraft Tutorials
Please feel free to comment below, and ask away with any questions. You can also find me via the links below


Blog:

Online Store:

Stamping @ The Warren Craft Forum:

Email:
kim.tolton@googlemail.com

youTube


Pinterest:

Google +

Facebook:

Twittert:

Instagram:
@kim.tolton

LinkedIn: