google-site-verification: google70410e9e92d4fda2.html
Showing posts with label punches; punches. Show all posts

Monday, 23 May 2016

Rubber Stamped Pool Party Balloon Celebration CASE Card Stampin' UP! UK

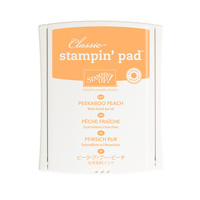
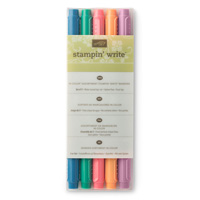
Today I am sharing with you a card I have CASED from the many creative ideas contained within the New Stampin' Up! Catalogue that launchest 1st June. But the good news, is that with the exception of the Peekaboo Peach Stampin Write Marker and Classic Ink Pad, you can reproduce this card now as the Balloon Celebration Stamp Set and co-ordinating Balloon Punch are rolling over into the new catalogue. So all you need to do is replace the Peekaboo Peach marker and ink pad with another Orange/yellow based marker such as Delighful Dijon, Crushed curry. Pumpkin Pie, Calypso Coral, or Daffodil Delight.

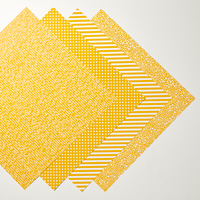
The Designer Series Paper, comes from the Regals Colour Collection 12" x 12" Stack, and picked the Night of Navy Dotty pattern, and used the Peekaboo Peach Marker with the brush tip, to colour in the dots.
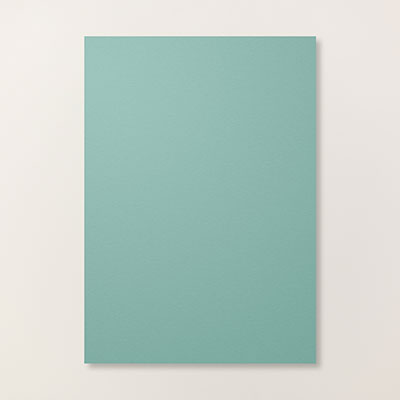
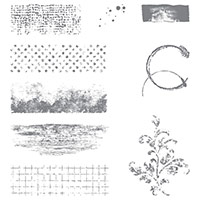
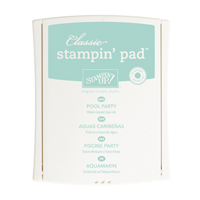
The card base was made using Soft Sky and randomly stamped the smaller stamps in the set using Pool Party ink.
The sentiment was stamped using Night of Navy Ink and highlighted the Champagne wording using the Peekaboo Peach Marker.
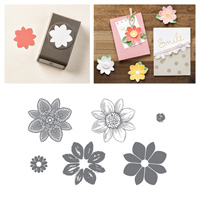
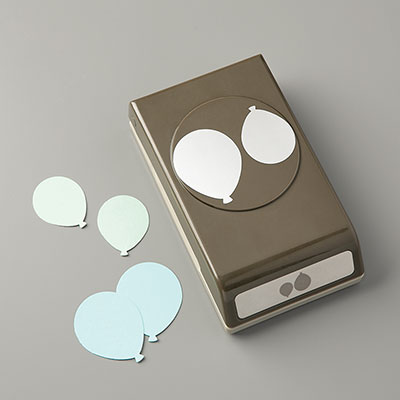
I used just the dots stamp from the this Multi-Step Stamp Set, using Peekaboo Peach ink onto Whisper White Cardstock and punched out the balloon, popped it up using a Stampin Dimensional and popped at the top of the balloon string

My 9 year old grandson made one of these for his Sisters Birthday, and had great fun doing it, whilst I made our granddaughters card.
We have 3 grandchildren, and they all love crafting time with me, and they never cease to amaze me with their creativity!


Feel free to CASE any of my creative projects (Copy & Paste Everything)


Click on the icons below to view/order any of the products used in today's tutor

Table built using Product Table Builder by The Crafty Owl - Independent Stampin' Up! Demonstrator.
  1. Trim a piece of Soft Sky Cardstock to 21 x 14.8 cms; score ar 10.5 cms;
  2. Using the smaller stamps in the Balloon Celebration Stamp Set (seed heads, dotty circle, stars), randomly stamp the from of the cardstock using Poo; Party Classic Ink Pad
  3. Trim a piece of Regals Designer Series Paper (dotty) to 14.4 x 5 cms and using the Peekaboo Peach Stampin Write Marker with the brush tip, colour in the white dots. Attach to the card front.
  4. Using the Night of Navy Classic Ink Pad, stamp the Balloon String, bow & Sentiment onto the card front.
  5. Stamp the shading dotty balloon stamp using Peekaboo Peach ink & punch ou using the balloon punch; Add a Stampin Dimensional to the back of the balloon and position onto the card front.
  6. Finish by using the marker to add highlights to the sentiment; fold and Burnish.


How to Contact or Follow Me

Kim Tolton, Independent Stampin Up Demonstrator.
Card & Papercraft Tutorials
Please feel free to comment below, and ask away with any questions. You can also find me via the links below


Blog:

Online Store:

Stamping @ The Warren Craft Forum:

Email:
kim.tolton@googlemail.com

youTube


Pinterest:

Google +

Facebook:

Twittert:

Instagram:
@kim.tolton

LinkedIn:


Monday, 16 May 2016

Sneak Peak of my Stampin' Up! PDemonstrator Pre-order Delivery Box of Goodies

I hope that wherever you are in the World, that your day is as bright and beautiful as it is here in Essex, UK?

It is ht too hot, not too cool, bright, without that glare in the eyes that sends you running for your sunglasses .... in a nutshell, ... PERFECT

And what more can I enjoy on such a wondrous day as today? Yup, you've got it! My pre-order delivery arrived from Stampin' Up! So I thought I would share the opening of my box og goodies with all of you.


But maybe the first question on your lips will be .... What the heck is Pre-Order?
Well, Pre-order is one of the perks of being a Stampin' Up! Demonstrator. With each new release of an annual catalogue, Seasonal Mini Catalogue or other promotion, Demonstrators are given the opportunity to purchase a selection of products from the new catalogue/promotion. This gives us the chance to familiarise ourselves with the new products, and make samples to share with all of you. A win win scenario for all of us. I am sure you will agree, that it is much better to see samples of products you are adding to your wish list, before you commit to purchase.

So, should you ever fancy a particular stamp set in one of the catalogues, you can contact me with a Request List of stamp sets, dies, embossing folders etc, that you would like to see samples of
And providing I have the items available (I tend to have most items available in my craft room) I will make you a sample or two and share on my blog and also a video tutorial to go with it.

So are you ready for the big reveal?


Here we go ...


·        
Feel free to CASE any of my creative projects (Copy & Paste Everything)


Watch the Video


How to Contact or Follow Me


Kim Tolton, Independent Stampin Up Demonstrator.
Card & Papercraft Tutorials
Please feel free to comment below, and ask away with any questions. You can also find me via the links below


Blog:

Online Store:

Stamping @ The Warren Craft Forum:

Email:
kim.tolton@googlemail.com

youTube


Pinterest:

Google +

Facebook:

Twittert:

Instagram:
@kim.tolton

LinkedIn:


Tuesday, 26 January 2016

Timeless Textures Wedding Invitation Expressions Natural Elements Stampin Up! UK


  • As you scroll down today's blog post, you will find :
  • icons of all the products used to create today's card - click on them to visit my online store;
  • A Video Tutorial
  • & a typed tutorial
Feel free to CASE any of my creative projects (Copy & Paste Everything)


Click on the icons below to view/order any of the products used in today's tutorial

Table built using Product Table Builder by The Crafty Owl - Independent Stampin' Up! Demonstrator.

Watch the Video Below

Tutorial

1.    Trim a piece of Lost Lagoon Cardstock to 14.8x 10.5 cms
2.  Trim a piece of Whisper White Cardstock to 14.4 x 10.1 cms
3. Using the aged edge stamp from the Timeless Textures Stamp Set & Sahara Sand Classic Ink Pad, Stamp a border around all 4 edges of the cardstock, stamping off the page slightly
4.  Using the flourish stamp and Lost Lagoon Classic Ink Pad, stamp all four corners without re-inking the stamp (1st to 4th generation stamping technique)
5.  Sponge the edges of the cardstock using a wedge of Stampin Sponge and Lost Lagoon Ink. This will intensify the frayed edges appearance
6.  Trim a piece of Pool Party Glitter Ribbon to slightly longer than the width of the cardstock; run a strip of tear & Tape adhesive along one side, and attach to the card front, approximately a third of the way up the cardstock, wrapping the excess ribbon around the back of the card.
7.  Using Tombow Adhesive, attach a Congratulations Expressions Natural Element  above the ribbon.
8.  Finish by typing or writing your Date/Time/Place details onto Whisper White Carstock measuring 14.4 x 10.1 cms & adhere to the back of the invitation
How to Contact or Follow Me


Kim Tolton, Independent Stampin Up Demonstrator.
Card & Papercraft Tutorials
Please feel free to comment below, and ask away with any questions. You can also find me via the links below


Blog:

Online Store:

Stamping @ The Warren Craft Forum:

Email:
kim.tolton@googlemail.com

youTube


Pinterest:

Google +

Facebook:

Twittert:

Instagram:
@kim.tolton

LinkedIn:


Friday, 28 August 2015

Sneak Peek Delicate Ornament Thinlits Dies

With a few days left before the 2015 Seasonal Autumn/Winter Catalogue goes live, and I have a little sneak Peek for you
well technically there are four sneak Peeks here for you
The first Sneak Peeks, are these beautiful Christmas Ornaments (baubles to those of us in the UK)
Followed by the Wooden Snowflake elements

Then there is the Gold Cording Trim
And the  Delicate Ornament Thinlits Dies ... but you will be pleased to know that you can save yourself 15% when you purchased the Dies and the Embellished ornaments as part of the bundle.
Finally, there is the Winter Wonderland Designer Vellum Stack.

And there is technically a fifth sneak Peak .... and that is the new Precision Base Plate to use with your Big Shot Die Cutting Machine, and it is aimed at being used with intricate Dies

So I do hope you like your first little look at the latest goodies that will be on offer from Stampin Up! on 1st September


Join my Pinterest community board,
where you can share your own Stampin Up Creations?
Follow the Pinterest Board on the left hand side bar and I will send you an invitation to follow the Stampin Up! At The Warren Community Pinterest Board

If you have any questions on techniques or products, or Joining my Team/discussing the business opportunities Stampin Up! Can offer
Contact Me

Or telephone/text 07759587004

Happy Stamping
Kim xxx         

Order your Craft Supplies on line 24/7

http://www.stampinup.net/esuite/home/stampinupatthewarren/

Monday, 6 April 2015

Stamp Set Showcase 2015 Mini Treat Bag

Today I have a Mini Treat Bag for you that would be perfect for wedding showers / favours
Or any other celebration needing favour bags.

Here I used the Irresistible Emboss Resist Designer Series Paper left over from my Sale A Btation Freebies stash.

I used an ombre sponging technique using Wisteria Wonder Ink, and start colouring at the bottom of the bag and graduating the colour up to the top of the bag. Just keep adding ink at the bottom and graduating it upward using gentle circular motions with your sponge until you have the Emobre effect you are looking for.

Instructions for making the bag using the Mini Treat Bag Thinlets Dies is on the packaging that comes with the product. They look fab made with Heat Embossed Vellum too as you get that little hint of the goodies inside!


There is a number of additional dies in the pack including a bow, a hearts border, a small tag and others. Here I used the hearts border die and then backed it with Marina Mist Designer Series Paper.


The embellishments come from the Artisan Accessory Kit in the Stampin Up! 2015 Spring Summer Catalogue

To this I added some Linen Thread and made some Doily Flowers using the Petal Potpourri  Bundle conssting of a flower stamp set and Co-ordinating Medalian Flower Punch. Add a Wooden Mini Clothespin to keep the bag firmly shut, and a couple of Banners die cut using the Banners Framelits and papers from the Subtles Designer Series Paper Stack.

I hope you will agree that this makes a very pretty Treat Bag that any bride to be or wedding guests would be happy to receive

If you would like to join my Pinterest community board where you will be able to post your own Stampin Up creations. Simply email me and I will add you to the board

If you would like to ask any questions on techniques or products, or anything else related to my blog posts, please feel free to ask away
Happy Stamping
Kim xxx

Contact me to order:
Telephone/Txt: 07759587004

Or Order Online 24/7
                                                                                               
Or Click on the image of the products used below and it will take you straight to my online store
Table built using Product Table Builder by The Crafty Owl - Independent Stampin' Up! Demonstrator.