google-site-verification: google70410e9e92d4fda2.html
Showing posts with label home decore. Show all posts

Wednesday, 14 October 2015

Jolly Christmas Marker to Stamp Technique Video Tutorial

Today I have another Video Tutorial for you
Those of you that subscribe to my Newsletter, will recognise it, as it is featured on this months Newsletter 
And the reason I wanted to do a video, is because this card is perfect for the Novices out there, or those of you that enjoy crafting but have little time.
I also feel that Kids would have great fun making these cards to give to their friends and Teachers


Scroll further down for the tutorial 

Below are all the products used to create today's card
Click on the items to view or order them.
Table built using Product Table Builder by The Crafty Owl - Independent Stampin' Up! Demonstrator.


TUTORIAL
  1. CARD BASE - Trim a piece of Thicker A4 Whisper White Cardstock to 21 cms x 10.5 cms; score the long side at 10.0 cms. fp;d and burnish the fold using your Bone Folder
  2. Trim a piece of the Merry Moments Designer Series Paper Stack (DSP) to 14.4 cms x 10.1 cms
  3. Adhere the DSP to the Card Base using Fast Fuse Adhesive
  4. Cut a Tea Lace Doily in half, and using a little Fast Fuse Adhesive, adhere one half of the doily to the top of the card front, and the other to the bottom of the card front
  5. Trim a piece of regular  Whisper White Cardstock to 10.1 cms x 6.6 cms
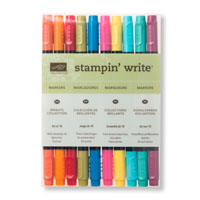
  6. Ink up your stamp using the Stampin Write Markers (I used the Brights Collection Set); give a big HUFF onto the inked surface of your stamp before stamping onto the middle of the whisper white cardstock.; apply Fast Fuse Adhesive to the back of the cardstock and mount onto the centre of your card front.
  7. Trim a piece of Real Red Cardstock to 10.5 cms x 0.5 cms; use a few tiny drops of Tombow Liquid Glue to one side and adhere to your card front so it just overlaps the joing between the doily and the stamped cardstock.
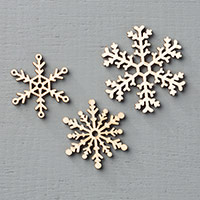
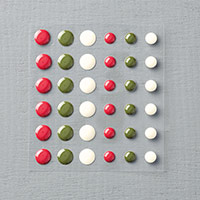
  8. Apply a Stampin Dimensional (sticky fixer foam pad) to the centre of a Snowflake Element; turn it over and add a Home for Christmas Enamel Dot to the top side of the Snowflake Element.
  9. Make a bow with some Cherry Cobbler Bakers Twine, leaving long 'tails' and stock to the back of the Snowflake Element using a Glue Dot. Stock the Snowflake to your card front.
  10. Add a few more Enamel Dots to decorate and you are done ... Feel Free to CASE away
  11. (Case = Copy & Paste Everything) & most of all, Have Fun!

JOIN my Pinterest Community Board
 Where you will be able to post your own Stampin Up! Makes
Simply follow my Community Pinterest Board
(See the left hand side bar of this Blog)
And I will sent you an invitation to start pinning

If you have any questions on techniques, orders, products
OR
 Joining my Team as an Independent Stampin Up!  Demonstrator
contact me via:-
Text: 07759587004
Order Online 24/7

Saturday, 10 October 2015

My First every Video Tutorial - Unplugged Pillow Box Die & Reason for the Season Bundle

Yes, today is the unveiling of my first ever Video Tutorial
It is not perfect, and the camera prematurely turned off before I had said my closing words, but the basis of the tutorial is there.
I promise to get the time down on future tutorials, 
but hope you enjoy this video ... and hear my Essex Girl Accent too
Yes .... TOWY born and bred!


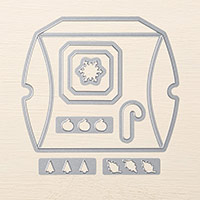
  1. Using the Pillow Box Thinlits Die Cut 2 pillow box pieces using Mossy Meadow Cardstock
  2. Fold and the score line on the tab at one end of the die cut
  3. Apply a piece of Tape & Tear Adhesive to each of the tabs, close to the score line
  4. with both tabs facing left, remove ahere the 2 pieces together
  5. Fold in half on the score line and adhere together making a complete box
  6. Gently fold the curved ends in at one end.; Pop your gift into the open end, and then close the open end.
  7. Wrap around some White Glitter Ribbon and tie a pretty bow, leaving fairly long ends, snip the ends of the ribbon at an angle.
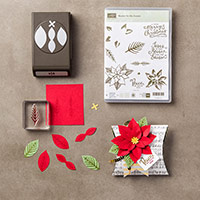
  8. Trim some 8 cm wide strips of Cherry Cobbler Cardstock, and using the Flower Builder Punch, Punch out 6 of each petal, and then another 6 from Mossy Meadow Cardstock
  9. Using Mini Glue Dots, adhere 6 large Cherry Cobbler petals together, 6 small petals & 3 double ended petals. & layer the flowers up using Glue Dots
  10. Make the Mossy Meadow 'Leaves' in the same way,, and adhere behind the flower,
  11. Pick the Snowflake Element you want to use for the centre of your flower, and apply a stampin Dimensional to the back. Turn the Snowflake over and place a white Home For Christmas Enamel Dot to the centre. Stci the snowflake to the centre of the flower.
  12. Wrap some loops of Gold Cording Trim around your fingers and secure to the back of your Flower using Glue Dots
  13. Stamp your sentiment from the Reason for the Season Stamp Set using the new Archival Basic Black Archival Classic Ink Pad &, Die cut using one of the accessory dies in the Pillow Box Thinlits pack


Below you will find links to all the products I have used for this lovely creation

Table built using Product Table Builder by The Crafty Owl - Independent Stampin' Up! Demonstrator.


JOIN my Pinterest Community Board
 Where you will be able to post your own Stampin Up! Makes
Simply follow my Community Pinterest Board
(See the left hand side bar of this Blog)
And I will sent you an invitation to start pinning

If you have any questions on techniques, orders, products
OR
 Joining my Team as an Independent Stampin Up!  Demonstrator
contact me via:-
Text: 07759587004
Order Online 24/7
Thursday, 8 October 2015

Today I am giving you a quick taster of Tomorrow Blog:
But for today I have an IMPORTANT NOTICE
I have had to make some minor changes to my social networking sites, including this one
You will find all the information you need below the photo


Please Update all your bookmarks for my sites as below:

Telephone/Text: 07759587004


Wednesday, 7 October 2015

Vintage Christmas Tags - with changes

Today's card is one of the projects made at the first of this years Christmas Card Classes here at 
The Warren

I posted a very similar tutorial a while back, but I have since played around with the design and came up with this, I feel it is an improvement on my original design, and hope you agree?

As always, I have included product icon links for the items used to make today's card, just click on them to order, and further down the blogpost, you will find the step by step tutorial.
Have a go ... it is great fun and a simple but stylish vintage styled card that your family and friends will be WOW'd by your creativity ...

Below are the products I have used to create this Class card. 
Click on the product icons to order them via my online store
Table built using Product Table Builder by The Crafty Owl - Independent Stampin' Up! Demonstrator.

Here is the Tutorial

  1. begin by creating your Card Base by trimming a piece of Thicker A4 Whisper White Cardstock to 21cms x 14.8 cms; Score the long side at 10.8 cms,, fold and use a Bone Folder to run along the fold to make it nice and crisp. Place to one side to avoid contamination.
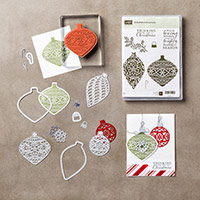
  2. Stamp the Wide Bauble (ornament) onto a piece of Whisper White Cardstock using Night of Navy Classic Ink Pad; Ink up a wedge of a Stampin Sponge with Mossy Meadow Classic Ink Pad, ink off most of the ink on the sponge, and then sponge all over the bauble; Cie Cut the bauble using the Delicate Ornament Thinlits Dies
  3. Using a scrap of Silver Foiled Cardstock, die cut the Bauble Top using the Delicate Ornament Dies; apply a Stampin Dimension to the back of the bauble top (you may need to cut down one of the foam pads to fit).; Loop through a piece of Gold Cording Trim and gently pull the loop tight; add some Stampin Dimensionals to the back of the Bauble.
  4. Trim a piece of Whisper White Cardstock to 14 cms x 13.7 cms; take the circular stamp and tree tag stamp from the Vintage Tags Hostess Stamp Set, along with your Bauble and decide on your layout; TAKE A PHOTO OF YOUR LAYOUT ON YOUR MOBILE PHONE. take your piece of sponge with the Mossy Meadow Ink on it, and make some gentle sponge marks around your layout; remove the stamps and bauble, and sponge the area in and around the marks you just made. You may need to re-ink the sponge, but ink off any excess ink onto scrap paper.
  5. Using the Mossy Meadow Classic Ink Pad, stamp the tree stamp tag according to your layout.; Stamp the circular Santa Stamp using the Soft Suede Classic Ink Pad; Mount your Bauble into position, and secure the cording Trim on the back of the panel using a little Fast Fuse Adhesive.
  6. Now for the finishing touches - Tuck a Snowflake Element behind the bauble using a couple of Glue Dots. Be Gentle or you will break the snowflake; Top this with a Metal Rimmed PEarl.Randomly add 3 Iced Rhinestones to the card front; Mat (layer)onto a piece of Mossy Meadow Cardstock measuring 14.4 cms x 10.1 cms; Finally, mount this onto your Card Base.