
Today I have another Video Tutorial for you
Those of you that subscribe to my Newsletter, will recognise it, as it is featured on this months Newsletter
And the reason I wanted to do a video, is because this card is perfect for the Novices out there, or those of you that enjoy crafting but have little time.
I also feel that Kids would have great fun making these cards to give to their friends and Teachers

Scroll further down for the tutorial
Below are all the products used to create today's card
Click on the items to view or order them.
 |  |  |  |  |
 |  |  |  |  |
 |  |  |  |  |
 |  |  |  |  |
 |  |  |
Table built using Product Table Builder by The Crafty Owl - Independent Stampin' Up! Demonstrator.
TUTORIAL
- CARD BASE - Trim a piece of Thicker A4 Whisper White Cardstock to 21 cms x 10.5 cms; score the long side at 10.0 cms. fp;d and burnish the fold using your Bone Folder
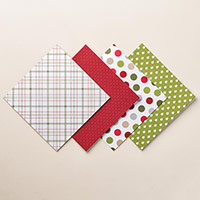
- Trim a piece of the Merry Moments Designer Series Paper Stack (DSP) to 14.4 cms x 10.1 cms
- Adhere the DSP to the Card Base using Fast Fuse Adhesive
- Cut a Tea Lace Doily in half, and using a little Fast Fuse Adhesive, adhere one half of the doily to the top of the card front, and the other to the bottom of the card front
- Trim a piece of regular Whisper White Cardstock to 10.1 cms x 6.6 cms
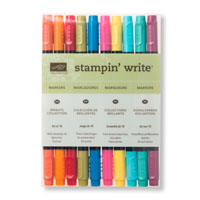
- Ink up your stamp using the Stampin Write Markers (I used the Brights Collection Set); give a big HUFF onto the inked surface of your stamp before stamping onto the middle of the whisper white cardstock.; apply Fast Fuse Adhesive to the back of the cardstock and mount onto the centre of your card front.
- Trim a piece of Real Red Cardstock to 10.5 cms x 0.5 cms; use a few tiny drops of Tombow Liquid Glue to one side and adhere to your card front so it just overlaps the joing between the doily and the stamped cardstock.
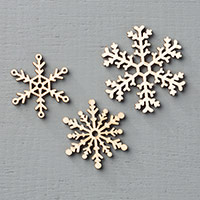
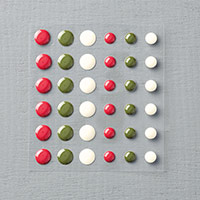
- Apply a Stampin Dimensional (sticky fixer foam pad) to the centre of a Snowflake Element; turn it over and add a Home for Christmas Enamel Dot to the top side of the Snowflake Element.
- Make a bow with some Cherry Cobbler Bakers Twine, leaving long 'tails' and stock to the back of the Snowflake Element using a Glue Dot. Stock the Snowflake to your card front.
- Add a few more Enamel Dots to decorate and you are done ... Feel Free to CASE away
- (Case = Copy & Paste Everything) & most of all, Have Fun!

JOIN my Pinterest Community Board
Where you will be able to post your own
Stampin Up! Makes
Simply follow my
Community Pinterest Board
(See the left hand side
bar of this Blog)
And I will sent you
an invitation to start pinning
If you have any
questions on techniques, orders, products
OR
Joining my Team as an Independent Stampin
Up! Demonstrator
contact me via:-
Email me: kim.tolton@googlemail.com
Text: 07759587004
Order Online 24/7
No comments:
Post a Comment