
Good Morning to you all & hope your day is going well?
I cannot believe another week has slipped by, so we now only have 11 weeks to Christmas!
Where is the time going?
Anyhow, the card I am sharing with you today is one of the makes from the series of Christmas Card Classes I am running this year. It looks complex, but is actually very simple to make.
Box Cards are super Special 3D cards that are able to stand upright on a table or shelf without warping and falling over. & this one fits into an A6 Envelope, so it is easy to post.
Make these in bulk and fold flat until needed. You can even place a strip of tape along the tab that secures the box together, so it is ready to complete the card as you need it.
And you can use any shape die to create an aperture box card, so the scope is endless.
You will find the full tutorial a bit further down today's blogpost,
But I have listed all the products you will need to re-create this card.
Just click on the product icons to view/order them via my online store, should you be missing any of the items in your crafting collection.
 |  |  |  |  |  |  |
 |  |  |  |  |  |  |
 |  |  |  |  |  |  |
 |  |  |  |  |  |
Table built using Product Table Builder by The Crafty Owl - Independent Stampin' Up! Demonstrator.

- Trim a piece of Thicker Whisper White Cardstock to 14.8 cms x 26 cms
- Using either the scoring blade on your Stampin Trimmer OR the Simply Scored Scoring Board with the Metric Plate. to score the cardstock along the LONG edge at 1 ,2, 3, 13, 14, 15 & 25 cms
- on the back of the cardstock, draw 2 diagonal lines on the back to make a cross using a PENCIL
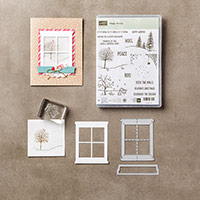
- Place the window Die over the cross, centering the window on the cross and around the edges of the internal window using a sharp Pencil.
- Using a Steel Rule and a Scalpel OR the cutting blade on your Stampin Trimmer, cut out the aperture (this will allow you to adhere the window frame to the front of your card)
- Rub out the cross on the back of the panel
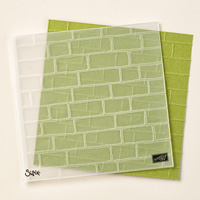
- Dry the panel with the aperture, using the Brick Wall Textured Impressions Embossing Folder (TIEF) and run through your Big Shot with the Multi-~Purpose Platform
- Ink up a piece of sponge using Sahara Sand Classic Ink Pad, and sponge the embossed panel to colour up your bricks. Keep adding layers of ink until you are happy with the effect
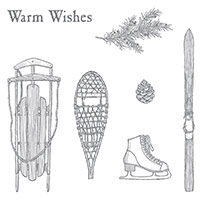
- Using the Mossy Meadow Classic Ink Pad, ink up the conifer branch stamp from the Winter Wishes Stamp Set. leaving approximately a 1cm gap between the aperture and the stamping (so you can see the greenery once you add the frame to the card).
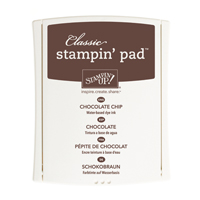
- Using the Choc Chip Classic Ink Pad, stamp some pine cones to the window decoration
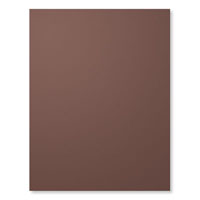
- Die Cut the Window frame using the Die from the Hearth & Home set, using Chocolate Chip Cardstock
- Apply a small amount of glue to the back of the frame using the Fine Tip Glue Pen and adhere the frame in place.
- fold and burnish all the score lines in a concertina fold (i.e. Valley & Mountain folds), using a Bone Folder. If you gently fold the card up, so the window frame is at the front, you will be able to see which inside panel you need to work on to create the nightscape scene
- Begin by Wiping the Embossing Buddy all over the panel you are going to be working on, to eliminate any static on the cardstock which can create unsightly blobs on your sponged background.
- Next, stamp your Happy Scenes Stamps using Versamark Ink Pad onto the inside panel
- Dust the stamped images with Clear Embossing Powder and heat set using your Heat Tool. This is your Emboss Resist - i.e., the ink you sponge this panel with will 'resist' the ink where you have stamped.
- Now you can begin sponging using the Night of Navy Classic Ink Pad and a piece of Stampin Sponge, You can build the colour to be as light or as dark as you like.
- Using a piece of Kitchen Towel, wipe over the embossed images to remove any residual ink, which will sharpen your stamped images.
- Apply a strip of Fast Fuse Adhesive, Tombow or Tape and Tear adhesive to the 1cm tab at the end of the cardstock, fold up the card and stick together creating a free standing box card.
- Stamp your sentiment from the Antique Tags Stamp Set, and punch it out (the sentiment doesn't quite fit the punch, but it still creates a decorative label
- Roll up some Gold Cording Trim and adhere to the back of your Label using Glue Dots. Add a couple of Stampin Dimensionals to the back and mount onto your card front.
- Finally, pop a Stampin Dimensional to the back of a Snowflake Element and attach to your card front.

JOIN my Pinterest Community Board
Where you will be able to post your own
Stampin Up! Makes
Simply follow my
Community Pinterest Board
And I will sent you
an invitation to start pinning
Hi:
If you have any
questions on techniques, orders, products
OR
Joining my Team as an Independent Stampin
Up! Demonstrator
contact me via:-
Email me: kim.tolton@googlemail.com
Text: 07759587004
Order Online 24/7
No comments:
Post a Comment