
Welcome Back to another of this weeks Catalogue Case Cards
The aim of this weeks Video Supported Case Cards is to encourage new and novice Crafters, to get stuck in and have a go.
This weeks cards are all quick and simple, no fuss cards
Have you ever thought about learning a new skill?
Perhaps you are an existing Crafter who is looking at taking their hobby to the next level?
Perhaps you are a novice to card and paper craft, but looking for a new business opportunity?
If the answer to any of the above is YES, then perhaps you should drop me a line to talk about what how you could develop your business your way, and join my Team to support you along that journey. whilst becoming part of the larger Stampin Up! Family!
As an Independent Stampin Up! Demonstrator, you can work your business around your life, and not the other way around
And here is the main thing, If you already have the beginnings of or concept of a Craft Based Business, then surely it makes sense to purchase all your craft supplies from one supplier (aka Stampin Up!) AND urn commission at the same time ... just on your personal orders
OR
You can build a flourishing dynamic business with a Team of your own, whilst supported by your Upline AKA (Me lol)
And you may fit in anywhere in between

Below you will find all the products used to make today's card
Click on the icons to vie or order them in my online store.
 |  |  |  |  |  |  |
 |  |  |  |  |  |  |
 | 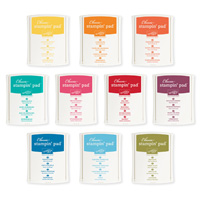 |
Table built using Product Table Builder by The Crafty Owl - Independent Stampin' Up! Demonstrator.
TUTORIAL
- Create your Card Base by trimming a piece of Thicker A4 Whisper White Cardstock to 21 cms x 14.8 cms; Score the long side at 10.5 cms using either the scoring blade on your Stampin Trimmer, OR the Scoring Tool with the Metric Plate; Fold and burnish using a bone folder
- Trim a piece of Regular Whisper White Cardstock to 14.5 cms x 10.1 cms. This is the panel you are going to be stamping
- Using the Summer Silhouettes Stamp Set, stamp the following stamps in order:
- Mosaic Stamp - Bermuda Bay Classic Ink Pad, using 1st to 5th generation stamping technique, to achieve a staggered ombre effect as seen in the photo
- Stem Stamp - Early Espresso Classic Ink Pad, stamp 2 stems
- Flower heads - Daffodil Delight Classic Ink Pad, stamping twice per flower with each flower head
- Trim another piece of Whisper White Cardstock to 2 cms x 10.1 cm; stamp your sentiment from the Dozen Thoughts Stamp Set, using the Early Espresso Classic Ink Pad.
- Apply a strip of Fast Fuse Adhesive to the back of the sentiment panel and adhere to the lower section of the card front.
- Apply Stampin Dimensionals to the back of the Card Front, and mount onto your card base.
Happy Stamping
Kim xx

JOIN my Pinterest Community Board
Where you will be able to post your own
Stampin Up! Makes
Simply follow my
Community Pinterest Board
And I will sent you
an invitation to start pinning
If you have any
questions on techniques, orders, products
OR
Joining my Team as an Independent Stampin
Up! Demonstrator
contact me via:-
Email me: kim.tolton@googlemail.com
Text: 07759587004
Order Online 24/7
No comments:
Post a Comment