
Welcome Back to another of this weeks Catalogue Case Cards
The aim of this weeks Video Supported Case Cards is to encourage new and novice Crafters, to get stuck in and have a go.
This weeks cards are all quick and simple, no fuss cards
This is a quick an easy introduction to Dry Embossing.
Dry Embossing is a fabulous way to introduce texture into your cards very quickly
This adds interest to what is essentially a very simple card that is suitable for the complete novice, or the more experienced paper crafter who finds themselves short of time.
You need just some ink, stamps and paper plus the Itty Bitty Accents Punch Pack to create those little flowers.
A few basic pearls and some Venetian Crochet Trim and you are all done.
Simple? ... of course. Now I know that a Big Shot is probably the largest outlay you will make in terms of tools, but it is an essential if you want to make stylish cards simply by adding either some dry embossing or die cuts ... and realistically, what can you buy for £99 these days on something that will last you for years!
If you think you can gather a few friends together to hold a 'Virtual' Party with my help, and you could earn enough Stampin Rewards to get a great discount on that Big Shot, and if the order is big enough, you may not even have to pay for it
To find out more on 'Virtual Parties' drop me a line
kim.tolton@googlemail.com
Welcome Back to another of this weeks Catalogue Case Cards
The aim of this weeks Video Supported Case Cards is to encourage new and novice Crafters, to get stuck in and have a go.
This weeks cards are all quick and simple, no fuss cards

Below you will find links to all the products used in today's tutorial
Click on the product icons to view or order them in my online store
 |  |  |  |  |  |  |
 |  |  |  |  |  |  |
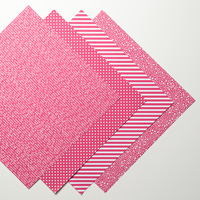 |  |  |  |
Table built using Product Table Builder by The Crafty Owl - Independent Stampin' Up! Demonstrator.
TUTORIAL
- Begin by making your A6 Card Base by trimming a piece of A4 Thicker Whisper White Cardstock to 21 cms x 14.8 cms; fold and burnish using a Bone Folder
- Trim a piece of Very Vanilla Cardstock to 14.3 cms x 10 cms
- Trim another piece of Very Vanilla Cardstock to 10 cms x 9.5 cms
- Dry Emboss this panel using Tab 1 on your Big Shot Multipurpose Platform & the Honeycomb Textured Impressions Embossing Folder (TIEF),
- Apply a couple of strips of Fast Fuse or Tombow Adhesive to the debossed side and adhere to the lower section of the card
- Trim a piece of the Brights Colour Collection Designer Series Paper (DSP) Stack to 3 cms x 9.5 cms
- Apply Fast Fuse Adhesive to one side of this strip, close to the edges
- Apply a piece of Venetian Crochet Trim to the bottom of the DSP
- Attach immediately above the embossed panel, allowing the Crochet Trim to overlap the top edge of the embossed panel.
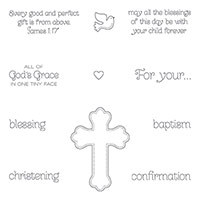
- Trim a piece of Crumb Cake Cardstock to 2 cms x 9.5 cms, Stamp with the sentiment of your choice from the All Gods Grace Stamp Set. to the left hand edge of the strip. using the Crumb Cake Classic Ink Pad
- Onto a scrap of Very Vanilla Cardstock, Stamp the Cross. then stamp the teeny heart in the middle of the cross
- Cut around the cross using paper snips, remembering to rotate the cardstock and not the scissors
- Apply Stampin Dimensionals to the back of the cross & mount onto your card front.
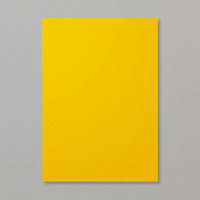
- Punch 3 flowers using the Itty Bitty Accents Punch Pack and Crushed Curry Cardstock, add these to your card using Glue Dots
- Finish with a Basic Pearl in the centre of each flower
Happy Stamping
Kim xxx

JOIN my Pinterest Community Board
Where you will be able to post your own
Stampin Up! Makes
Simply follow my
Community Pinterest Board
And I will sent you
an invitation to start pinning
If you have any
questions on techniques, orders, products
OR
Joining my Team as an Independent Stampin
Up! Demonstrator
contact me via:-
Email me: kim.tolton@googlemail.com
Text: 07759587004
Order Online 24/7
No comments:
Post a Comment