
Sadly, we all need a card we can fall back on, when we need to let out friends and family know that we are thinking of them, when life throws us worry, sadness and uncertainty
This is my card
I simply change the choice of tree in the stamp set, when I am making the card for a gentleman, and remove the pink tones.
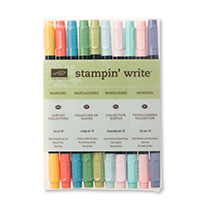
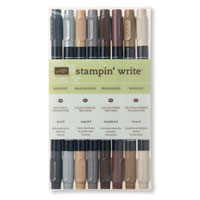
Today's card is made using Stampin Write Markers
I find this technique really relaxing, as my life is usually running at one pace ... super fast!
so to sit with my makers and make up a batch of cards, helps me to regain my equilibrium

Below you will find the items I have used to create today's card
Click on the Product Icons to view them, or order them via my online store (UK)
 |  |  |  |  |  |  |
 |  |  |  |  |  |  |
 |  |  |  |
Table built using Product Table Builder by The Crafty Owl - Independent Stampin' Up! Demonstrator.
Below is today's Supporting Video Tutorial
- Begin by making your A6 card base by trimming a piece of Thicker A4 Whisper White Cardstock to 21 cms x 14.8 cms; Score the long side at 10.5 cms; fold and burnish with a bone folder
- Trim a piece of regular Whisper White Cardstock to 10.1 cms x 14.5 cms; Apply Stampin Dimensionals to the back of the panel and mount onto the front of your card base (landscape)
- Trim another piece of Whisper White Cardstock to 9.7 cms x 14 cms
- Ink up the branches of the tree using the Sift Suede Stampin Write Marker
- Ink up the flowers on the tree using the Blushing Bride Stampin Write Marker
- Ink up the leaves using the Pear Pizzazz Stampin Write Marker
- Before stamping, you need to re-hydrate the ink on the stamp by giving a really good 'Huff' of breath over the stamps surface.
- Select your choice of sentiment from the Hopeful Thoughts Stamp Set and stamp onto the panel using the Soft Suede Classic Ink Pad.
- Now for the scoring
- Using either the Simply Scored Tool, with the Metric Plate in situ, and score 2 or 3 horizontal lines, taking care to skip the sections where the score line meets any f the stamped images.
- Apply stampin Dimensionals to the back of the panel and mount onto your card base.
Happy Stamping
Kim xxx

JOIN my Pinterest Community Board
Where you will be able to post your own
Stampin Up! Makes
Simply follow my
Community Pinterest Board
And I will sent you
an invitation to start pinning
If you have any
questions on techniques, orders, products
OR
Joining my Team as an Independent Stampin
Up! Demonstrator
contact me via:-
Email me: kim.tolton@googlemail.com
Text: 07759587004
Order Online 24/7
No comments:
Post a Comment