
Firstly, My apologies for going AWOL for a few days, My eldest Son decided he really had to Share his Upper Respiratory Tract Infection with me .... bless him, NOT! h aha Anyway, after a couple of days rest, and am ready to get back to business as usual, even if my voice is husky ... some may say that is sexy, I'm not so sure about that ..
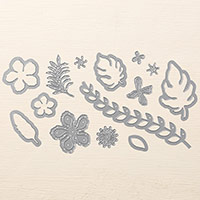
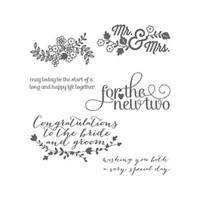
Today's project is a wedding Congratulations Die Cut Card using the Botanicals Framelets Dies from Stampin U! I the flower dies, as you can make all kinds of combinations of flowers, and with 14 dies in the pack, it is great value. The sentiment comes from the For The New Two stamp set (in the current Stampin Up! Annual Catalogue)
Today's project is a wedding Congratulations Die Cut Card using the Botanicals Framelets Dies from Stampin U! I the flower dies, as you can make all kinds of combinations of flowers, and with 14 dies in the pack, it is great value. The sentiment comes from the For The New Two stamp set (in the current Stampin Up! Annual Catalogue)

- As you scroll down today's
blog post, you will find :
- icons of all the products
used to create today's card - click on them to visit my online store;
- A Video Tutorial
- & a typed tutorial
Feel free to CASE any of my creative
projects (Copy & Paste Everything)
Click on the icons below to view/order
any of the products used in today's tutorial


Watch the Video Below
Tutorial
1. Trim a piece of
Thicker Whisper Cardstock to 14.8 x 21 cms; Score the long side at 10.5 cms; Fold & Burnish
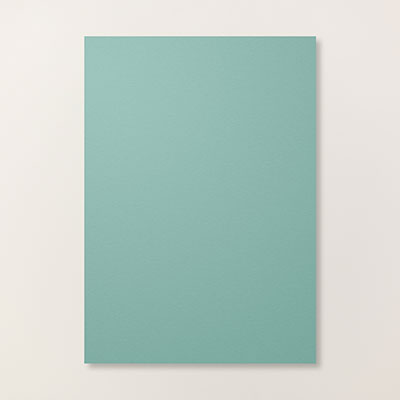
2. Trim a piece of Lost Lagoon Cardstock to 14.4 x 10.1 cms & adhere to your card base (I used Fast Fuse)
3. Trim a piece of Whisper White Cardstock to 14 x 9.7 cms' using the edgelet Die in the Botanicals Builder Framelits Die Pack and run through your Big Shot with the Magnetic Platform in place.
4. Mount the die cut onto top of the Lost Lagoon Mat (layer)
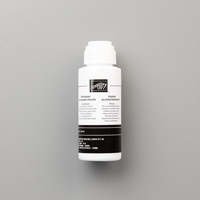
5. Die cut the botanicals you need to create your floral element, I used the medium flower, Stamen, Large Leaf, Small leaf ... Layer these up using a combination of Stampin dimensionals and Fine Glue Pen. Add a Basic Rhinestone to the centre of the flower, and mount your floral die cuts onto your card front.
6. Finish by stamping your Sentiment from the For The New Two Stamp Set to the bottom right og the card front using Basic Black Ink Pad.
2. Trim a piece of Lost Lagoon Cardstock to 14.4 x 10.1 cms & adhere to your card base (I used Fast Fuse)
3. Trim a piece of Whisper White Cardstock to 14 x 9.7 cms' using the edgelet Die in the Botanicals Builder Framelits Die Pack and run through your Big Shot with the Magnetic Platform in place.
4. Mount the die cut onto top of the Lost Lagoon Mat (layer)
5. Die cut the botanicals you need to create your floral element, I used the medium flower, Stamen, Large Leaf, Small leaf ... Layer these up using a combination of Stampin dimensionals and Fine Glue Pen. Add a Basic Rhinestone to the centre of the flower, and mount your floral die cuts onto your card front.
6. Finish by stamping your Sentiment from the For The New Two Stamp Set to the bottom right og the card front using Basic Black Ink Pad.

How to Contact or Follow Me
Kim Tolton,
Independent Stampin Up Demonstrator.
Card & Papercraft
Tutorials
Please feel free to
comment below, and ask away with any questions. You can also find me via the
links below
Blog:
Online Store:
Stamping @ The Warren
Craft Forum:
Email:
kim.tolton@googlemail.com
youTube
Pinterest:
Google +
Facebook:
Twittert:
Instagram:
@kim.tolton
LinkedIn:
No comments:
Post a Comment