
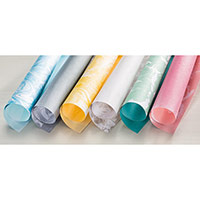
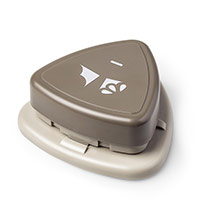
And very Quickly, today is Part Two of my Explosion Box How To Tutorial using the Corner Trio Punch and the Perfectly Artistic Sale A Bration Designer Series Papers (DSP)
I have repeated the tutorial below, and the Part Two Video so you can see how I assembled and decorated the box.

- icons of all the products used to create today's card - click on them to visit my online store;
- A Video Tutorial
- & a typed tutorial
Feel free to CASE any of my creative projects (Copy & Paste Everything)
Click on the icons below to view/order any of the products used in today's tutor
Watch the Video Below
 |  |  |  |  |
 |  |  |  |  |
 |  |  |  |  |
 |  |  |  |  |
 |  |
Tutorial
1. LID Trim a piece of
cardstock to 15 x 15 cms; score on all sides at 2.5 cms; Fold & Burnish all
score lines; Notch out 4 corners notch out the 4 corners & adhere kid
corners using Tombow Liquid Glue; Trim Designer Series Paper to:
- Four pieces
measuring 9.5 x 2 cms
- One piece
measuring 9.5 x 9.5 cms; & adhere to lid.
1. 2. LARGE LAYER - Trim a piece of
12" cardstock to 30 x 30 cms (12" x 12"); score at 10 & 20
cms; rotate by 45 degrees and score again at 10 & 20 cms; using Kraft
Scissors, remove the four outer corners, following the score lines, so you are
left with a cross shaped piece of cardstock; fold & burnish all the score
lines;
3. MIDDLE LAYER - Trim a piece of
cardstock to 27 x 27 cms; score at 9 & 18 cms; Rotate by 45 degrees &
score at 9 & 18 cms fold & Burnish; Cut out the 4 corners to create a
cross shape; Trim the following pieces of Designer Series Paper:
- Four pieces
measuring 8.5 x 8.5
- Four
pieces measuring 8.5 x 8.5 (contrast) & adhere to the middle
layer.
4. SMALL LAYER - Trim a
piece of Cardstock to 24 x 24 cms; score at 8 & 16 cms; Rotate by 45
degrees and score at 8 & 16 cms; cut out the 4 outside corners
Fold & Burnish
& attach to the cardstock Trim the following pieces of
Designer Series Paper to;
- Five pieces
measuring 5.5 x 5.5 cms
- Four pieces
measuring 5.5 x 5.5 cms (contrast)


How to Contact or Follow Me
Kim Tolton, Independent Stampin Up Demonstrator.
Card & Papercraft Tutorials
Please feel free to comment below, and ask away with any questions. You can also find me via the links below
Blog:
Online Store:
Stamping @ The Warren Craft Forum:
Email:
kim.tolton@googlemail.com
youTube
Pinterest:
Google +
Facebook:
Twittert:
Instagram:
@kim.tolton
LinkedIn:
No comments:
Post a Comment