google-site-verification: google70410e9e92d4fda2.html
Showing posts with label punches;. Show all posts

Sunday, 21 June 2015

Stamp Set Showcase 2015 World Map meets For Your Country

Happy Fathers Day to all the Fathers out there!
I hope you are surrounding by your families, whether that is from a distance
or with you in person
Fathers are amazing people and I am delighted that we have a special day dedicated to fathers young and old, throughout the world!!!!
And with our fathers in mind, I am also aware that there will be many servicemen out there who are separated from their families today
I hope they know how ,much their families love and miss them,  hoping you return home safe and sound following your Tour of Duty
An d that goes for all fathers out there that are missing their families today.


And with that in mind, today's card is rather poignant 
The combination of the Dictionary background stamp (now retired) along with the
 WORLD MAP, 
GORGEOUS GRUNGE & 
FOR YOUR COUNTRY 
stamp sets
 this card just shouts out to those fathers out there around the world.


I used a combintation of Subtles Collection Classic Ink Pads
& Cardstock
Plus
Neutrals Classic Ink Pads and cardstock.

The card is heavily layered intentionally, as generally, Fathers Day cards are given in person, rather than posted, so no worries about postal rates.

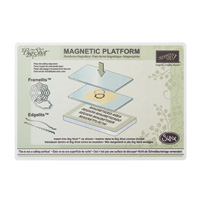
A full list of products can be found at the bottom of this post, simply click on the product icons to view them in more detail, or place an order.


Would like to JOIN  my Pinterest Community Board?
 where you will be able to post your own Stampin Up! Makes?
If the answer is YES please email me via

If you would like to ask any questions on techniques or products, or anything else related to my blog posts, please feel free to ask away
Happy Stamping
Kim xxx

Contact me to order:
Telephone/Txt: 07759587004
Email: kim@stampinupatthewarren.com

Or Order Online 24/7
                                                                                               
Or Click on the image of the products used below and it will take you straight to my online store
Table built using Product Table Builder by The Crafty Owl - Independent Stampin' Up! Demonstrator.

 If you have any questions on techniques, orders, products
OR
 Joining my Team as an Independent Stampin Up!  Demonstrator
contact me via:-
Text: 07759587004 OR
Order Online 24/7
http://www.stampinup.net/esuite/home/stampinupatthewarren/


Monday, 15 June 2015

Artistically Awesome Thank You

And here is a different shade of Awesomely Artistic

In today's, vintage styled card project that I am sharing with you, has used the stamps in a very different way to yesterday's card.

You can change the feel of this card, but using classic ink pads from one of the other 5 Colour Collections from Stampin Up!
Each colour collection works with one another, so little thought is needed with regards of 'what colours go with what?' because the hard work is done for you.
BUT
Stampin Up! has worked so hard with it's colour collections to also allow the all the colour collections to contrast with one another to.

Now there are some basic rules
Use 1, 3, or 5 colours .... more than that can look overwhelming, and doesn't draw the eye in to the centre of the piece.

You can have different tones of the same colour ... either by using the similar colours in one of the other colour collections,
Or by using 1st, 2nd, & third generation stamping (or more than this depending on the ink you are using)
This simply means the amount of times you can stamp onto your project, before you need to re-ink your stamp. This gives beautiful shades of the same colour, and can at it's faintest, leave almost a watermark effect on a project.
And that is the technique I have used on this card.


I began by making my A6 card base using the A4 Thick Whisper White Cardstock, now available from Stampin Up. Score and fold in half and rotate to the landscape orientation
I then used Watermelon Wonder ink to stamp the flower from the Awesomely Artistic Stamp Set. and randomly stamped the front of the card blank using up to 5th generation stamping.
Then I overstamped this with the splatter stamp using Dijon Delight ink.

Now trim a piece of Mint Macaron cardstock, and stamp with a combination of the splatter stamp (using Delightful Dijon ink), the Fern (using mint macaron ink for a tone on tone effect), Tip Top Taupe for the Button stamp, and also for he burlap stamp, which I stamped around the outside border of this panel. 
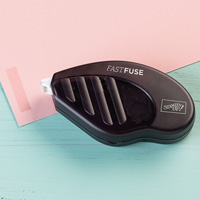
Next, I adhered a piece of Tea Lace Doily to the reverse of the panel using Fast Fuse adhesive.
Adhere this panel to the card front. I used Fast Fuse.


The next step, is to stamp the sentiment onto a piece of Very Vanilla cardstock using Tip Top Taupe ink. I have used one of the sentiment stamps from Another Thank You.
This was overstamped using the splatter stamp again. And again, using Delightful Dijon ink.
I trimmed the sentiment to size and attached off centre and at an angle to the card front

Finally, I stamped the button using Tip Top Taupe onto a scrap of cardstock, and punched it out.
The edges were sponged using a little Delightful Dijon ink to give more of a 3D image, and this was adhered to the card front using a Stampin Dimensional,


 Would you would like to join my Pinterest community board?
 Where you will be able to post your own Stampin Up creations?

If the answer is YES
 Simply email me and I will add you to the board


If you have any questions on techniques or products, or 
Joining my Team/discussing the business opportunities Stampin Up! Can offer
Contact Me

 telephone/text 07759587004


Sunday, 14 June 2015

An Artistically Awesom Friend

Today and tomorrow, I am getting back in touch with my more vintagey self
It feels like I have waited forever to be able to order the new background builder stamp set

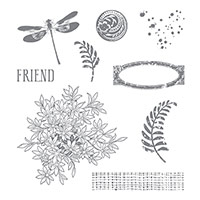
Awesomely Artistic

We did get to play with this stamp set at the Demonstrator Regional Stampin Up! Event in Telford during June this year, and honestly, you should have heard the 'oooohhhhs' and ahhhhh's in the room when this stamp set was demonstrated
So much potential, and I know that this will be one of my favourites, along with Gorgeous Grunge & Summer Silhouettes stamp sets.

I rarely use Designer Series Papers, but I rather liked the patterns on the new colour collection DSP stacks, so I purchased the neutrals pack, as I know I could add colour myself with sponging, brayering etc.

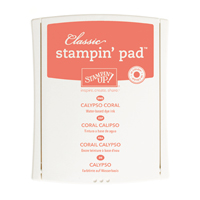
And that is what I have done with todays card. I trimmed a piece of the DSP to fit the front of the card blank, and sponged the panel with Calypso Coral ink, and also inked the edges of the card blank. 

Now this is another new product, yes, Stampin Up is now selling thicker A4 Whisper White cardstock that is more suitable for card blanks (bases). Now how cool is that??

Anyway my next job was to trim a piece of Crumb Cake and distressed the edges by tearing the cardstock using my fingers.
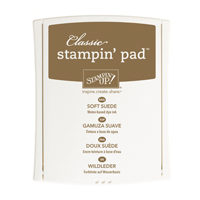
I then stamped this panel with a variety of the stamps from the set, using inks from the Subtles collection, along with Soft Suede for stamping the hessian trm stamp.
This panel was them mounted onto the card front using Fast Fuse (see yesterdays post for the video in how to use this great adhesive).
Then I stamped the Dragonfly onto a piece of Whisper White cardstock, using Marina Mist ink. This was cut out by hand using my trusty Paper Snips.


I then stamped the Thank You stamp from 'Another Thank You' Stamp Set, and the book plate stamped and over stamped the centre with the  FRIEND stamp (from Awesomely Artistic SS) onto scraps of Whisper White Cardstock, that I then sponged with Calypso Coral ink.


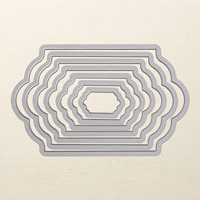
 The Thank You was then die cut using the new Lots of Labels Framelits Die. and attached some trimmed Tea Lace Doily to the reverse side before attaching some Stampin Dimensionals before mounting it onto the card front, then added the Dragonfly that I had added a few Basic Rhinestones on the thorax for some sparkle. Next I stamped a couple of the ferns, and cut them out, again using my paper snips. I used my paper piercing tool to make 4 small holes where the faux rivets are on the bookplate stamp, and added a mini brad in each corner. The ferns were adhered to the card front using Fast Fuse, and the book plate adhered to overlap them using Stampin Dimensionals,


And below are the products I have used, click on the icons to view them in more detail.

Table built using Product Table Builder by The Crafty Owl - Independent Stampin' Up! Demonstrator.
Would like to JOIN  my Pinterest Community Board?
 where you will be able to post your own Stampin Up! Makes?
If the answer is YES please email me via
Kim@stampinupatthewarren.com


 If you have any questions on techniques, orders, products
OR
 Joining my Team as an Independent Stampin Up!  Demonstrator
contact me via:-
Email me: kim@stampinupatthewarren.com
Text: 07759587004 OR