google-site-verification: google70410e9e92d4fda2.html
Showing posts with label . scrapbooks. Show all posts

Sunday, 21 June 2015

Stamp Set Showcase 2015 World Map meets For Your Country

Happy Fathers Day to all the Fathers out there!
I hope you are surrounding by your families, whether that is from a distance
or with you in person
Fathers are amazing people and I am delighted that we have a special day dedicated to fathers young and old, throughout the world!!!!
And with our fathers in mind, I am also aware that there will be many servicemen out there who are separated from their families today
I hope they know how ,much their families love and miss them,  hoping you return home safe and sound following your Tour of Duty
An d that goes for all fathers out there that are missing their families today.


And with that in mind, today's card is rather poignant 
The combination of the Dictionary background stamp (now retired) along with the
 WORLD MAP, 
GORGEOUS GRUNGE & 
FOR YOUR COUNTRY 
stamp sets
 this card just shouts out to those fathers out there around the world.


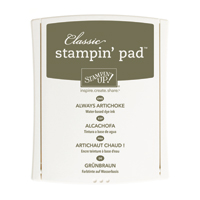
I used a combintation of Subtles Collection Classic Ink Pads
& Cardstock
Plus
Neutrals Classic Ink Pads and cardstock.

The card is heavily layered intentionally, as generally, Fathers Day cards are given in person, rather than posted, so no worries about postal rates.

A full list of products can be found at the bottom of this post, simply click on the product icons to view them in more detail, or place an order.


Would like to JOIN  my Pinterest Community Board?
 where you will be able to post your own Stampin Up! Makes?
If the answer is YES please email me via

If you would like to ask any questions on techniques or products, or anything else related to my blog posts, please feel free to ask away
Happy Stamping
Kim xxx

Contact me to order:
Telephone/Txt: 07759587004
Email: kim@stampinupatthewarren.com

Or Order Online 24/7
                                                                                               
Or Click on the image of the products used below and it will take you straight to my online store
Table built using Product Table Builder by The Crafty Owl - Independent Stampin' Up! Demonstrator.

 If you have any questions on techniques, orders, products
OR
 Joining my Team as an Independent Stampin Up!  Demonstrator
contact me via:-
Text: 07759587004 OR
Order Online 24/7
http://www.stampinup.net/esuite/home/stampinupatthewarren/


Tuesday, 24 March 2015

Sale A Bration 2015 Week 11 Day 7

Today I have another  Butterfly Basics / Butterfly Thinlets Combo for you
The card design was CASED from Stampin Up's Impressions Magazine.
Now, not just anyone can get the Impressions Magazine as it is exclusive to Stampin Up Demonstrators. It is packed with Creative ideas and project recipes

Now the project that inspired me to make this card, was in fact, used on a Mini Treat Bag project.
I saw it and could see the scope for making it into a card, and here it is
I hope you like it?

Please note that at the time of posting this, the Butterfly Thinlets are unavailable to order. We are hoping that stocks will be available in the near future, so do check availability often via my website by clicking here 
So here is the tutorial


you will need a 6" square White Card Blank (card base)
Trim a piece of Baked Brown Sugar cardstock to 12 cm x 12 cm
Randomly stamp the cardstock with the tiny flower stamp using Soft Suede ink
Use a uniball White Gel Pen to add a white centre to each stamped flower.
Stamp the chevron like long stamp at the base of the card using Basic Black ink.

Down the centre of the card, stamp the Honeycomb stamp from Butterfly Basics stamp set, using Strawberry Slush ink.

Now die cut a banner from Pistachio Pudding cardstock
Mat this panel onto a piece of Mossy Meadow cardstock measuring 12.5 cms x 12.5 cms

Next die cut the medium Butterfly using the Butterfly thinlets die from Crisp Cantaloupe cardstock.
TIP
When die cutting using intricate Dies, use the following 'sandwich for your Big Shot:
Magnetic Platform
Cutting Plate
Tumble Drier Sheet
Cardstock
Wax Paper
Metal Die (cutting blade facing down)
Cutting Plate
Run the sandwich through your Big Shot back and forth a couple of times,

This will allow all those teeny pieces from the die to stick to the dryer sheet and give a crisper die cut.
Add a Stampin Dimensional to the back of the butterfly and attach to your card front on top of the banner.
Stamp the Sentiment of your choice from the Butterfly Basics stamp set onto White  Vellum using Black Stazon Ink
Once dry, trom the Vellume to size and use your paper snips to make banner ends to the stamped vellum
Adhere this to the Butterfly using Glue Dots.
Thread a metal button from the Artisan Embellishment Kit with Linen Thread, and tie a bow leaving large loops and long tails.
Attach to the body of the butterfly
And there you have it!


If you would like to ask any questions on techniques or products, or anything else related to my blog posts, please feel free to ask away
Happy Stamping
Kim xxx

Contact me to order:
Telephone/Txt: 07759587004

Or Order Online 24/7
                                                                                               
Or Click on the image of the products used below and it will take you straight to my online store
Table built using Product Table Builder by The Crafty Owl - Independent Stampin' Up! Demonstrator.


Monday, 20 October 2014

Stamp Set Showcase Week 14 (7) An Open Heart

Welcome to the last day of

AN OPEN HEART  
Stamp set showcase

And today brings together the Banner Framelits, my favourite Seasonal Catty Designer Series Papers (DSP) Under The Three, the luxurious 5/8" Gold Satin Ribbon
With of course, An Open Heart stamp set.


Begin by making your card blank by trimming a piece of Whisper White cardstock to 12x12cms
Stamp the leaf stamp a couple of times on the right hand side of the cardstock using Always Artichoke ink.
Then stamp the bird in Soft Suede ink so he is sitting on a branch.

Mount this onto a piece of Soft Suede cardstock measuring 12.5 x 12.5cms
Mount this onto a piece of Under The Tree DSP measuring 14.5x14.5cms


Now for those Banners Framelits

Stamp the 'An Open Heart' stamp into the reverse side of the DSP you used in the previous step.
Due cut this using the best fitting Banner Framelits and apply Stampin Dimensionals to the reverse
Then die cut a further 3 banners in a combinations of sizes/lengths and add these vertically to the top left of the stamped cardstock using a teeny bit of Tombow Multipurpose Glue. 
Add the stamped banner horizontally to the top left of the stamped cardstock.

Wrap some of that luxurious Gold Ribbon around the layered card, and tie a bow [TIP - tie your bow with the card unpside down and you should get your bow tails in the right position when you put the card the right way up]

Mount your layered card topper onto your card blank with a little Tombow MP Glue OR Sticky Strip

Finally, add 3 Basic Rhinestones to the top left and bottom right of the card.

Now I will be off for a Lemsip to soothe my sore throat and thumping head ha ha

See you again tomorrow for the start of a new weeks worth of  the next Stamp Set Showcase

Until tomorrow then ...


If you would like to ask any questions on techniques or products, or anything else related to my blog posts, please feel free to ask away

Happy Stamping
Kim xxx

Contact me to order:
Telephone/Txt: 07759587004
Email: kim@stampinupatthewarren.com

Or Order Online 24/7

Or Click on the image of the products used below and it will take you straight to my online store
Table built using Product Table Builder by The Crafty Owl - Independent Stampin' Up! Demonstrator.