google-site-verification: google70410e9e92d4fda2.html
Showing posts with label ; punches;. Show all posts

Thursday, 11 June 2015

Catalogue Corrections Prize Draw Winner & Free Stamps


Before I get to business, I want to say a HUGE thank you to all of you that have been sending love and wishes, and asking after how my doggy, Hamish, is doing.

Well, he has Stage 3 Nasal cancer, isolated to the left side of his head, sinus' & nasal passageways.
We already knew that he cannot be cured, as these rare cancers tend to already be advanced before the first outward sign show (nose bleeds), And this is the case with Hamish.
Yesterday we met with the Oncologist. She is Europe's Leading Canine Oncologist, and the only referral centre in the UK is less than 20 miles away!! How lucky are we? She is the super vet on Cancers in Dogs and Cats.
It was very sobering to see the results of his CT scan, BUT the oncologist feels that he will benefit from a new protocol of palliative Radiotherapy. This should shrink the cancer, allowing his sinus' to drain (reducing headaches), and most importantly, improve his quality of life. 

She felt, that he is very fit and active for an 11 year old dog, and did not even give euthanasia as an option at this stage.

So he was marked with a big cross between his eyes, so they can complete the radiotherapy planning when he returns to the Hospital on Tuesday. 

The support we have received from friends and family, which includes you guys, has been wonderful


And here he is .... looking more like a Raccoon than a West Highland White Terrier haha ha!

Today, with the additional pain relief he has been prescribed, he is bounding around the garden chasing the magpies and dancing about with his dried tripe stick!


Firstly, Congratulations to Sindy A for winning a Stamp Set from my
 Stampin Up! Catalogue Launch Open House Party Prize Draw

Your stamp set will be winging itself to you tomorrow!


And now to business, there are a few corrections needed for the 2015-2016 Stampin Up! Annual Catalogue, and here they are:

Stampin Up!
2015-2016 CATALOG CORRECTIONS
x-x-x-x-x-x-x-x-x-x-x-x-x-x-x-x-x-x-x-x

I put post it notes on the affected pages, with a little note of the correction, just so I don't get confused 

Page 28: 140304The Love Story Project Life bundle is incorrectly listed as photopolymer. There is no stamp set included in the bundle.
x-x-x-x-x-x-x-x-x-x-x-x-x-x-x-x-x-x-x-x
Page 57: 140217 The item code for the You’re So Sweet Clear-Mount bundle is incorrect. The correct code is 140217.
x-x-x-x-x-x-x-x-x-x-x-x-x-x-x-x-x-x-x-x
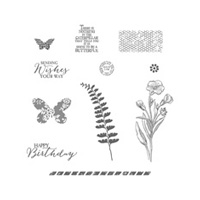
Page 126: 130939The Flower Shop Stamp Set was incorrectly priced 
at 39,00 € | £22.00. 
The correct price is29,00 € | £22.00.

 x-x-x-x-x-x-x-x-x-x-x-x-x-x-x-x-x-x-x-x
Page 173: 135502The Envelope Liners Framelits Dies product listing incorrectly includes Medium Envelopes as a coordinating product. The Framelits coordinate with C6 envelopes.
x-x-x-x-x-x-x-x-x-x-x-x-x-x-x-x-x-x-
And the final business of today is to remind you that before 30 June, you and your friends can earn free stamps when you Join My Team of Independent Stampin Up! Demonstrators
If you would like to get generous discounts on your craft supplies as a Hobbyest, or explore the Business Opportunities of becoming a Demonstrator, please contact me for an informal chat

Tel/txt: 07759587004
or read about the demonstrator promotion online at:


 .

Friday, 10 April 2015

Stamp Set Showcase 2015 Stippled Blossoms Meets Summer Silhouettes

Good Morning Ladies and Gentlemen
As Promised, I have the tutorial for the card I gave you a sneak peak of  yesterday

This card uses one of Stampin Up!s most popular Two Step Stamp Sets

Stippled Blossoms

& I have coupled it with a great background builder stamp set

Summer Silhouettes

The key with two step stamp sets is co-ordination.
Stampin Up! has taken great care to create 4 main colour collections and 2 In Colour Collections
The collections mirror similar colours, but n different tones, and the tones of the neutrals collection is similar with regard to intensity and tone of colour.
This is where Stampin Up! excels - the colour co-ordination of everything ... inks, pens, cardstock, ribbons and trims, accessories etc.

This card combines the Subtles Collection with the Brights collection


Begin by trimming the Whisper White cardstock to size. 
You will need to allow for matting the Whisper White panel onto Pear Pizzazz cardstock (trimming it to 0.5 cm larger than the Whisper White panel)
And then you will be matting this onto a piece of Blushing Bride cardstock (again, the cardstock should be 0.5 cm larger than the Pear Pizzazz panel)


Take the Whisper White panel, and you want the largest flower stamp with the least detail on it. Randomly stamp several of these onto the panel using Blushing Bride ink. Ensure you are also stamping off the page too to give that random feel to the pattern.
Next, take the more defined large flower stamp from the set, and ink it up with Melon Mambo ink.
Line up the stamp with the blushing bride images you have on the panel. It is not essential that they are exactly lined up, but you could use a Stamp A Ma Jig to line the stamps up exactly if you wish.
Next you are going to use the same 2 step process to stamp the large leaf stamp (least defined first with Pear Pizzazz ink and he more defined stamp with Old Olive ink)
Repeat the above processes using the small flower and small leaf, using the same inks. There is also a rosebud stamp in the set, but I didn't use that for this project as I didn't want to cram too much in and make the card look crowded.


Now for the Summer Silhouettes Stamp Set.

I used the Mosaic stamp from the set with Sahara Sand ink. 
I randomly over stamped the cardstock to give the impression that the flowers are growing through a trellis,

Before matting, wrap around some of the Sahara Sand  Lace Trim around the card front. I used a little Tombow Multi-Purpose Liquid Glue to adhere the 3 layers together as Tombow doesn't cause the cardstock to warp. You also get around 3-4 seconds to position the cardstock before the glue bonds.

Next is the die cutting and dry embossing.

Stamp your sentiment onto a piece of Whisper White cardstock using Chocolate Chip ink (I used a stamp from the Really Good Greetings Stamp Set)

Die cut this using the best fitting Window Frame Framelits
Then take the Fun Frames Textured Impressions Embossing Folder (TIEF) and line it up over your sentiment & dry emboss the  die cut using wither your Big Shot or your Texture Boutique.

Now die cut another Window Frame, but the size up, using Pear Pizzazz cardstock, and again use a TIEF to dry emboss this frame.Apply Stampin Dimensionals to the reverse of each label/frame and layer up, attach to your card front using Dimensionals again.
Add your embellishments, I used the Simply Pressed  Clay with the Buttons & Blossoms Clay Moulds to make the wee little flower. Attach using Fast Fuse Adhesive

And there you have it. Perfect for a special occassion card - now it is your turn ...

If you would like to join my Pinterest community board where you will be able to post your own Stampin Up creations. Simply email me and I will add you to the board
kim@stampinupatthewarren.com

If you would like to ask any questions on techniques or products, or anything else related to my blog posts, please feel free to ask away
Happy Stamping
Kim xxx

Contact me to order:
Telephone/Txt: 07759587004
Email: kim@stampinupatthewarren.com

Or Order Online 24/7
                                                                                               

Or Click on the image of the products used below and it will take you straight to my online store
Table built using Product Table Builder by The Crafty Owl - Independent Stampin' Up! Demonstrator.

Tuesday, 24 March 2015

Sale A Bration 2015 Week 11 Day 7

Today I have another  Butterfly Basics / Butterfly Thinlets Combo for you
The card design was CASED from Stampin Up's Impressions Magazine.
Now, not just anyone can get the Impressions Magazine as it is exclusive to Stampin Up Demonstrators. It is packed with Creative ideas and project recipes

Now the project that inspired me to make this card, was in fact, used on a Mini Treat Bag project.
I saw it and could see the scope for making it into a card, and here it is
I hope you like it?

Please note that at the time of posting this, the Butterfly Thinlets are unavailable to order. We are hoping that stocks will be available in the near future, so do check availability often via my website by clicking here 
So here is the tutorial


you will need a 6" square White Card Blank (card base)
Trim a piece of Baked Brown Sugar cardstock to 12 cm x 12 cm
Randomly stamp the cardstock with the tiny flower stamp using Soft Suede ink
Use a uniball White Gel Pen to add a white centre to each stamped flower.
Stamp the chevron like long stamp at the base of the card using Basic Black ink.

Down the centre of the card, stamp the Honeycomb stamp from Butterfly Basics stamp set, using Strawberry Slush ink.

Now die cut a banner from Pistachio Pudding cardstock
Mat this panel onto a piece of Mossy Meadow cardstock measuring 12.5 cms x 12.5 cms

Next die cut the medium Butterfly using the Butterfly thinlets die from Crisp Cantaloupe cardstock.
TIP
When die cutting using intricate Dies, use the following 'sandwich for your Big Shot:
Magnetic Platform
Cutting Plate
Tumble Drier Sheet
Cardstock
Wax Paper
Metal Die (cutting blade facing down)
Cutting Plate
Run the sandwich through your Big Shot back and forth a couple of times,

This will allow all those teeny pieces from the die to stick to the dryer sheet and give a crisper die cut.
Add a Stampin Dimensional to the back of the butterfly and attach to your card front on top of the banner.
Stamp the Sentiment of your choice from the Butterfly Basics stamp set onto White  Vellum using Black Stazon Ink
Once dry, trom the Vellume to size and use your paper snips to make banner ends to the stamped vellum
Adhere this to the Butterfly using Glue Dots.
Thread a metal button from the Artisan Embellishment Kit with Linen Thread, and tie a bow leaving large loops and long tails.
Attach to the body of the butterfly
And there you have it!


If you would like to ask any questions on techniques or products, or anything else related to my blog posts, please feel free to ask away
Happy Stamping
Kim xxx

Contact me to order:
Telephone/Txt: 07759587004

Or Order Online 24/7
                                                                                               
Or Click on the image of the products used below and it will take you straight to my online store
Table built using Product Table Builder by The Crafty Owl - Independent Stampin' Up! Demonstrator.