google-site-verification: google70410e9e92d4fda2.html
Showing posts with label .scrapbooks. Show all posts

Friday, 10 April 2015

Stamp Set Showcase 2015 Stippled Blossoms Meets Summer Silhouettes

Good Morning Ladies and Gentlemen
As Promised, I have the tutorial for the card I gave you a sneak peak of  yesterday

This card uses one of Stampin Up!s most popular Two Step Stamp Sets

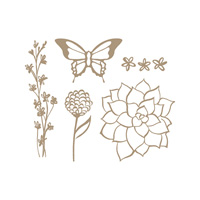
Stippled Blossoms

& I have coupled it with a great background builder stamp set

Summer Silhouettes

The key with two step stamp sets is co-ordination.
Stampin Up! has taken great care to create 4 main colour collections and 2 In Colour Collections
The collections mirror similar colours, but n different tones, and the tones of the neutrals collection is similar with regard to intensity and tone of colour.
This is where Stampin Up! excels - the colour co-ordination of everything ... inks, pens, cardstock, ribbons and trims, accessories etc.

This card combines the Subtles Collection with the Brights collection


Begin by trimming the Whisper White cardstock to size. 
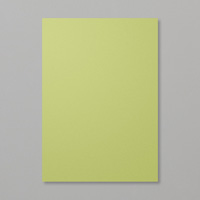
You will need to allow for matting the Whisper White panel onto Pear Pizzazz cardstock (trimming it to 0.5 cm larger than the Whisper White panel)
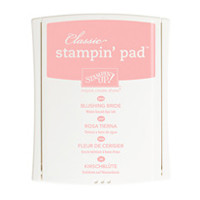
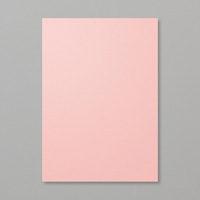
And then you will be matting this onto a piece of Blushing Bride cardstock (again, the cardstock should be 0.5 cm larger than the Pear Pizzazz panel)


Take the Whisper White panel, and you want the largest flower stamp with the least detail on it. Randomly stamp several of these onto the panel using Blushing Bride ink. Ensure you are also stamping off the page too to give that random feel to the pattern.
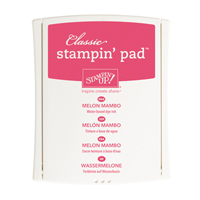
Next, take the more defined large flower stamp from the set, and ink it up with Melon Mambo ink.
Line up the stamp with the blushing bride images you have on the panel. It is not essential that they are exactly lined up, but you could use a Stamp A Ma Jig to line the stamps up exactly if you wish.
Next you are going to use the same 2 step process to stamp the large leaf stamp (least defined first with Pear Pizzazz ink and he more defined stamp with Old Olive ink)
Repeat the above processes using the small flower and small leaf, using the same inks. There is also a rosebud stamp in the set, but I didn't use that for this project as I didn't want to cram too much in and make the card look crowded.


Now for the Summer Silhouettes Stamp Set.

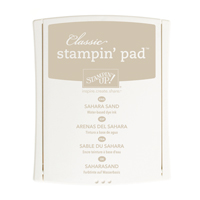
I used the Mosaic stamp from the set with Sahara Sand ink. 
I randomly over stamped the cardstock to give the impression that the flowers are growing through a trellis,

Before matting, wrap around some of the Sahara Sand  Lace Trim around the card front. I used a little Tombow Multi-Purpose Liquid Glue to adhere the 3 layers together as Tombow doesn't cause the cardstock to warp. You also get around 3-4 seconds to position the cardstock before the glue bonds.

Next is the die cutting and dry embossing.

Stamp your sentiment onto a piece of Whisper White cardstock using Chocolate Chip ink (I used a stamp from the Really Good Greetings Stamp Set)

Die cut this using the best fitting Window Frame Framelits
Then take the Fun Frames Textured Impressions Embossing Folder (TIEF) and line it up over your sentiment & dry emboss the  die cut using wither your Big Shot or your Texture Boutique.

Now die cut another Window Frame, but the size up, using Pear Pizzazz cardstock, and again use a TIEF to dry emboss this frame.Apply Stampin Dimensionals to the reverse of each label/frame and layer up, attach to your card front using Dimensionals again.
Add your embellishments, I used the Simply Pressed  Clay with the Buttons & Blossoms Clay Moulds to make the wee little flower. Attach using Fast Fuse Adhesive

And there you have it. Perfect for a special occassion card - now it is your turn ...

If you would like to join my Pinterest community board where you will be able to post your own Stampin Up creations. Simply email me and I will add you to the board
kim@stampinupatthewarren.com

If you would like to ask any questions on techniques or products, or anything else related to my blog posts, please feel free to ask away
Happy Stamping
Kim xxx

Contact me to order:
Telephone/Txt: 07759587004
Email: kim@stampinupatthewarren.com

Or Order Online 24/7
                                                                                               

Or Click on the image of the products used below and it will take you straight to my online store
Table built using Product Table Builder by The Crafty Owl - Independent Stampin' Up! Demonstrator.

Thursday, 19 March 2015

Sale A Bration 2015 Stampin’ Up! behind the scenes Week 11 Day 3

Before I get to today's card, I want you to view this short video so you understand why I LOVE being a Stampin Up! Demonstrator ... do take a few moments to watch, as it will help you understand some of the additional benefits that come with being a Stampin Up Demonstrator and how we help others to get in touch with their creativity, have fun, and new achieve new accomplishments..


If the video makes wonder ,,,, send me a message, give me a call, find me on Facebook, Google + or twitter for a chat about Stampin Up! Your Way!

And I am hoping you are still with me because I have a really quick and simple but pretty Thank You Bookmark for you.

Believe it or not, many people still read good old paper books, as opposed to e-readers, tablets or laptops ... Personally, I do a bit of each, But I have always had that habit of dog-earing the page I have gread too, which drives my husband mad! He is always telling me to use a book mark, and has bought me many over the past 20+ years!

So with that in mind, I made this tag for all my workshop attendees, so they can mark their favourite stamp sets in the complementary catalogue they receive when they attend their first workshop/class with me.


The bookmark feature 2 of the additional Sale A Bration freebies you can qualify for with every £45 order on curent Stampin Up! products via my online store
they are;
For Being You Stamp Set
&
Natures Perfection Stamp Set


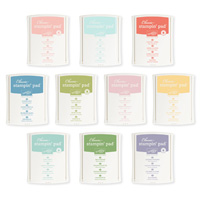
The Thanks was stamped using Soft Suede ink, and the Natures Perfection images were stamped using Subtles Collection Classic Ink Pads

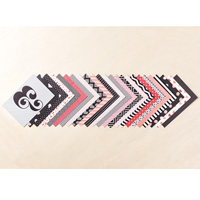
Each tag measures 5 cms x 12 cm, and another to the same size using the Stacked With Love Designer Series Paper Stack (from the Seasonal Catalogue).


One end of the tag, and the DSP were punched using the Scallop Tag Topper Punch, and subtles Cotton Ribbon was thread through and ties off using Linen Thread.

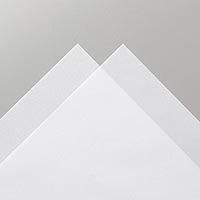
Finally, I stamped the butterfly from Natures Perfection Stamp Set onto White Vellum and punched out using 

There, I told you, as simple as 123 or ABC

the Elegant Butterfly Punch.


If you 

would like to ask any questions on techniques or products, or anything else related to my blog posts, please feel free to ask away
Happy Stamping
Kim xxx

Contact me to order:
Telephone/Txt: 07759587004
Email: kim@stampinupatthewarren.com

Or Order Online 24/7
                                                                                               
Or Click on the image of the products used below and it will take you straight to my online store
Table built using Product Table Builder by The Crafty Owl - Independent Stampin' Up! Demonstrator.


Wednesday, 18 March 2015

Sale A Bration 2015 Week 11 Day 2


Daydream Medallions 
is the order of the day

This versatile stamp set can be made to look contemporary, vintage or even Steampunk  just by changing the colour schemes 

Here I have gone with the contemporary with a vintage twist
by using Blackberry Bliss which is so on trend right now, with Soft Suede to tone it down, and a Vintage Button tied with  Linen Thread.

The stamp set co-ordinates perfectly with the Floral Frames Framelits which has created that layered look. I have used Stampin Dimensionals between each layer (including the button.) I know it will have to be posted as a large letter, but sometimes those extra pennies are worth the love and attention to give to your card making when it is for someone you love and care about.

I heat embossed in alternating layers of Blackberry Bliss and Soft Suede.
You need to use the following Heat Embossing technique to achieve this:

Ink up your stamp with Versamark Ink (this is slow drying so there is no rush) and without stamping, you need to ink your stamp with your chosen colour classic ink pad (i.e. Blackberry Bliss or Soft Suede), STAMP onto Whisper White cardstock, Dust with CLEAR Embossing Powder .
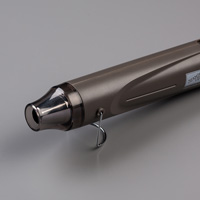
Melt the embossing powder with your heat tool.

The embossing powder should melt very quickly. DO NOT wiggle your heat tool about or your cardstock will warp. Instead, slowly move the heat tool around the stamped image as the ink melts. 

For best results, I always let my heat tool warm up for 30 seconds before starting to heat the image.

If you haven't done any heat embossing, start with a metallic embossing powder, such as gold, as the transformation is spectacular and is very visual with regards to just how quickly the powder melts, and it cools just as quickly.


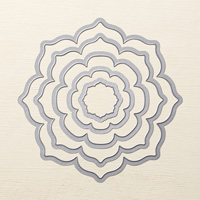
Once you have Heat Embossed each of the Medallions, you need to die cut them using the Floral Framelits.
You will need to trim a piece of Whisper White Cardstock to 13.8 cms x 9.5 cms. Mat this onto a piece of Blackberry Bliss cardstock measuring14.3 cms x 10 cms

Mount your layered Medallions onto the card front, thread your Vintage Button with Linen Thread and attach a Stampin Dimensional to the reverse and adhere the button to your top layer of Medallions.

Finally, is the label. I trimmed a piece of Whisper White cardstock to 1 cm x 12 cm and stamped this with the Just Because Sentiment from the  A Dozen Thoughts stamp set in Blackberry Bliss ink. This was trimmed to size using the Banner Punch by inserting the label in through the top of the punch and guide it between the cutting plates and punch. (practice this technique on some scrap cardstock first). Rotate and repeat with the opposite end.
Mat (layer) this onto a piece of Blackberry Bliss cardstock measuring 1.5 cms x 13 cms and trim to size using the Banner Punch as above. Attach Stampin Dimensionals to the reverse of the label and position on your card front.


If you would like to join my Pinterest community board where you will be able to post your own Stampin Up creations. Simply email me and I will add you to the board
kim@stampinupatthewarren.com

If you would like to ask any questions on techniques or products, or anything else related to my blog posts, please feel free to ask away
Happy Stamping
Kim xxx

Contact me to order:
Telephone/Txt: 07759587004
Email: kim@stampinupatthewarren.com

Or Order Online 24/7
                                                                                               
Or Click on the image of the products used below and it will take you straight to my online store
Table built using Product Table Builder by The Crafty Owl - Independent Stampin' Up! Demonstrator.