
Today and tomorrow, I am getting back in touch with my more vintagey self
It feels like I have waited forever to be able to order the new background builder stamp set
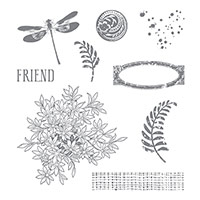
Awesomely Artistic
We did get to play with this stamp set at the Demonstrator Regional Stampin Up! Event in Telford during June this year, and honestly, you should have heard the 'oooohhhhs' and ahhhhh's in the room when this stamp set was demonstrated
So much potential, and I know that this will be one of my favourites, along with Gorgeous Grunge & Summer Silhouettes stamp sets.
I rarely use Designer Series Papers, but I rather liked the patterns on the new colour collection DSP stacks, so I purchased the neutrals pack, as I know I could add colour myself with sponging, brayering etc.
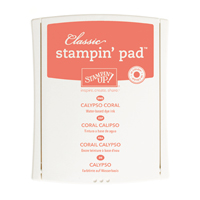
And that is what I have done with todays card. I trimmed a piece of the DSP to fit the front of the card blank, and sponged the panel with Calypso Coral ink, and also inked the edges of the card blank.
Now this is another new product, yes, Stampin Up is now selling thicker A4 Whisper White cardstock that is more suitable for card blanks (bases). Now how cool is that??
Anyway my next job was to trim a piece of Crumb Cake and distressed the edges by tearing the cardstock using my fingers.
I then stamped this panel with a variety of the stamps from the set, using inks from the Subtles collection, along with Soft Suede for stamping the hessian trm stamp.
This panel was them mounted onto the card front using Fast Fuse (see yesterdays post for the video in how to use this great adhesive).
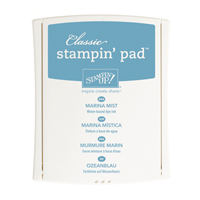
Then I stamped the Dragonfly onto a piece of Whisper White cardstock, using Marina Mist ink. This was cut out by hand using my trusty Paper Snips.

I then stamped the Thank You stamp from 'Another Thank You' Stamp Set, and the book plate stamped and over stamped the centre with the FRIEND stamp (from Awesomely Artistic SS) onto scraps of Whisper White Cardstock, that I then sponged with Calypso Coral ink.


And below are the products I have used, click on the icons to view them in more detail.
 |  |  |  |  |
 |  |  |  |  |
 |  |  |  |  |
 |  |  |  | 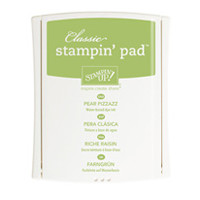 |
 |
Table built using Product Table Builder by The Crafty Owl - Independent Stampin' Up! Demonstrator.
Would like to JOIN my Pinterest Community
Board?
where you will be able to post your own
Stampin Up! Makes?
If the answer is YES
please email me via
Kim@stampinupatthewarren.com

If you have any
questions on techniques, orders, products
OR
Joining my Team as an Independent Stampin Up! Demonstrator
contact me via:-
Email me: kim@stampinupatthewarren.com
Text: 07759587004 OR
Order Online: http://www.stampinupatthewarren.stampinup.net

No comments:
Post a Comment