hmmm ,,, looking ag ghd photo's on here as I type up this blog, my lovingly heat embossed baubles look like little critters as the rhinestones look like eyes ... hopefully the photos will look better on the larger screen once I have published this ... I do hope anyway
I will plod along in hope that all will be OK he he!
and so here is todays ORNAMENTAL PINE HANDMADE CARD
Many of you will have noticed that I love 6" (15cm) cards, and today is no exception. I do use A6 cards for all occasions, but I think that the larger square card lends itself to a more luxurious look when making cards for special occasions, it could be Christmas, but this template could very easly be made into a Wedding Card where the colour scheme can be coordinated with the wedding colourscheme. I have teamed todays Christmas Card with the Labels Framelits to creat a lovely layered look, and the little Banner Punch helped me create gorgeous banner ends to the sentiment label.
So once you have made your Card Blank, you need to trim another piece of Whisper White cardstock to 14cms x 14cms. Ink the edges of the cardstock with Gold Encore ink using a sponge dauber.
Trim a piece of Cherry Cobbler Designer Series Paper from the Regals DSP stack, to 14cms x 7cms. Ink the outer edgges with the Encore Gold ink as before, and then adhere to the top half of the cardstock.
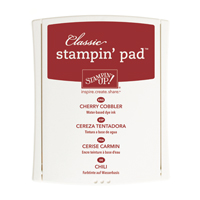
Ink up the larger Sentiment Stamp and using Cherry Cobbler ink, to the bottom right of the panel.
Die cut one of the Label Framelits (pick the largest size that fits the card leaving plenty of whitespace) from Cherry Cobbler Cardstock.
Next select the next size down (smaller) Label framelit and die cut from Whisper White cardstock.
Ink up the Ornamental Pine Stamp from Garden Green ink and stamp onto the white die cut label. Ink the edges of both die cut labels (i,e, the white label and the cherry cobbler label) with Gold Encore ink as above.
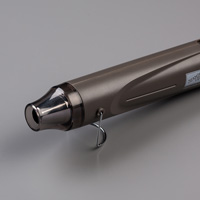
Now, on a scrap of Cherry Cobbler cardstock, stamp 2 or 3 of the Baubles in Versamark, dust with Gold Embossing Powder, remove the excess and heat set with your Heat Tool.
Cut out the baubles with your paper snips, ink the edges with gold encore ink.
Now for the labels. You need to trim away a section of the labels on the left hand side (as in the photos), then adhere the two labels together using a little Tombow Multipurpose Glue, and next you need to attach the labels to the left hand side of the stamped panel. Attache the layered panel to the card blank.
Tie a nice large bow using Cherry Cobbler Sheer Linen Ribbon and attach to the card front using a few Glue Dots.
Apply Stampin Dimensionals to the reverse side of the baubles you embossed earlier and adhere to the stamped label. Add a few Basic Rhinestones.
Finish by stamping the Christmas Wishes Sentiment onto Whisper White cardstock in Cherry Cobbler Ink. Trim to 1.5cms high as you are going to make a long narrow sentiment label.
Use the Banner Punch to create banner ends to the label, but do not put the cardstock into the punch in the normal way or you will over shorten the label. You do need to open the punch, and feed one end of the label in through the top of the punch so you only trim away one end. Repeat with the other end in the same way.
Apply Stampin Dimensionals to the reverse and attache to the top centre of the card, and ad a few more Basic Rhinestones.
And there you have it .... now it is your turn. Tag me in to any photo's of your CASED cards as I would love to see what you do with this card as a template.
ping me
your email address and I will add you
kim@stampinupatthewarren.com
If you would like
to ask any questions on techniques or products, or anything else related to my
blog posts, please feel free to ask away
Happy Stamping
Kim xxx
Contact me to
order:
Telephone/Txt:
07759587004
Email: kim@stampinupatthewarren.com
Or Order
Online 24/7
Or Click on the
image of the products used below and it will take you straight to my online
store
Table built using Product Table Builder by The Crafty Owl - Independent Stampin' Up! Demonstrator.


No comments:
Post a Comment