
Good Morning Good People!
I have a wonderful mash up today for you, using not one, but two of this years Seasonal Stamp Sets
BRIGHT & BEAUTIFUL
&
ORNAMENTAL PINE.
The later will be one of the forthcoming Stamp Set Showcase weeks, which is how today's card came into being.
I was prepping for one of my Christmas Card Stamp Camps, and was trying out different colour combo's and techniques to make this stamp set one of my WOW projects, and after a play on my Grid Paper, I went for a try on a scrap of Whisper White cardstock, I loved the result. The full project looks stunning (you will have to watch out for that in coming weeks) but I so loved the trial piece that I just had to find a way to incorporate it into another card, and this is it he he
If you like the taster, them pop over to my online Store and purchase your set to be sure you have it at the ready to CASE some of my cards
And here is the tutorial

Begin by making your A6 Card Blank by trimming a piece of Whisper White cardstock to 14.8cm x 21cm. Using your Scoring Tool, Score the long side at 10.5cms, fold and burnish the fold with your bone folder.
You are now going to randomly stamp the from of your card blank using Encore ink and the medium and small stars in the Bright & Beautiful Stamp Set.
Trim another piece of Whisper White cardstock to 14.3cm x 8cms
Ink Up the Ornamental Stamp - just the Pine stamp in Versamark ink, then before stamping, use Soft Suede ink to ink the branch part of the stamp, and Mossy Meadow for the pine portion of the stamp, trying not to contaminate your ink pads with the different inks.
Stamp onto the cardstock you have just trimmed to size. Cover with Clear Embossing Powder, taop off the excess and heat with your Heat Tool.
Clean the pine stamp, and over stamp just the green portion of the stamp with Old Olive ink, and carefully wipe off any excess ink over the previously embossed image. This will provide some tonal changes in the pine image.
Now stamp the hook stamp in Black Stazon ink, and them ink up the Bauble Stamp in first Versamark and then Blackberry Bliss ink, and stamp onto the cardstock so the bauble looks like it is hanging on the hook.
Ink the edges of the cardstock using a sponge dauber and Gold Encore Ink.
Stamp your Sentiment of choice to the cardstock. I have used a retired stamp that I purchased at a huge discount in the CLEARANCE RACK so do keep a close eye on this to get yourself some real bargains!
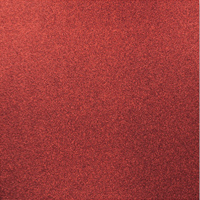
Mat this onto a piece of Red Glimmer Paper measuring 14.8cms x 8.5cms using Stampin Dimensionals to pop it up, Apply Stampin Dimensionals to the back of the Glimmer Paper and attach to the Card Blank
Now go have some fun creating your own versions

I would love to see you own creations so if you
would like to join my community board on my Pinterest account, to post your own
photo's
ping me
your email address and I will add you to the Board
email:
kim@stampinupatthewarren.com
If you would like
to ask any questions on techniques or products, or anything else related to my
blog posts, please feel free to ask away
Happy Stamping
Kim xxx
Contact me to
order:
Telephone/Txt:
07759587004
Email: kim@stampinupatthewarren.com
Or Order
Online 24/7
Or Click on the
image of the products used below and it will take you straight to my online
store
 |  |  |  |  |
 |  |  |  |  |
 |  |  |  |  |
 |
Table built using Product Table Builder by The Crafty Owl - Independent Stampin' Up! Demonstrator.


No comments:
Post a Comment