Good Morning for the final day of
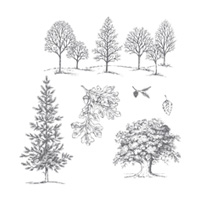
LOVELY AS A TREE
And todays card combines just a tiny tad of Holiday Home with Santa and his sleigh
And a LOT of Dazzling Dianmonds!
In keeping with my favourite things, todays card will require a 6" (15 cm) Whisper White Square Card Blank
Trim a piece of Night of Navy cardstock to 14.5 cms x 14.5 cms and attach to the card blank using a tiny amount of Tombow Multi-Purpose Glue.
Next, you want to die cut a large scallop circle using the Circle Collection Framelits using Dazzling Diamonds Glimmer Paper
 Apply Stampin Dimensionals to the reverse side and mount in the centre of the card blank
Now die cut a circle of Night of Navy cardstock and die cut using the largest of the circles collection, circles.
Next, using Versamark, stamp the 4 trees stamp in the Lovely As A Tree stamp set, plus the santa and his sleigh from the Holiday Home stamp set as you can see in the photo's.
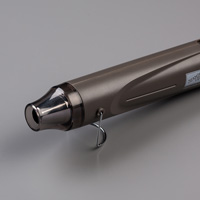
Sprinkle with White Embossing Powder, remove the excess by rapping the back of the cardstock just once, and heat set with your Heat Tool.
Next, randomly stamp the teeny stars stamp (also from the Holiday Home stamp set) using Versamark, but this time, heat emboss the images using Silver Embossing powder, just as you have above.
Apply Stampin Dimensionals to the reverse and mount on top of the scallop circle.
Finish by stamping your sentiment onto a 1.5 cm strip of Whisper White cardstock.
Use the banner punch to create the banner ends to your tag. STOP!!!
before trying to make your banner ends, you need to know that instead of punching a tag in the usual way, if you did that here, you would just shorted the tag. Instead, you need to insert the stamped label strip of card into the punch from the top. carefully slotting the cardstock between the cutting blades until you get one end the right length. Repeat this process for the opposite end of the label.
Apply Stampin Dimensionals to the reverse of the tag and attach to the top right corner of the card.
And there you have it!!
If you
would like to join my community board on my Pinterest account to post your own
photo's
ping me
your email address and I will add you
kim@stampinupatthewarren.com
If you would like
to ask any questions on techniques or products, or anything else related to my
blog posts, please feel free to ask away
Happy Stamping
Kim xxx
Contact me to order:
Telephone/Txt:
07759587004
Email: kim@stampinupatthewarren.com
Or Order
Online 24/7
Or Click on the
image of the products used below and it will take you straight to my online
store
Table built using Product Table Builder by The Crafty Owl - Independent Stampin' Up! Demonstrator.


No comments:
Post a Comment