google-site-verification: google70410e9e92d4fda2.html

Thursday, 3 December 2015

Stampin Up! Mini Treat Bags Holly Jolly Christmas Greetings & Gift Tag

Today I am giving you a taster of what is to come next week
Christmas is coming upon us fast. My hubby got all the decorations & Tree up yesterday, and is busy ordering out cheeky Christmas jumpers as we speak (we get a new one each year)
Anyhow, from next week, it is all going to be about Gift Packaging, Box Making and Gift Tags
You can order your Christmas craft supplies direct from my website by clicking on the product icons below. If you live outside the UK, the links will take you to Stampin Up! site for your area,
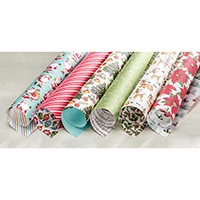
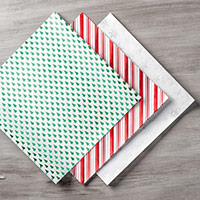
Today though, I have a Mini Treat Bag for you, using the Holidays Fancy Foil Designer Vellum
Plus a Punched and die cut Gift Tag, held together with a wooden Clothespin.


 Below you will find the product icons for the items I used to create today's Festive Treat Bag
Click on the icons to view or order them via my online store
Table built using Product Table Builder by The Crafty Owl - Independent Stampin' Up! Demonstrator.


WATCH THE VIDEO BELOW

  1. Chose the Foiled Vellum you would like to use from the Holidays Fancy Foil Designer Vellum Pack and trim roughly to the size f the Treat Bag Thinlits Dies (you will need one wide and one narrow for the standard sized bags)
  2. Run through your Big Shot, ensuring your have the right sides of the vellum, face down onto your vellum before running though your Big Shot ... use the Magnetic Platform for best results
  3. Fold and burnish all crease line using a bone folder
  4. Run a strip of Tape & Tear Adhesive down the tab on each piece & adhere the 2 pieces together
  5. fold up the bottom Flap and adhere with Tape & Tear 
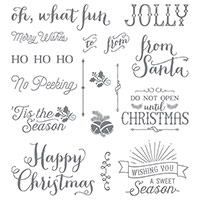
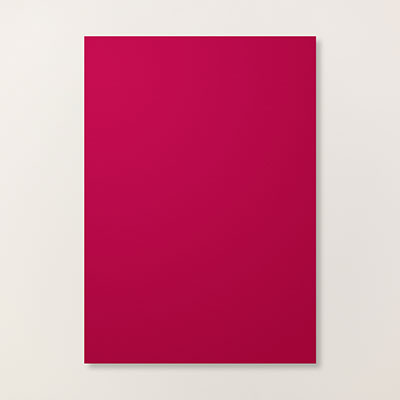
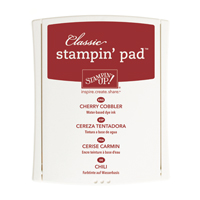
  6. Now for the Tag - Stamp the large snowflake from the Holly Jolly Greetings Stamp Set onto a piece of Real Red Cardstock, using Cherry Cobbler classic Ink Pad
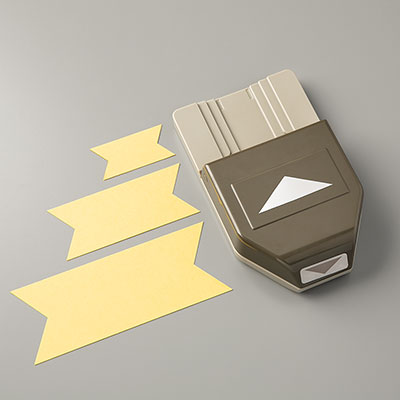
  7. Punch out the snowflake using the 21/2" Circle Punch. 
  8. punch a hole in the top of the tag using the 1/16" handheld punch
  9. Die cut your sentiment from the Christmas Greetings Thinlits Dies and Whisper White Cardstock; mount onto your tag using the Fine Tip Glue Pen
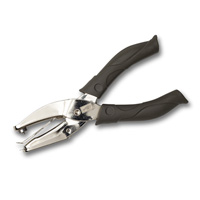
  10. Stamp your Christmas Sentiment from the Holly Jolly Greetings Stamp Set & cut out using your Paper Snips, creating banner ends. use cut down Stampin Dimensionals to the back and adhere to the tag.
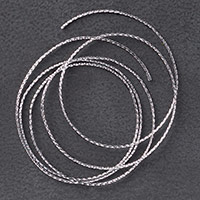
  11. Thread through some Silver Cording Trim and attach to the treat bag using a Clothespin or paper clip


Kim Tolton, Independent Stampin Up Demonstrator.
Card & Papercraft Tutorials
Please feel free to comment below, and ask away with any questions. You can also find me via the links below
Blog:

Online Store:

Stamping @ The Warren Craft Forum:

Email:

Pinterest:

Google +

Facebook:

Twittert:

Instagram:
@kim.tolton

LinkedIn:

Wednesday, 2 December 2015

Stampin Up! Oh What Fun we're Home for Christmas

Today I have another quick and simple card for you to make for your nearest and dearest this Christmas.
Today's card features Stampin Up!s Home for Christmas Designer Series Papers and the Oh What Fun Stamp Set, with a little bling in the form of some Dazzling Diamonds Banners that are tucked behind the 'Wishing You A Sweet Season' Sentiment label
Even a complete novice could make this card in less than 10 minutes, as it is mostly about trimming pieces of card and decorative paper.

 Below you will find the icons for the products used to create today's card
Click on the icons to view them or order them via my Demonstrator Website
Table built using Product Table Builder by The Crafty Owl - Independent Stampin' Up! Demonstrator.

Watch the Video Below

Make your Card Base by trimming a piece of Thicker Whisper White Cardstock to 21 cms x 14.8 cms; score the long side at 10 cms; fold and burnish
  1. Trim a piece of diagonally striped Home For Christmas Designer Series Papers measuring 14 cms x 6 cms. Adhere to the card front using Fast Fuse Adhesive
  2. Trim a piece of the snowy village paper from the Home For Christmas DSP Pack measuring ; adhere across the centre of the card front using Fast Fuse
  3. Stamp your sentiment onto a scrap of Very Vanilla Cardstock and the Mossy Meadow Classic Ink Pad and the Oh What Fun Stamp Set
  4. Punch out the sentiment using the 2" Circle Punch
  5. Using the Banner Punch, punch out three banners using Dazzling Diamonds Glimmer Paper
  6. add some Tape & Tear adhesive to the back of the circle and adhere the banners to them
  7. Mount the sentiment label onto the cardfront using Stampin Dimensionals

Kim Tolton, Independent Stampin Up Demonstrator.
Card & Papercraft Tutorials
Please feel free to comment below, and ask away with any questions. You can also find me via the links below
Blog:

Online Store:

Stamping @ The Warren Craft Forum:

Email:

Pinterest:

Google +

Facebook:

Twittert:

Instagram:
 @kim.tolton

 LinkedIn:

Tuesday, 1 December 2015

Stampin Up!s Home for Christmas, Oh What Fun Triple Banner Punch Christmas Card

Today's card is aimed at those of you who have either too little time to sit and make lots of Christmas Cards, or for those of you who are new to card making

The card is made using one of the decorative papers from the Home for Christmas Designer Series Paper Pack from Stampin Up!; I have used the Christmas Carol Music Sheet for my card, but you could replace it with any of the double sided papers in the pack.
There is no need for Die Cutting, as the Triple Banner Punch does all you need for today
There is a small amount of stamping to create your own background to one of the Banners, and the sentiment too, A simple Winter Wonderland Embellishment, sets the card off nicely


Below you will find all the products  used to create today's Card
Click on the product icons to view them in more detail, or to place an order

Table built using Product Table Builder by The Crafty Owl - Independent Stampin' Up! Demonstrator.


WATCH THE VIDEO BELOW


  1. Make your A6 card base by trimming a piece of Thicker Whisper White Cardstock to 21 cms x 14.8 cms; score the long side at 10.5 cms, Fold & Burnish
  2. Trim your chosen Designer Series Paper from the Home For Christmas DSP pack, to 14.4 cmsx 10.1 cms; Sponge the edges of the DSP using Cherry Cobbler Classic Ink Pad adhere to your card front using Fast Fuse Adhesive
  3. Trim a piece of Cherry Cobbler Cardstock to 5 cms x 9.7 cns
  4. Randomly Stamp with the Bauble Stamp from the Oh What Fun Stamp Set using Cherry Cobbler Classic Ink Pad
  5. Apply a couple of strips of Fast Fuse Adhesive to both long edges of the cardstock, coils up some Gold Cording Trim and adhere to the back of the banner; add some Stampin Dimensionals to the back, and mount onto your card front
  6. Trim a piece of Very Vanilla Cardstock to 11 cms x 2.5 cms; Insert into the Triple Banner Punch, repeat with the opposite end; sponge the edges with Cherry Cobbler ink
  7. Stamp with the JOLLY stamp from the Oh What Fun stamp set using Archival Basic Black Classic Ink Pad
  8. Mount onto your card front at an angle and add a Winter Wonderland Embellishment using a couple of Glue Dots

Stamping At The Warren
Kim Tolton

Independent Stampin Up! Demonstrator (UK)
Card & Paper Craft Classes & How To Tutorials
JOIN my Pinterest Community Board
 Where you will be able to post your own Stampin Up! Makes
Simply follow my Community Pinterest Board
And I will sent you an invitation to start pinning

If you have any questions on techniques, orders, products
OR
 Joining my Team as an Independent Stampin Up!  Demonstrator
contact me via:-
Text: 07759587004
Order Online 24/7


Stamping @ The Warren Craft Forum:

Pinterest:

Google +

Facebook:

Twitter:

Instagram:
@kim.tolton

LinkedIn: