google-site-verification: google70410e9e92d4fda2.html

Saturday, 27 June 2015

Cutie Pie Cake Slice Box

Welcome to the weekend! 
I hope you have something spectacular planned?
Here at the Warren, it will be business as usual, caring for our menagerie of various animals, and our bee Hives too
Time to do a Hive inspection to see how much honey they have produced so far! hmmmm yum!!

And talking of Yum, I also have 2 cakes to design
The first is for a special little lady who wants a Monster Hi Cake ... so no pressure there!

But the second, is a Minions Wedding Cake
Yes, you heard me correctly!
The bride wants her wedding made as fun as possible for all the attending children.
& that means ....

Yes, I have a whole batch of Cake Boxes to make for the children (and the adult kiddies amongst us) so their cakes can be taken home without getting squashed.
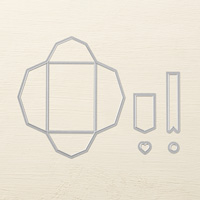
Fortunately for me, Stampin Up has released a new Thinlets Die, 

Yes, the Cutie Pie die set comes not just with the box die, but also various accessory dies, including words, flowers, toppers, and dies for the edges, a bow and more.


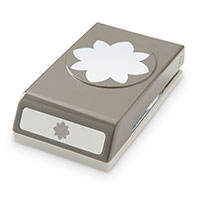
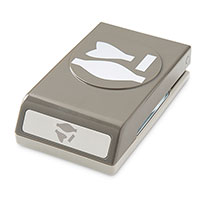
Now on this occasion, I haven't used the bow in the die pack, instead, I have used the Bow Punch Builder Stamp as I wanted something a little more out there
I added sections of Tea Lace Doily between the boc and the box topper.

There is a co-ordinating stamp set. Sweet Stack,  that also comes as a Project Kit Bundle.

Now I thought I had added the stamp set to the order, but I hadn't!

So after reminder to self to check order before paying
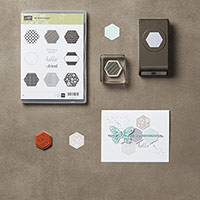
I looked through my stamp stash, and decided the Chalk Lines Photopolymer Stamp Set would work nicely


I think it worked well, don't you?

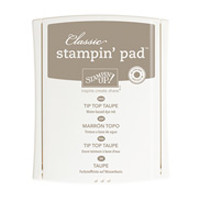
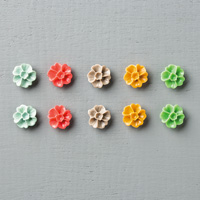
I used Very Vanilla Cardstock with Mint Macaron Classic Ink Pad for the stamping, and finished the cake box with one of the In Colour Blossom Accents flowers
(I went for Watermelon Wonder to add contrast)

The joy of making your own Cake boxes, is that you can co-ordinate everything
Table Numbers, Place Cards, Invitations, Order of Service, even your own table confetti using the hearts or stars confetti border punches.

So of course, for the wedding cake I will be making, I will choose
Pacific Point & Daffodil Delight colour scheme

I will try and remember to post a photo of the finished cake ... but it is not until August, so I still have time to do the planning!
And I think I will need it. he he

So here are the products I have used to make this cutie box
Click on the product icons below to view them in more detail, or to place an order
Table built using Product Table Builder by The Crafty Owl - Independent Stampin' Up! Demonstrator.


Would like to JOIN  my Pinterest Community Board?
 where you will be able to post your own Stampin Up! Makes?
If the answer is YES please email me via


If you have any questions on techniques, orders, products
OR
 Joining my Team as an Independent Stampin Up!  Demonstrator
contact me via:-
Text: 07759587004 OR

Order Online 34/7

Friday, 26 June 2015

Weekly Deals


Weekly Deals

Now I am certain you will recognise some, if not all the products in this weeks Weekly 
Deals from Stampin Up (See below) 

as many of them have been featured in recent posts 

And with only 4 days to go before the Recruiting  Promotion ends (30 June)

Why not reap the fullest benefits and Join my team You could then include some of the products below in your starter kit?

 (only applies to products in the current catalogue)

That would mean that you get even more value for your money on the £99 starter Kit

And if you join Team Warreners by 30 June 2015, you will also get to pick any two stamp sets in the catalogue FREE

Now here is the thing about Stampin Up!
If you do not want to do Demonstrations to groups of people, that is OK

If you want to join Stampin Up! just to benefit from the 20% Nett discount on all your crafting supplies, that is OK too!

Perhaps your meet regularly with a group of friends regularly to scrapbook or make cards, for example, that is also OK

It really is about Stampin Up Your Way

Do you need to love local to me? 

The answer is a resounding NO ... 

the only proviso is that you live in the UK

You will get ongoing support from myself, helping you on your Stampin Up! Journey, whether you want to support your hobby with discounts on quality craft supplies, OR  you want to make this a part time or full time career, doing in home Workshops, or classes, and/or building a Team of Demonstrators of your own
There are additional rewards and recognition for selling and recruiting

You can work towards Incentive Trips
 and Attend Stampin Up! Events


BUT MOST OF ALL, YOU BECOME PART OF THE STAMPIN UP! FAMILY


When you JOIN Stampin Up, you also get enrolled into a new demonstrator  programme to help you find your feet over the first six months

Read about my own Stampin Up! Journey
when you

Show: 
All
Sort By: 
A-Z
Choose Happiness Clear-Mount Stamp Set by Stampin' Up!


Price£16.00 £12.00
Flower Medallion Punch by Stampin' Up!


Price£16.00 £12.00
Fun Frames Textured Impressions Embossing Folders by Stampin' Up!


Price£7.75 £5.81
Fuse Fast Adhesive by Stampin' Up!


Price£9.00 £6.75
Gift Card Envelope & Trims Thinlits Dies by Stampin' Up!


Price£30.00 £22.50
Six-Sided Sampler Clear-Mount Stamp Set by Stampin' Up!


Price£19.00 £14.25
Tangelo Twist A4 Cardstock by Stampin' Up!


Price£6.50 £4.88
Work of Art Clear-Mount Stamp Set by Stampin' Up!


Price£20.00 £15.00


Thursday, 25 June 2015

Sassy Six Sided Sampler

Do I have a super Fast Sassy Card for you today
So quick and easy to make, and save 15% on the purchase price if you purchase the Six Sided Sampler & the Co-Ordinating Hexagonal Punch as a bundle
This card is suitable for a complete novice, and a perfect quick make for the more experienced stamper when time is in short supply!

Keep reading below to see the step by step tutorial
And you can order the products just by clicking on the icons below
Go on ... have a go, and then Follow My Pinterest Community Board (link on the side bar on this blog) and I will send you an invite to join the community  so you can post photo's of your own Stampin Up! Creations
They do not have to be 100% Stampin Up! products, so long as you have some Stampin Up! products  on the creation, you can post onto the board

The community board is increasing in pinners daily, so why not make some new friends, learn new techniques, and get feed back and suggestions on your own paper craft creations
It is a friendly group consisting of Stampin Up! Demonstrators, hobby crafters, and crafters who sell their creations.

If you scroll down to the tutorial, you will also get a sneaky peek at tomorrows blog post ... a super gift box that's good enough to eat!


And here are the products used today
Click on the product icons to view them in more detail

Table built using Product Table Builder by The Crafty Owl - Independent Stampin' Up! Demonstrator.

And now for that Step By Step Tutorial

Begin by making your Card Base by trimming a piece of Thicker A4 Whisper White Cardstock to 10.5 cms x 30 cms
Using the scoring blade on your Stampin Trimmer, score the long side at 15 cms
Fold and run your Bone Folder along the fold to give a crisp edge 
TIP
Always fold away from the score line as this prevents the cardstock fracturing along the fold
Put your card base to one side to prevent contamination by inks

Next, trim a piece of Mint Macaron Cardstock to 10.1 cms x 14.6 cms
You will use this to mat (layer) the card front

Now trim a piece of Whisper White Cardstock to 9.7 cms x 14.5 cms
Cut a small section of a Tea Lace Doily and wrap it around the top right corner of the Whisper White Panel. Adhere to the back of the cardstock using a little Tombow Glue or Some Fast Fuse Adhesive.

Lay this panel face up on a piece of scrap paper or your grid paper

Now for the stamping

TIP
Always select an acrylic block that is closest in size to your clear mount or photopolymer stamp, without it overlapping the sides of the stamp. This will give a more even pressure when stamping, and reduces the likelihood of inking up the parts of the stamp you don't want ink on (usually the outside edges of the rubber stamp)


Mount the sentiment of your choice from the Sassy Salutations Stamp Set in the bottom left of the cardstock, using Tip Top Taupe Classic Ink Pad.

Now select 5 of the hexagonal stamps from the Six Sided Sampler Stamp Set
Mount the first of these onto an acrylic block
Use a combination of Mint Macaron and Tip Top Taupe Classic Ink Pads to make your 'hive' pattern

REMEMBER
to clean your rubber stamp with a Baby Wipe before changing colour, and stamp off any residual ink onto a piece of kitchen paper,
Condition your stamp with Stampin Mist, before putting your rubber stamps away, to prolong their life.
Once you have created your hive pattern, you now need to select two of the stamps you have used, and using the same colour ink pads as before, stamp one of each pattern onto some scrap Whisper White Cardstock making sure you have a flat edge toward the edge of the cardstock to make punching easier.

Now, open your Hexagonal Punch, and with the base of the punch facing upwards (so you can see the hole in the punch, slot your cardstock with the stamped image facing you, between the cutting plates of the punch. Line up the edges with the punch, and PUNCH. Repeat this with your second stamped image.
Pop a couple of Stampin Dimensionals on the back of each of your punched pieces, and adhere them to your card front, lining them up over the top of the stamped images you placed on the card front. This will add dimension to your card.
Finish with using a little Chrystal Effects as a glue to adhere one of the co-ordinating In colour Blossom Accents over the Tea Lace Doily

Adhere the card front to the Mint Macaron Layer (Mat) using Fast Fuse Adhesive or Tombow,
Apply Stampin Dimensionals to the back of the layered card front, and mount onto your Card Base

And there you have it ... your card is made!! Well Done!
Kim xx

REMINDER
You only have until 30 June to Qualify for 2 Free Stamp Sets & Additional Benefits as you begin your Stampin Up! Journey by


If you have any questions on techniques, orders, products 
OR
 Joining my Team as an Independent Stampin Up!  Demonstrator 
contact me via:-

Text: 07759587004 
OR
Order Online 34/7