google-site-verification: google70410e9e92d4fda2.html

Tuesday, 26 April 2016

Timeless Textures with Gold Foil & VellumDie Cut Butterfly Stampin Up! UK


________________________________________

As you scroll down today's blog post, you will find :

·        icons of all the products used to create today's card - click on them to visit my online store;
·        A Video Tutorial
·        & a typed tutorial
Feel free to CASE any of my creative projects (Copy & Paste Everything)


Click on the icons below to view/order any of the products used in today's tutor


Table built using Product Table Builder by The Crafty Owl - Independent Stampin' Up! Demonstrator.


Watch the Video Below

Tutorial

  1. Make your Card Base by Trimming a piece of Tip Top Taupe Cardstock to 30 x 10.5 cms; Score aat 14.8cms; Fold & Burnish
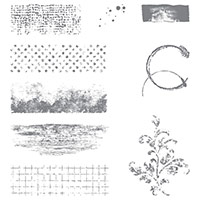
  2. Trim a piece of Very Vanilla Cardstock to 14 x 9.7 cms' Stamp the edges of the cardstock using the frayed paper stamp from the Timeless Textures Stamp Set, using Watermelon Wonder Ink Pad and an inking off technique to remove a little ink from the stamps surface, before stamping onto the cardstock
  3. Using Delightful Dijon Ink Pad, Randomly stamp some of the curled lavender ring stamp, leaving a rough oval of Very Vanilla Cardstock in the middle.
  4. Stamp the oval center section of the cardstock with the Grid lines stamp, using Mint Macaron Ink Pad, and 2nd generation Stamping Technique (i.e. stamp the card twice before re-inking the stamp).
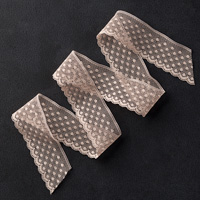
  5. Wrap a piece of Sahara Sant Lace Trim across the centre of the cardstock, and secure on the back of the panel using Tear & Tape. or Fast Fuse Adhesive
  6. Mat onto a piece of Watermelon Wonder Cardstock measuring 14.4 x 10.1 cms; Mount onto the Card Front using Stampin Dimensionals for lift.
  7. Stamp your sentiment onto a strip of Very Vanilla Cardstock  using Chocolate Chip Ink Pad and create Banner Ends using the 1" square Punch
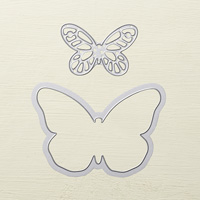
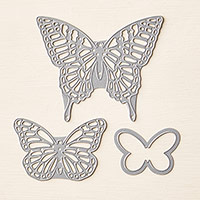
  8. Die Cut a Bold Butterfly Framelit using the Botanical Blooms Vellum Stack papers; and a detailed butterfly using the co-ordinating Thinlet & Gold Foiled Cardstock. Stack then on top of each other after gently folding in half. I used Stampin Dimensionals between the layers.
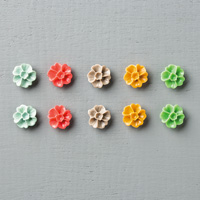
  9. Using Crystal Effects, adhere an In Colour Blossom Accent (resin Flower), Position the topper on the card front, then slot in the sentiment label, using a couple of Stampin Dimensionals
  10. Finish with a few Basic Rhinestones


How to Contact or Follow Me


Kim Tolton, Independent Stampin Up Demonstrator.
Card & Papercraft Tutorials
Please feel free to comment below, and ask away with any questions. You can also find me via the links below


Blog:

Online Store:

Stamping @ The Warren Craft Forum:

Email:
kim.tolton@googlemail.com

youTube


Pinterest:

Google +

Facebook:

Twittert:

Instagram:
@kim.tolton

LinkedIn:


Friday, 22 April 2016

Faux Picture Frame Card Timeless Textures Stampin Up! UK


________________________________________

As you scroll down today's blog post, you will find :

·        icons of all the products used to create today's card - click on them to visit my online store;
·        A Video Tutorial
·        & a typed tutorial
Feel free to CASE any of my creative projects (Copy & Paste Everything)


Click on the icons below to view/order any of the products used in today's tutor

Table built using Product Table Builder by The Crafty Owl - Independent Stampin' Up! Demonstrator.

Watch the Video Below

Tutorial


  1. Card Base:- Trim a piece of Tip Top Taupe Cardstock to 30 x 10.5 cms; score at 14.8 cms; fold & Burnish
  2. Trim a piece of Very Vanilla Cardstock to 14 x 9.7 cms
  3. Stamp the edges of the cardstock with the faux wood stamp from the Timeless Textures Stamp Set using Tip Top Taupe Ink Pad
  4. Over-stamp the border using the faux typeset stamp  and Delightful Dijon Ink Pad; Stamping off some of the ink onto scrap paper before stamping the card stock (stamping off technique)
  5. Using the Watermelon Ink Pad, stamp a flourish in each corner, then using stamping off the page technique (i.e. stamping just part of the image onto the cardstock) stamp around the border, but do not over do this.
  6. Trim a of Very Vanilla Cardstock to 6.5 x 5.5 cms, stamp the sentiment from Trust God Stamp Set, using Soft Suede Ink Pad; Mat onto a piece of Watermelon Wonder Cardstock measuring 5.9 x 6.9 cms using Fast Fuse or Tombow Adhesive
  7. Using a Paper Piercing Tool. make a small hole in the top two corners, and thread with a length of Linen Thread and tie a knot, adjusting the length according to where you are going to place the topper on the card
  8. Position the topper at an angle on the stamped cardstock (do not stick down at this stage) and using your paper piercing tool, make a hole where the brad will go to act as the hanger for the  topper..
  9. Use the Antique brad to secure the linen thread in place, add Stampin Dimensionals to the back of the topper and position on the cardstock.
  10. Add Stampin Dimensionals to the back of the larger panel and mount onto the card base.
  11. Finish with some Basic Rhinestones

How to Contact or Follow Me

Kim Tolton, Independent Stampin Up Demonstrator.
Card & Papercraft Tutorials
Please feel free to comment below, and ask away with any questions. You can also find me via the links below


Blog:

Online Store:

Stamping @ The Warren Craft Forum:

Email:
kim.tolton@googlemail.com

youTube


Pinterest:

Google +

Facebook:

Twittert:

Instagram:
@kim.tolton

LinkedIn:


Tuesday, 19 April 2016

I Can Hardly Believe it, But Stampin Up! Has Published this Years Retiring List

Stampin Up!The Retiring List is Here
But you need to be quick if you want to take advantage of the discounts!


The Retiring List is updated daily, as once stocks of an item are gone, they are gone for good.
The list is Too Huge to list on here
BUT
You can browse the list to your hearts content via my website

If you are in the UK, and need assistance with choosing or ordering the products on your wish list, just drop me a line


or Text 07759587004

Sunday, 17 April 2016

Helping Me Grow Watercolour Technique Stampin Up! UK


Above is my Upline, Donna Keene (left) and myself (on the right) at yesterdays Stampin Up! On Stage Live Regional Event for Demonstrators, at The International Conference Center, Telford, UK.

We had a great day, and shared lots of card swaps (watch out for those). met up with friends, and came away with 3 free stamp sets from the up-coming Annual Catalogue (2016-2017) so we now have plenty of time to play with the new products before we can begin sharing samples with you. We also came home with a copy of the new catalogue, and boy do I have a wish list or what??!!?? he he

And now for today's Card Technique


Today's card brings you a Watercolour Technique using an Aquapainter and the In Colour Ink Ink Pads from Stampin' Up!
I have only recently become good friends with these in-colours. It has taken me a year of avoiding using them, and a project I have been working on with Stampin' Up! to get to know these intense, bright colours intimately. And I have to admit, that avoiding this colour collection was a grave error on my part! So over the next couple of weeks, I am going to be sharing projects with you that showcase this colour collection. The main stamp set is Helping Me Grow, with just a touch of the small splatter stamp from the Butterfly Basics Stamp Set, to give some texture to the background. There is also a nice shimmer to this card, and that was achieved by using Stampin Up!'s Shimmery White Cardstock. It makes a fresh change to Watercolour Paper, and is robust enough to stand up to a Watercolour Technique, so long as you do not saturate the card with water.
________________________________________

As you scroll down today's blog post, you will find :
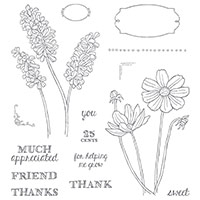
·        icons of all the products used to create today's card - click on them to visit my online store;
·        A Video Tutorial
·        & a typed tutorial
Feel free to CASE any of my creative projects (Copy & Paste Everything)


Click on the icons below to view/order any of the products used in today's tutor
Table built using Product Table Builder by The Crafty Owl - Independent Stampin' Up! Demonstrator.


Watch the Video Below

Tutorial

  1. Trim a piece of Tip Top Taupe Cardstock to 10.5 x 30 cms; score the long side at 14.8 cms; fold & Burnish
  2. Trim a piece of Shimmery White Cardstock to 14 x 9.7 cms; stamp the large flowers using Archival Black Ink Pad.; Using your aquapainter, use the Watermelon Wonder for the flowers & Cucumber Crush Ink Pad for the leaves and stems. Remember to squidge the ink pads firmly before opening, to transfer ink from the ink pad, into the well. You can then pick up small amounts of ink from the well as you paint.
  3. Using Tip Top Taupe, stamp the decorative corner stamp in each of the 4 corners; Using the small splatter stamp from Butterfly Basics Stamp Set, and the Watermelon Wonder Ink Pad, create a subtle splatter background for the card.
  4. Once dry, mat onto a piece of Watermelon Wonder Cardstock measuring 14.4 x 10.1 cms Mount onto your card base.
  5. Trim a strip of Mint Macaron cardstock to 10 x 1.5 cms, stamp with the dotted line stamp using Tip Top Taupe Ink Pad, use the banner punch to create banner ends(feed the card through the top of the punch and guide between the cutting plates and punch - repeat with the opposite end.
  6. Punch the Birthday sentiment from the Petite Pairs Stamp Set using Tip Top Taupe ink Pad onto a scrap of Shimmery White Cardstock, and punch out using the large oval punch.
  7. Trim a small piece of Tea Lace Doily using Paper Snips.
  8. Now to assemble. Using a little Tombow Liquid Glue, stick the piece of doily where the stems overlap at the bottom of the card front.; Attach the banner above this, overlapping a little, using Stampin Dimensionals; finally, pop a couple of Stampin Dimensionals on the back of the sentiment label, and mount at an angle overlapping the doily and the banner


How to Contact or Follow Me


Kim Tolton, Independent Stampin Up Demonstrator.
Card & Papercraft Tutorials
Please feel free to comment below, and ask away with any questions. You can also find me via the links below


Blog:

Online Store:

Stamping @ The Warren Craft Forum:

Email:
kim.tolton@googlemail.com

youTube


Pinterest:

Google +

Facebook:

Twittert:

Instagram:
@kim.tolton

LinkedIn: