
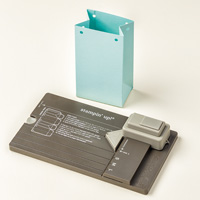
Today I am sharing another Gift Bag made using the Gift Bag Punch Board (GBPB)
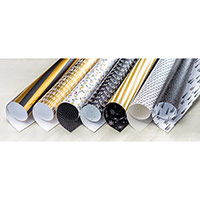
This time I have used a combination of the Winter Wonderland Specialty Designer Series Paper (DSP)
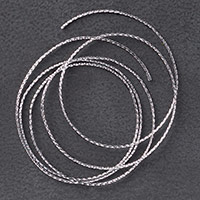
I went with q Black, White & Silver theme, using White Shimmery Cardstock for the Tag, and White Organza Ribbon, with Silver Cording Trim
I also discovered, that the reverse punch can also be used to make the hole in your gift tag ... witch means it is even quicker to make, and even less products needed,
There is, of course, a list of all the products used today a little further down the page, and if you click on the icons, it will take you straight to that item in my online store (UK only)
Below that is the VIDEO tutorial
And below that is the Typed Tutorial, so whether you are a visual or auditory learner, I should have you covered!
I hope you enjoy today's offering, and feel free to leave comments.
If you follow the Pinterest board on the side bar of this blog, I will invite you to begin pinning your own photo's (crafters only please )

Click on the product icons below to view or order the item via my online Demonstrator Website
 |  |  |  |  |  |  |
 |  |  |  |  |  |  |
 |  |  |  |  |  |
Watch The Video Below
- Trim your Piece of Winter Wonderland Designer Series Paper to: 10" x 8"
- Remeber to put your paper into the punch upside down if the paper is in one direction
- With the Long Side at the top of the punch; Line up the Designer Series Paper with the start line & Punch
- score the Horizontal line & the Large Vertical Line
- Line up the Large score line with the Start Line & Punch
- Score the Horizontal, Triangle the TWO Side score lines
- Line up the second Side Score Line with the Start Line & Punch
- Repeat steps 4 - 7
- Run a strip of Tape & Teat Adhesive down the narrow long tag
- Run a couple of pieces of Tape & Tear on one of the wide base tabs
- Fold all score lines using just your fingers & adhere the box together
- Gently pinch in each side piece of the bag, allowing the 'triangle' to form at the lower half of each side of the box
- Use the Reverse Punch on the GBPB to make holes in the top of the bag
- Thread ribbon through holes & tie a bow
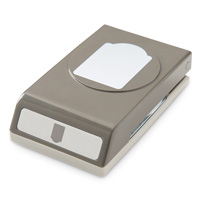
- Stamp your sentiment from the Merry Everything Stamp Set using the Archival Basic Black Classic Ink Pad & punch out using the Note Tag Punch (lean your stamp with Stazon Ink Cleaner)
- Make a hole in the top of the Tag using the Reverse Punch on the GBPB
- Thread with some Silver Cording Trim & tie onto your ribbon bow,

Kim Tolton, Independent Stampin Up
Demonstrator.
Card & Papercraft Tutorials
Please feel free to comment below,
and ask away with any questions. You can also find me via the links below
Blog:
Online Store:
Stamping @ The Warren
Craft Forum:
Email:
Pinterest:
Google +
Facebook:
Twittert:
Instagram:
@kim.tolton
LinkedIn:
No comments:
Post a Comment