google-site-verification: google70410e9e92d4fda2.html
Showing posts with label my digital studio; punches; punches. Show all posts

Tuesday, 31 March 2015

Sale A Bration 2015 Week 12 Day 7 Cheers To Love

Bokeh Technique

I have seen the Bokeh Technique popping up all over the internet, and although my hubby is big with his photography and has used this technique in that medium, but it never occurred to me to give it a co with my card making.

So here it is ... and I LOVED playing with the Circles Mask from Stampin up! with White Craft Ink and  sponge dauber.


Begin by sponging your background onto a 10 cms x 14.3 cms piece of Whisper White cardstock.
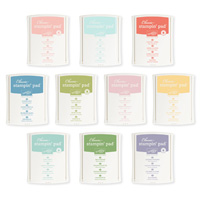
I used a Stampin Sponge and each of the Subtles  Collection Classic ink pads to create your multi-coloured background.
Then use a little Washi Tape to hold the piece of cardstock down, and also tape down the circles Mask. 
Ink up the sponge dauber with White Craft Ink and work it into the circles. Keep moving the mask after giving the ink a chance to dry, overlapping the circles you have already formed to create a multi-tonal background.
Trim a piece of White Vellum to 14.3 cms x 10 cms and adhere the Vellum to the card front using Glue Dots
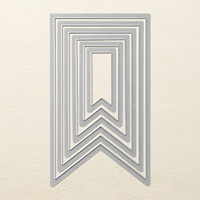
Use the Banners Framelits to make one large and one small banner from Marina Mist and Blushing Bridge cardstock respectively.
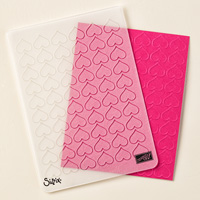
Dry emboss the large banner with the Happy Hearts Textured Impressions Embossing Folder.
Attach the banners as shown above.
Cut a Tea Lace Doily in half and overlap it at the top of the card front and stick in place.


Finally Stamp the BRIDE stamp onto a piece of Whisper White cardstock using Black Stazon ink and adhere in place using a little Tombow Multi-Purpose Glue.
Attach the card front to an A6 White Card Blank,
Time for you htp have some fun ... go CASE away!


If you would like to join my Pinterest community board where you will be able to post your own Stampin Up creations. Simply email me and I will add you to the board

If you would like to ask any questions on techniques or products, or anything else related to my blog posts, please feel free to ask away
Happy Stamping
Kim xxx

Contact me to order:
Telephone/Txt: 07759587004
Email: kim@stampinupatthewarren.com

Or Order Online 24/7
                                                                                               
Or Click on the image of the products used below and it will take you straight to my online store
Table built using Product Table Builder by The Crafty Owl - Independent Stampin' Up! Demonstrator.


Saturday, 28 March 2015

Sale A Bration 2015 Week 12 Day 4

Since the Wedding Season is almost upon us, I thought it would be nice to do some features on wedding goodies, and I am beginning with today's Craft Card Invitation base, with an emboss resist Bride to be Wedding Shower Invitations

I adore the Postcard stamp from Stampin Up! In fact I have 2 ... one in Clear Mount and the other in Wood Mount
This is my basis for many of the wedding invitations orders I make up.

I have coupled the Postcard stamp with the Girls Night Out Stamp Set


The Postcard was stamped in Chocolate Chip ink onto Very Vanilla cardstock. This then needs to be Matted (layered) onto a piece of Kraft Cardstock, measuring 0.5 cm wider and longer than the postcard panel.

Next, stamo you Bride to Be with Versamark ink, stamp onto the Very Vanilla cardstock.
Dust with White Embossing Powder and gently shake off the excess, Heat with your Heat tool, only until the embossing powder melts.

Repeat on the opposite side of the Postcard but heat emboss the " Its A A Bridal Shower Sentiment"


Next, sponge the Bride and the Sentiment with Blushing Bride ink until you achieve your desired look.
Attach the Postcard card front to the Kraft Cardstock
Finally, attach the card front to an A6 Whisper White Card Blank.

And that is it. I try to keep Wedding invitations quite simple but stylish as generally they have to be make in bulk.

I hope you enjoy todays card and pop over to my Stampin Up At The Warren Pinterest page (Kim Tolton) and once you request to join my ommuity Page, you will be able to post your own
 Stampin Uo Creations


If you would like to join my Pinterest community board where you will be able to post your own Stampin Up creations. Simply email me and I will add you to the board
kim@stampinupatthewarren.com

If you would like to ask any questions on techniques or products, or anything else related to my blog posts, please feel free to ask away
Happy Stamping
Kim xxx

Contact me to order:
Telephone/Txt: 07759587004
Email: kim@stampinupatthewarren.com

Or Order Online 24/7
                                                                                               
Or Click on the image of the products used below and it will take you straight to my online store
Table built using Product Table Builder by The Crafty Owl - Independent Stampin' Up! Demonstrator.


Friday, 27 March 2015

Sale A Bration 2015 Week 12 Day 3


Cheers To Love
is todays Stamp set for this lovely aperture card using an ombre  technique with the assistance of Sale A Bration Freebie (with every qualifying  £45 order) Irresistibly Yours Specialty Designer Papers

This stamp set is perfect for those of you looking for a Homemade Wedding, including invitations, congratulations cards & my favourite ... Happily Ever After which is part of the stamp I have used on today's card.

I have used Blushing Bride ink, but you can tailor the colour, to that chosen by the Bride and Groom.
But you are going to have to be fast, as Sale A Bration ends 32 March 2015 at which point, this wonderful Emboss Resist paper pack will be no longer available!


Begin by sponging the cardstock. there is a variety of emboss resist papers in the pack, so chose your favourite. Begin sponging from the bottom up, using circular motions, bleeding the colour out as you go up the sheet. You can keep it subtle, or keep building on the ink by sponging over repeatedly without causing the surface of the cardstock to bobble. Once you are happy with the tonal finish, wipe over the paper with a piece of kitchen towel to remove any residual ink on the resist part of the paper.

Next, turn the paper over and draw a cross on the back to allow you to align the Oval Framelit (measure up the framelit against the Stamp for the best size. And Die Cut a central Oval. Best results are gained using the Magnetic Platform to hole your die and cardstock in place during die cutting.
Do not dispose with the Oval you die cut, as you are going to replace this in a moment.

Stamp your sentiment onto White Vellum cardstock using Black Stazon ink (fast drying), but you could also heat emboss the sentiment if you prefer.
Once dry, die cut the sentiment out using the next soze up Oval Framelit.
There is two ways of adhering the sentiment panel to the Aperture.
The first is to use the outside narrow border from your Stampin Dimensionals packs and mold them around the curves of the Oval to the back of the emboss resist paper. Alternatively, Stampin Up have Shaker Frames  you can purchase, (basically longer, narrower rounds of the Stampin Dimensionals), and work these around the aperture.

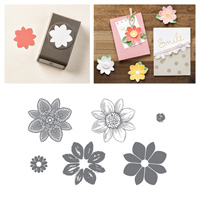
Next is a bot of Heat Embossing onto Vellum usng the lacy flower stamp in Petal Potpourri Stamp Set. Use Ink up the stamp with Versamark Ink and stamp into White Vellum. Dust with White Embossing Powder and shake off the excess. Heat set using a Heat Tool. Punch out the flowers using the Medallion Flower Punch. You want 3 flowers, each cut in half. Adhere these in two places around the oval (see photo's) using Glue Dots.
Turn the panel over so you have the back of the paper facing you, and replace the doe cut Oval on top of the Vellum and use a little tape to adhere in place, Attach Stamping Dimensionals in each corner, turn the panel over and attach to your White Card Blank.

Finish by adding a Something Borrowed Embellishment in top of each Glower.
And there you have it. A Card for every Bride to love!


If you would like to join my Pinterest community board where you will be able to post your own Stampin Up creations. Simply email me and I will add you to the board
kim@stampinupatthewarren.com

If you would like to ask any questions on techniques or products, or anything else related to my blog posts, please feel free to ask away
Happy Stamping
Kim xxx

Contact me to order:
Telephone/Txt: 07759587004
Email: kim@stampinupatthewarren.com

Or Order Online 24/7
                                                                                               

Or Click on the image of the products used below and it will take you straight to my online store
Table built using Product Table Builder by The Crafty Owl - Independent Stampin' Up! Demonstrator.