
Build A Bouquet The Papercraft Way
Today is the second half of the Berry Basket / Build a Bouquet Project
If you haven't already read it, take a peek at yesterdays tutorial to find out just how easy it is to make you own Berry Basket
And today I am going to give you a quick tutorial on making paper flowers to produce your own papercraft bouquet

Products needed for todays Project
Build a Bouquet Photo-polymer Stamp Set
Build a Bouquet Bigz Die
Spiral Flower Die
Butterfly Thinlets Die
A Selection of cardstock & Decorative papers (use up those scraps)
Big Shot with Extended Cutting Plates
Hot Melt Glue Gun
Hot Melt Glue Sticks
Bone Folder
Floristry Wire
Green Floristry Tape
Making paper flowers is much easier than you think, especially if you use a combination of Dies and punches, but today I am just looking at Die Cut flowers and petals.
The beauty of the Build a Bouquet Die is that you get a selection of different flowers and petal sizes, plus some leaves, all in one place.
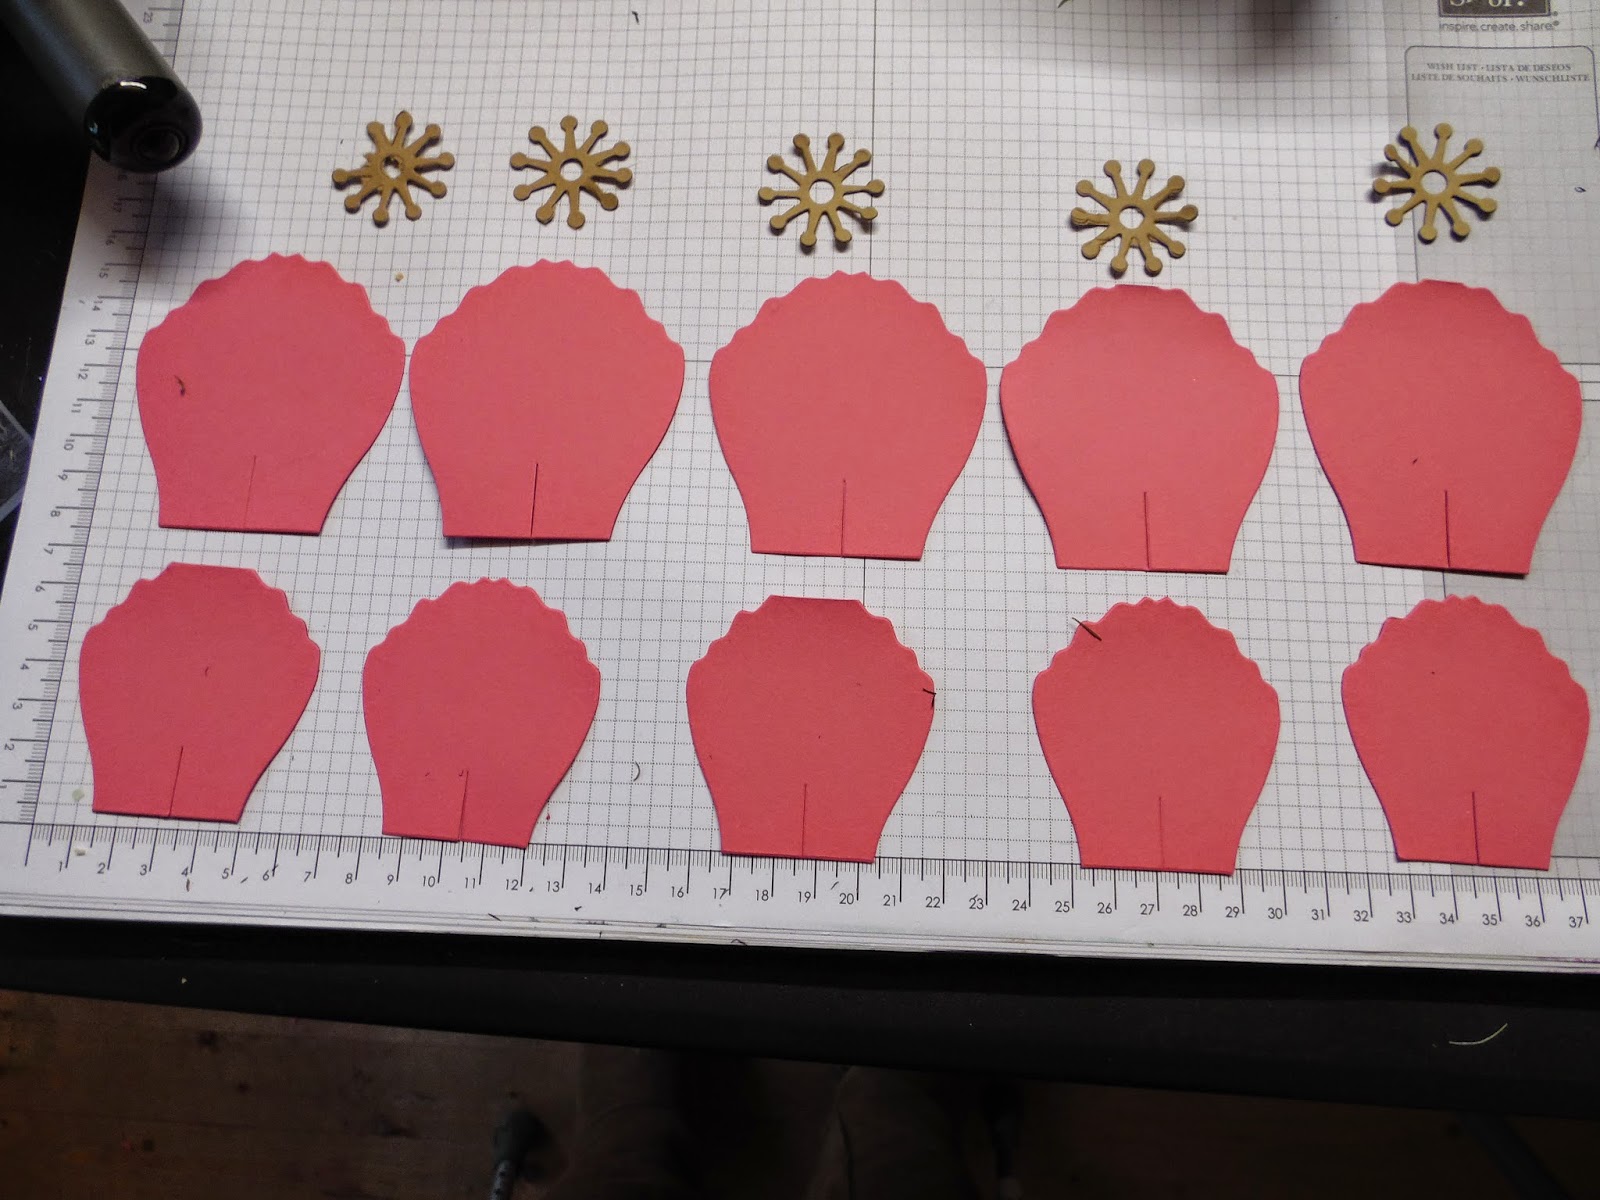
A basic flower has approximately 5 petals per flower
I decided to make some flowers using the coordinating stamp set. So I die cut the petals from Strawberry Slush cardstock, and stamped the petals with strawberry slush ink for a tone on tone effect.
You will notice that the die cuts a slit at the base of the petals., this is so you an create a rounded effect. To get the best life like effect, you want to very LIGHtLY spritz the cardstock (after stamping) and then scrunch the petal in your hands. open it back up and flatten it out. Allow the petal to dry. Repeat with all the petals. Once dry, use a bone folder to gently curve the petals.

Now for the glue gun. Use small dots of the melted glue sticks to secure the fold at the bottom of each petal. Once you have completed this with each of the petals, you then need to build your flower by layering up the petals to create the flower, using the glue gun again.

I used Baked Brown Sugar cardstock to die cut the centres of each flower, and attached them using very tiny dots of glue from the glue gun. Add leaves to the back of each flower and secure with the glue gun. And you can see the result is something that looks like a peony or an anemone

The next flower is using either the Pansy Punch or the pansy flower on the Build A Bouquet Die. Now these do not come with a cut already made for you, so you need to do this yourself using a pair of paper snips, (after giving the cardstock the spritz, scrunch, flatten, dry, curl routine.)
Overlap two petals and secure using the glue gun. Then use your bone folder to create some curves. The do not all have to go under ... this is your chance to play.
For the centre of the flower you could use brads, buttons, or some of the resin flowers in the Artisan Embellishment kit
I have used some retired resin floral accents, as I hate waste and try to use as much of my odds and ends of crafting supplies as I can!

You will notice roses in my Berry Basket, and these were made by using the Spiral Flower Die and gave them the the same technique of spritz, scrunch, flatten, dry and curl, If you haven't got a quilling tool, I find using your scoring stylus works just as well to get your rose started, and then I swap to rolling up the flower between my finger and thumb.

Now to build your flowers
Twist 4 lengths of floristry wire together. Fold the wire in half, leaving a loop at the loop.
Twist the two lengths together to create one strong 'stem'/ Twist Green floristry tape around the stem. Repeat for all your flowers
Turn your flowers face side down
Use your glue gun to attach the stem to the back of the flowers by adding a generous blob of glue to the loop, give it a wiggle to get the wire embedded in the glue, hold until the glue starts to set.
Repeat with all your flowers.
There is a little extra glueing to be done for the spiral flower (rose
You will notice that there is a figure of eight shaped base to this flower. You need to glue the base of the quilled flower to the base and then attach the wire as above.
The butterfly was die cut using the new intricate Butterfly Thinlet die from the Spring/Summer catalogue. I attached the sire to the back of this in the same way as with the flowers.
Use some Floristry Tape to tape your bouquet together so you have just one short'ish stem
I place some none soak Oasis into the bottom of the berry basket and insert your bouquet onto this, then play with the bouquet to arrange it to your liking.
I stamped the sentiment (from the Build A Bouquet Stamp Set) and die cut using the Chalk Talk framelits. I created the mat by die cutting two more of the labels from cardstock, I cut one in half on the vertical, and the other in half on the vertical. Then use a tiny amount of Tombow Multi-Purpose Liquid Glue to the corresponding pieces of the stamped label allowing 2-3 mm of the coloured cardstock showing.
Once you get the hang of it (and instructions do come with the Die s), try experimenting with Filter Paper, Designer Series Papers (DSP), Vellum, book pages, tissue paper etc
I would love to hear how you get along with your own bouquets, so please do let me know
P.S. Click here for the tutorial with tips on getting the best results when die cutting intricate dies

If you
would like to join my Pinterest community board where you will be able to post
your own Stampin Up creations. Simply email me and I will add you to the board
If you would like
to ask any questions on techniques or products, or anything else related to my
blog posts, please feel free to ask away
Happy Stamping
Kim xxx
Contact me to
order:
Telephone/Txt:
07759587004
Email: kim@stampinupatthewarren.com
Or Order
Online 24/7
Or Click on the
image of the products used below and it will take you straight to my online
store
 |  |  |  |  |
 |  |  |  |  |
 | 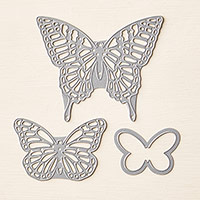 | 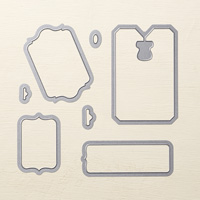 |  |  |
Table built using Product Table Builder by The Crafty Owl - Independent Stampin' Up! Demonstrator.


No comments:
Post a Comment