google-site-verification: google70410e9e92d4fda2.html
Showing posts with label my777; punches. Show all posts

Saturday, 27 September 2014

Stamp Set Showcase Week 11 (7)


WALK IN THE WILD STAMP SET

I have had a mixed day today, some sad family news, AND a trip to the Royal National Orthopaedic Hospital with out eldest son and coming away with more unknowns
Sometimes the challenges families face are difficult ones, but as long as families stick together and love one another, all will work out in the end ... whatever that end may be ...that is my hope as a Mum anyway
I am sure I am not the only Mum out there to feel this way?

And so when I feel the worries taking over .... I create
It helps me make my thoughts orderly again, and gives me breathing space to get myself together again, so I can be strong for my family

So at the end of another weeks Stamp Set Showcase
here is todays Card Make
A Calm and serene card with the help of  the Work of Art Stamp Set
It is also my debut of the Frosted Sequins Accessory pack from this years seasonal mini catalogue


So my regulars will know well, you need to begin by making your 6" card blank by trimming a piece of Whisper White cardstock to 15cms x 30cms
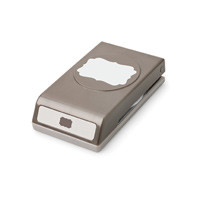
Round the corners using the corner punch
Score the long side at 15cms, fold along the score line and create a nice crisp fold by  burnishing with your bone folder.
Next, trim a piece of Baked Brown Sugar cardstock to 14.5cms x 14.5cms; round the corners of this piece of cardstock too
Dry emboss this piece of of cardstock with the Argyle Textured Impressions Embossing Folder (TIEF)
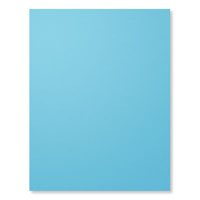
Trim a piece of Tempting Turquoise cardstock to 14cms x 14cms & round the corners


Trim another piece of Whisper White Cardstock to 13.5cms x 13.5cms
And ye, you have it ... round the corners using your punch.

Stamp the arch stamp from the Work of Art stamp set using Soft Sky Ink
Over stamp this with the Stag/Moose in Soft Suede ink
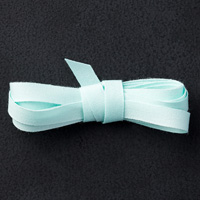
Wrap a piece of 1/4" Pool Party Cotton Ribbon and tie a bow
On a seperate piece of Whisper White cardstock stamp the CHRISTMAS WISHES stamp from the Ornamental Pine stamp set (also in the seasonal catty) using Soft Suede ink
Die cut the sentiment using the Project Life Cards & Labels Die
Die cut a couple of extra labels from Baked Brown Sugar cardstock
Cut one in half vertically and the other in half horizontally
Attach the corresponding pieces to the reverse of the sentiment label to create a layered label. I find Tombow MP Glue works best for this as it gives you a few seconds to position the pieces before it sets

Layer up the cardstock
Then add the sentiment label using Stampin Dimensionals & a couple of Snow Flake die cuts (also in the sequin pack). I secured mine with mini brads.
Attach a few rhinestones using Glue Dots
I hope you like?


If you have any questions on techniques, orders, products etc., please ask away by adding comments below, or you can contact me via:-

Email:       kim@stampinupatthewarren.com
Telephone/Text:07759587004
OR

Alternaitvely, you can click on the images of the products used below and it will take you straight to my store
Table built using Product Table Builder by The Crafty Owl - Independent Stampin' Up! Demonstrator.


Monday, 11 August 2014

Stamp Set Showcase Week 5 (3)

Day Three of this weeks Stamp Set Showcase

Oh My Goodies

And todays project is a gift box. Sam from Pootles.co.uk Designed the Box, and I have adapted it my way, going with a Mint Choc Chip colour theme.

The box will take 2 small Yankee candles, Cosmetics or similar
I have coupled this with the medium sized stamp in the Flowering Flourishes stamp set.


To begin, trim a piece of Wild Wasabi cardstock to 20cms x 29cms.
Randomly stamp this piece of cardstock using Chocolate Chip ink,
Stamp the 'oh my goodies' stamp onto Whisper White cardstock using Chocolate chip cardstock.
Die cut the label with the smallest die in the Deco Label collection Die
Then die cut a piece of Wild Wasabi cardstock to the next size up Die in the Deco Label Collection
Apply Stampin Dimensionals to the reverse of the stamped sentiment, attach this to the Wild Wasabi Label
And then apply dimensionals the the reverse of the Wild Wasabi label. Put to one side until dry.


Get out your scoring tool with the Metric plate and get your Large piece of trimmed & stamped Wild Wasabi cardstock 
score the long side at 1, 6, 12, 17, 34 & 28cms
Score the short side at 5 & 15cms
Fold and burnish  with your bone folder all the score lines

Now is the careful bit
Rotate the cardstock so you have the 1cm score line at the bottom (i.e. nearest to you) 
cut to the first score line on 12cms score line & the17cms score line
repeat on the opposite side
Fold the box up and stick using Tombow MP Glue
Gently Pinch together each side 
Hole Punch two holes at the top of the box. Make sure you are punching through the folded areas for best results
Add some ribbon or trim.
Stick the sentiment label to the card using the Stampin Dimensionals you applied to the reverse of your label earlier.

How quick and simple was that??

Table built using Product Table Builder by The Crafty Owl - Independent Stampin' Up! Demonstrator.


Happy Stamping 
Kim xxx

Before you go ... through August, by a Big Shot and you could qualify for a free stamp set. Visit my website for more details, (links below) and watch this video to see what you are missing


Contact us for details of  our bespoke Handmade Greetings Cards, Wedding Stationary, Gift Boxes and Favours:
Email: stampinupatthewarren@hotmail.co.uk
Phone: 08432896848
Text: 07759587004

Or Order your Stampin Up Products online 24/7 at


Saturday, 5 July 2014

Handmade Wedding Favours Stampin Up Style


My son and (now) Daughter In Law wanted to very much have a homemade wedding. And so, as a family we set to to ensure they had their wish come true, with homemade invites, decorations, bouquet and bridesmade posies. Even the button holes were handmade paper roses and, of course, there were the favours.

Can you see the sneek peek from yesterday? yes??


The theme used throughout was from one stamp set, and it is top of my list of Must Haves because it is just so versatile. If you add the Stamp-a-majog tool to the mix, you have even more stamping options available to you.

And the stamp set it ...

FOUR FRAMES

Perfect for labels, tags, greetings cards, scrapbooking and more. I particularly like using it in conjunction with the Creatively Yours stamp set.


But these favours were simple, with hand stamped and punched frames and hand written messages for each recipient, made using simple clear Cellophane wrapping and some red curling ribbon,  these favours were one of a kind. I hope you like them too?


Table built using Product Table Builder by The Crafty Owl - Independent Stampin' Up! Demonstrator.
To enquire on ordering, joining Team Warren, or our Bespoke Handmade Card & Gift Box service, please contact us:

Phone: 08432896848
Text: 07759587004