google-site-verification: google70410e9e92d4fda2.html

Monday, 28 September 2015

The First of this years Christmas Card Classes

Today was the first of this years Festive Card Classes
And it went great. All 5 cards completed in record time
Well Done Ladies!
And here is a selection of the cards made
So if you live in Essex, UK, and fancy learning a new skill,  or expanding your existing ones
And have some fun making Christmas Cards (or non-Festive cards if you prefer)
Then contact me to pop along for a chat and see what I can offer
Classes range from 1:1 and up to 8 (maximum). 
Classes are held in my purpose built,Workshop

kim@stampinupatthewarren.com
or
07759587004

Keep and eye out for the tutorials
They will be popping up over the next week or two


Join my Pinterest community board,
where you can share your own Stampin Up Creations?
Follow the Pinterest Board on the left hand side bar and I will send you an invitation to follow the Stampin Up! At The Warren Community Pinterest Board

If you have any questions on techniques or products, or Joining my Team/discussing the business opportunities Stampin Up! Can offer
Contact Me

Or telephone/text 07759587004

Happy Stamping
Kim xxx         

Order your Craft Supplies on line 24/7

http://www.stampinup.net/esuite/home/stampinupatthewarren/

Sunday, 27 September 2015

Reason for the Season in Cherry Cobbler


The card I am sharing with you all today, is one of my favourites
Not least because the Stamp Set and c-ordinating Punch come as a Bundle, saving you 15% on the retail price when you order the BUNDLE item number 140847

Be;ow you will find the product icons, click on the icons to view them in more detail, or place your order.
Alternatively,
Table built using Product Table Builder by The Crafty Owl - Independent Stampin' Up! Demonstrator.

Scroll a little further down for the tutorial


And here is the tutorial
  1. Begin byMaking your card base by trimming a piece of A4 Thicker Whisper White Cardstock to  6" x 7", use the scoring blade on your Stampin Trimmer to score the long side at 6"., Fold along the score line and run your bone folder along the crease to create a nice crisp fold.
  2. Trim a piece of Whisper White Cardstock to 12 cms x 12 cms. Dry emboss this panel using the Softly Falling Testured Impressions Embossing Folder (TIEF), by running it through your Big Shot Die Cutting Machine.
  3. Apply a couple of strips of Fast Fuse Adhesive to the back of the cardstock, and mat (layer) this panel onto a piece of Cherry Cobbler Cardstock measuring 12.4 cms x 12.4 cms
  4. Wrap around a piece of Gold Satin Ribbon and secure on the back of the panel using a little Fast Fuse Adhesive. Stamp your sentiment using Early Espresso Classic Ink Pad and die cut using the best fitting Die from the Tags & Labels Framelits Dies Pack; Use the Magnetic Platform for best results then running through your Big Shot. Apply Stampin Dimensionals to the reverse of the Label and adhere to the top right of your card base.
  5. Punch out 6 of he large  Petals using the Festive Flower Builder Punch (3 for each layer); adding a Stampin Dimensionals to the back of each flower This will give added dimension to the flower.
  6. Punch out 3 of the large flowers from the same punch, using Pear Pizzazz Cardstock. Stamp these using the co-ordinating Reason For The Season Stamp Se & Mossy Meadow Classic Ink Pad, layer these up as above and adhere the flower with leaves to your card front.
  7. Add a couple of Glue Dots to the back of one of the Snowflake Elements Embellishments, and attach firmly to the centre of the Poinsettia.
  8. Applu some Fast Fuse Adhesive to the back of the Card Front and attach to the centre of your 6" square Card Base.

Join my Pinterest community board,
where you can share your own Stampin Up Creations?
Follow the Pinterest Board on the left hand side bar and I will send you an invitation to follow the Stampin Up! At The Warren Community Pinterest Board

If you have any questions on techniques or products, or Joining my Team/discussing the business opportunities Stampin Up! Can offer
Contact Me

Or telephone/text 07759587004

Happy Stamping
Kim xxx         

Order your Craft Supplies on line 24/7

http://www.stampinup.net/esuite/home/stampinupatthewarren/

Saturday, 26 September 2015

Halloween Preparations

Halloween is just a month away ... uh huh ,,,, it certainly is
If you have children, or even if you don't but are thinking of organising something fun for Halloween then you might just enjoy watching this video from Stampin Up! UK


Once you have watched the video, pop over to my Demonstrator Website To order your products By 


Join my Pinterest community board,
where you can share your own Stampin Up Creations?
Follow the Pinterest Board on the left hand side bar and I will send you an invitation to follow the Stampin Up! At The Warren Community Pinterest Board

If you have any questions on techniques or products, or Joining my Team/discussing the business opportunities Stampin Up! Can offer
Contact Me

Or telephone/text 07759587004

Happy Stamping
Kim xxx         

Order your Craft Supplies on line 24/7
http://www.stampinup.net/esuite/home/stampinupatthewarren/

Friday, 25 September 2015

Embellished Ornaments Bundle

Oh dear .... I ,missed yesterdays post! It was a bizarre day as it began with a follow up appointment with my Pain Consultant asking how I was getting along with my new Spinal Cord stimulator and 'did I need re-programming' ... This But before this, the outpatients department denied any knowledge of my having an appointment  with my Consultant & the research nurses (I am participating in a research study, looking at the impact of stimulation for pain management on quality of life and activities of daily living) The end hope is that many more people will be offered such treatments for the management of severe chronic pain. Anyhow, I spoke on the phone to one of the research nurses, and they were expecting me, and directed me to the Day Unit where I was seen. 
I told them everything was hunky dory, and I was 100% happy with my new stimulator, having returned to all my 'normal' daily activities.
This doesn't mean that I am pain free by any means, but between stimulation, and learning to live within my limitations gives me a good quality of life, with the aid of my hubby, who is my 'Carer'.

So home we came, and I started cleaning out my guinea pigs (cavies) and 'POP' I felt the joint on right side of my pelvic bone dislocate .... and I couldn't move, I couldn't even straighten up from the position I was in, and there I am at the very bottom of the garden, only one elbow crutch to hand. I managed to get my hubbies attention eventually, and he got me my perching stool, and sat me down with screams of agony coming from my mouth, and tears streaming from my eyes. Now this is sadly a common occurrence, but I can usually pop the joint back by doing stretches to open the pelvis (my lumber spine is unsupported as they could not put in any metal work after my spinal injury many years ago.. ) And all the stretching achieved was to create more screams, and then my left leg and buttockk (my 'BAD' side) decided it was going to go into major spasm .... caused by the pressure on my spinal cord.

My hubby ran to get my wheelchair and got me back indoors, and in my reclining chair, popped some additional morphine in my mouth, and there I stayed until bed time. 

Although I had a very unsettled night, I was able to turn up my stimulation to mask the pain somewhat, and I an still very tender, I can get about with my crutches.

So now you know why I didn't post yesterday. I did try putting the laptop on my lap as I sat in my recliner, but my back wasn't having any of it, and then the additional morphine just sen me off to sleep!!

Don't et me wrong, I am not winging .... I ove my life, and I totally accept that these episodes come and go, and often it is my fault for not listening to my body starting to moan and groan that it has had enough, and I decide I will 'do just a little more' he he .... I think it is a woman thing .... or perhaps I am just too OCD .... but I do love to leave things clean and tidy he he

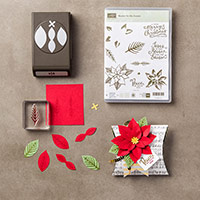
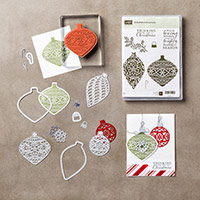
So after the story of yesterday, Today I am sharing with you a super quick card to make using one of the Bundles in Stampin Up!'s Autumn/Winter Seasonal Catalogue.
I have left the baubles swinging free, just as they would on the Christmas Tree


And this is how I made the card
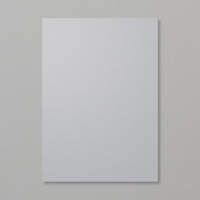
  1. Begin by making your 6" Square Card Base by trimming a piece of Thicker A4 Whisper White Cardstock to 6" x 12". Score the long side at 6" using the scoring blade on your Stampin Trimmer. Fold along the crease and use your Bone Folder to give a nice crisp fold.
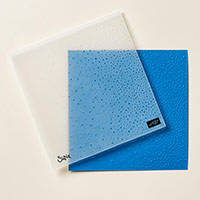
  2. Trim a piece of Winter Wonderland Designer Vellum Stack to 14
  3. 6 cms x 14.6 cms (I went with the gold crackle design to co-ordinate with the baubles); apply some Fast Fuse to the back of the foiled vellum and adhere to the front of your card base.
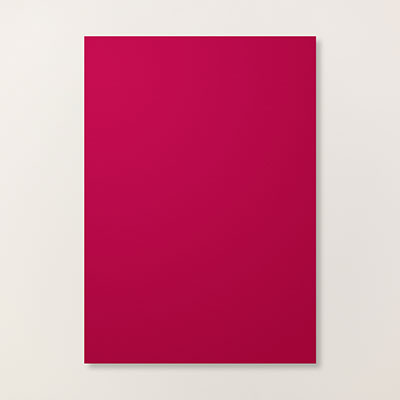
  4. Trim a piece of Whisper White Cardstock to 12cms x 12 cms; Trim a piece of gold dotty foiled Vellum from the same Vellum Stac to 13.8  cms x 13.8 cms. Apply a couple of strips of Fast Fuse Adhesive to the back of the Vellum, and mount onto the Whisper White Panel. Mat (layer) this onto a piece of Cherry Cobbler Cardstock measuring 12.4 cms x 12.4 cms.
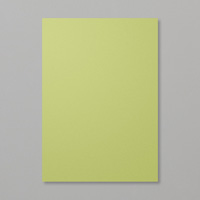
  5. Next, stamp the long Bauble from the Embellished Ornaments Stamp Set onto Old Olive Cardstock, using Mossy Meadow Classic Ink Pad.
  6. Now for some die cutting, so for the best result  you will need your Big Shot and preferably the new Precision Plate that works with the Multipurpose Platform on Tab 2. You could also use the Magnetic Platform, but you will need to use Wax Paper and run the die through the machine several times.
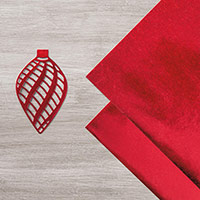
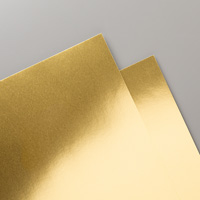
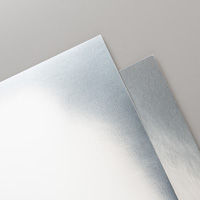
  7. Using the Delicate Ornament Thinlets Dies, Die cut the stamped Bauble, and then die cut the using the wider bauble in Die and Red Foiled Cardstock.; there is a small Flower shaped die in the thinlits  pack, die cut one of these from Gold Foiled Cardstock, and finally, die cut two hooped tops for the baubles using Silver Foiled Cardstock.
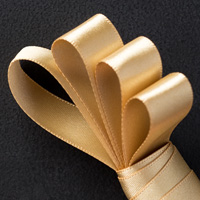
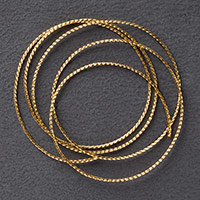
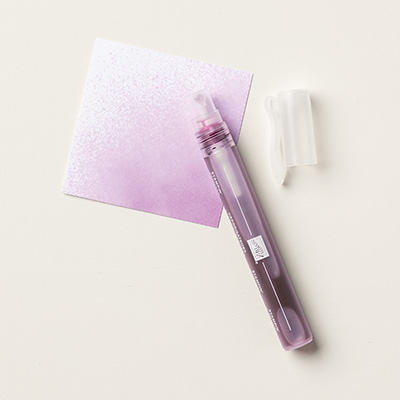
  8. Adhere the tops to the baubles using the new Fine Tip Glue Pen. Once dry, threat some Gold Cording Trim through the tops, and secure on the back of the Vellum panel using some Fast Fuse Adhesive. Apply some strips of Fast Fuse to the back of the panel and mount this onto your card front. Your Baubles should be 'swinging'. Adhere the gold die cut flower to the centre of the green bauble using the Fine Tip Glue Pen.
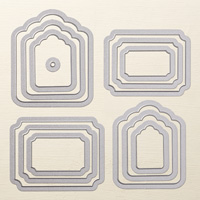
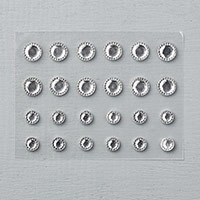
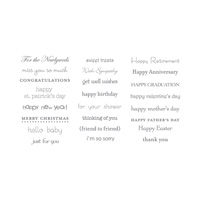
  9. Finally, you need to create your sentiment label. Stamp your sentiment onto a scrap of Whisper White Cardstock using Mossy MEadow Classic Ink Pad. Die Cut using the best fitting label in the Tags & Labels Framelits Dies. And then die cut the next size up label framelit using Old Olive Cardstock. Apply Stampin Dimensionals to the back of both labels, and layer them up. Attach to your card front, and embellish with a strip of Basic Rhinestones.


Below are the products I have used to create todays card.
Click on the product icons to view them in more detail, and/or place an order via my online store

Table built using Product Table Builder by The Crafty Owl - Independent Stampin' Up! Demonstrator.
Join my Pinterest community board,
where you can share your own Stampin Up Creations?
Follow the Pinterest Board on the left hand side bar and I will send you an invitation to follow the Stampin Up! At The Warren Community Pinterest Board

If you have any questions on techniques or products, or Joining my Team/discussing the business opportunities Stampin Up! Can offer
Contact Me

Or telephone/text 07759587004

Happy Stamping
Kim xxx         

Order your Craft Supplies on line 24/7
http://www.stampinup.net/esuite/home/stampinupatthewarren/

Wednesday, 23 September 2015

Watercolour Dove of Peace & Baby Wipe Swipe Technique

Happy Wednesday to you all
I hope you are all going to enjoy the card I am sharing with your today
as is combines a watercolour technique using Aqua Painters, and then the residual ink not used in the dove has been picked up onto a baby wipe and used to create the background paper in a paid pattern.

The DOVE OF PEACE Stamp has been really popular
And it suites so many different colouring and embossing possibilities, so you can really have some fun with this stamp.
For today's card, I masked the sentiment that comes as part of the rubber stamp, and in it's place I used the Christmas stamp from the TEENY TINY SENTIMENTS stamp set

The new Archival Basic Back and Basic Grey ink pads are what you need for preventing inks from bleeding outside the stamped lines.
You may remember the problems with the old Basic Black and Basic Grey Classic Ink Pads, as they smudged, and took forever to dry ... well, no more of that now!


And here is the tutorial

  1. Begin by making your 6" square card base by trimming a piece of Thicker A4 Whisper White Cardstock to 6" x 12". Score the long side using the Scoring Blade on your Stampin Trimmer at 6", fold along the score line and make a crisp fold by using your Bone Folder along the fold. Put to one side to avoid contamination of the card base from the inks you will be using.
  2. Trim a piece of Watercolour Paper  to 9 cms x 9 cms  dampen the entire surface with water using either your Aquapainter, or Stampin Spritzer . Moisten the other side too to avoid warping of the paper as it dries. Place a couple of drops into Pallette wells, of the following ink Refills: Old Olive, Crushed Curry, Real Red & Cherry Cobbler. Paint the watercolour paper with wash of Crushed Curry ink using your Aquapainter . Allow the paper to almost dry, and then stamp with the Dove Of Peace stamp using the Basic Black Archival Ink, after masking the sentiment using some masking tape. Remember to remove the masking tape before stamping.
  3. Now you can paint your dove using your Aqua Painter and a combination of Real Red and Cherry Cobbler Ink Refills. Build the colour in layers until you reach the effect you like. repeat with the leaf and the Old Olive ink.  Leave the paper to dry.
  4. Now, Mat (layer ) your Dove of Peace onto a piece of Real Red Cardstock, measuring 9.4 cms x 9.4 cms using a couple of strips of Fast Fuse Adhesive to the reverse of the Dove of Peace panel. Add some Stamping Dimensionals to the reverse side of the panel.
  5. Now, trim a piece of Whisper White Cardstock to 12 cms x 12 cms, Take a Baby Wipe and pick up any residual ink in the Real Red and Cherry Cobbler Inks you were using earlier. Swipe the baby wipe across the Whisper White Panel in a Plaid Pattern. Mat onto a piece of Cherry Cobbler Cardstock measuring 12.4 cms x 12.4 cms.Wrap a strip of Gold Glitter Ribbon, secure on the back of the panel using some Fast Fuse Adhesives. Add some Stampin Dimensionals to the back of the panel.
  6. Now all that is left, is the assembly and a little stamping. Using the Archival Black ink pad, stamp the Christmas Sentiment from the Teeny Tiny Sentiments Stamp Set in the bottom right corner of the card base.
  7. Mount the larger panel onto the card base. Then mount the Dove of Peace Panel at an angle onto top ... use the Stampin Dimensionals you placed on the back of the panels to stick the panels on.
  8. Add a tiny Basic Pearl to the eye if the Dove, and 3 Iced Rhinestone Embellishments to the top left corner of the larger pane, and the bottom right. 

Below you will find all the product icons used to create today's card,
 click on them to place your order 24/5 via my online store

Table built using Product Table Builder by The Crafty Owl - Independent Stampin' Up! Demonstrator.

Join my Pinterest community board,
where you can share your own Stampin Up Creations?
Follow the Pinterest Board on the left hand side bar and I will send you an invitation to follow the Stampin Up! At The Warren Community Pinterest Board

If you have any questions on techniques or products, or Joining my Team/discussing the business opportunities Stampin Up! Can offer
Contact Me

Or telephone/text 07759587004

Happy Stamping
Kim xxx         

Order your Craft Supplies on line 24/7
http://www.stampinup.net/esuite/home/stampinupatthewarren/