google-site-verification: google70410e9e92d4fda2.html
Showing posts with label Anniversary. Show all posts

Thursday, 1 September 2016

A Moroccan Timeless Love Floral Phases Anniversary Card for my Hubby using Stampin' Up! Products

Today is a super quick tutorial as it is my Wedding Anniversary
We have been together 23 years, Marries for 16 Years
He is my Soulmate and Best Friend

And so this is his card for this year.

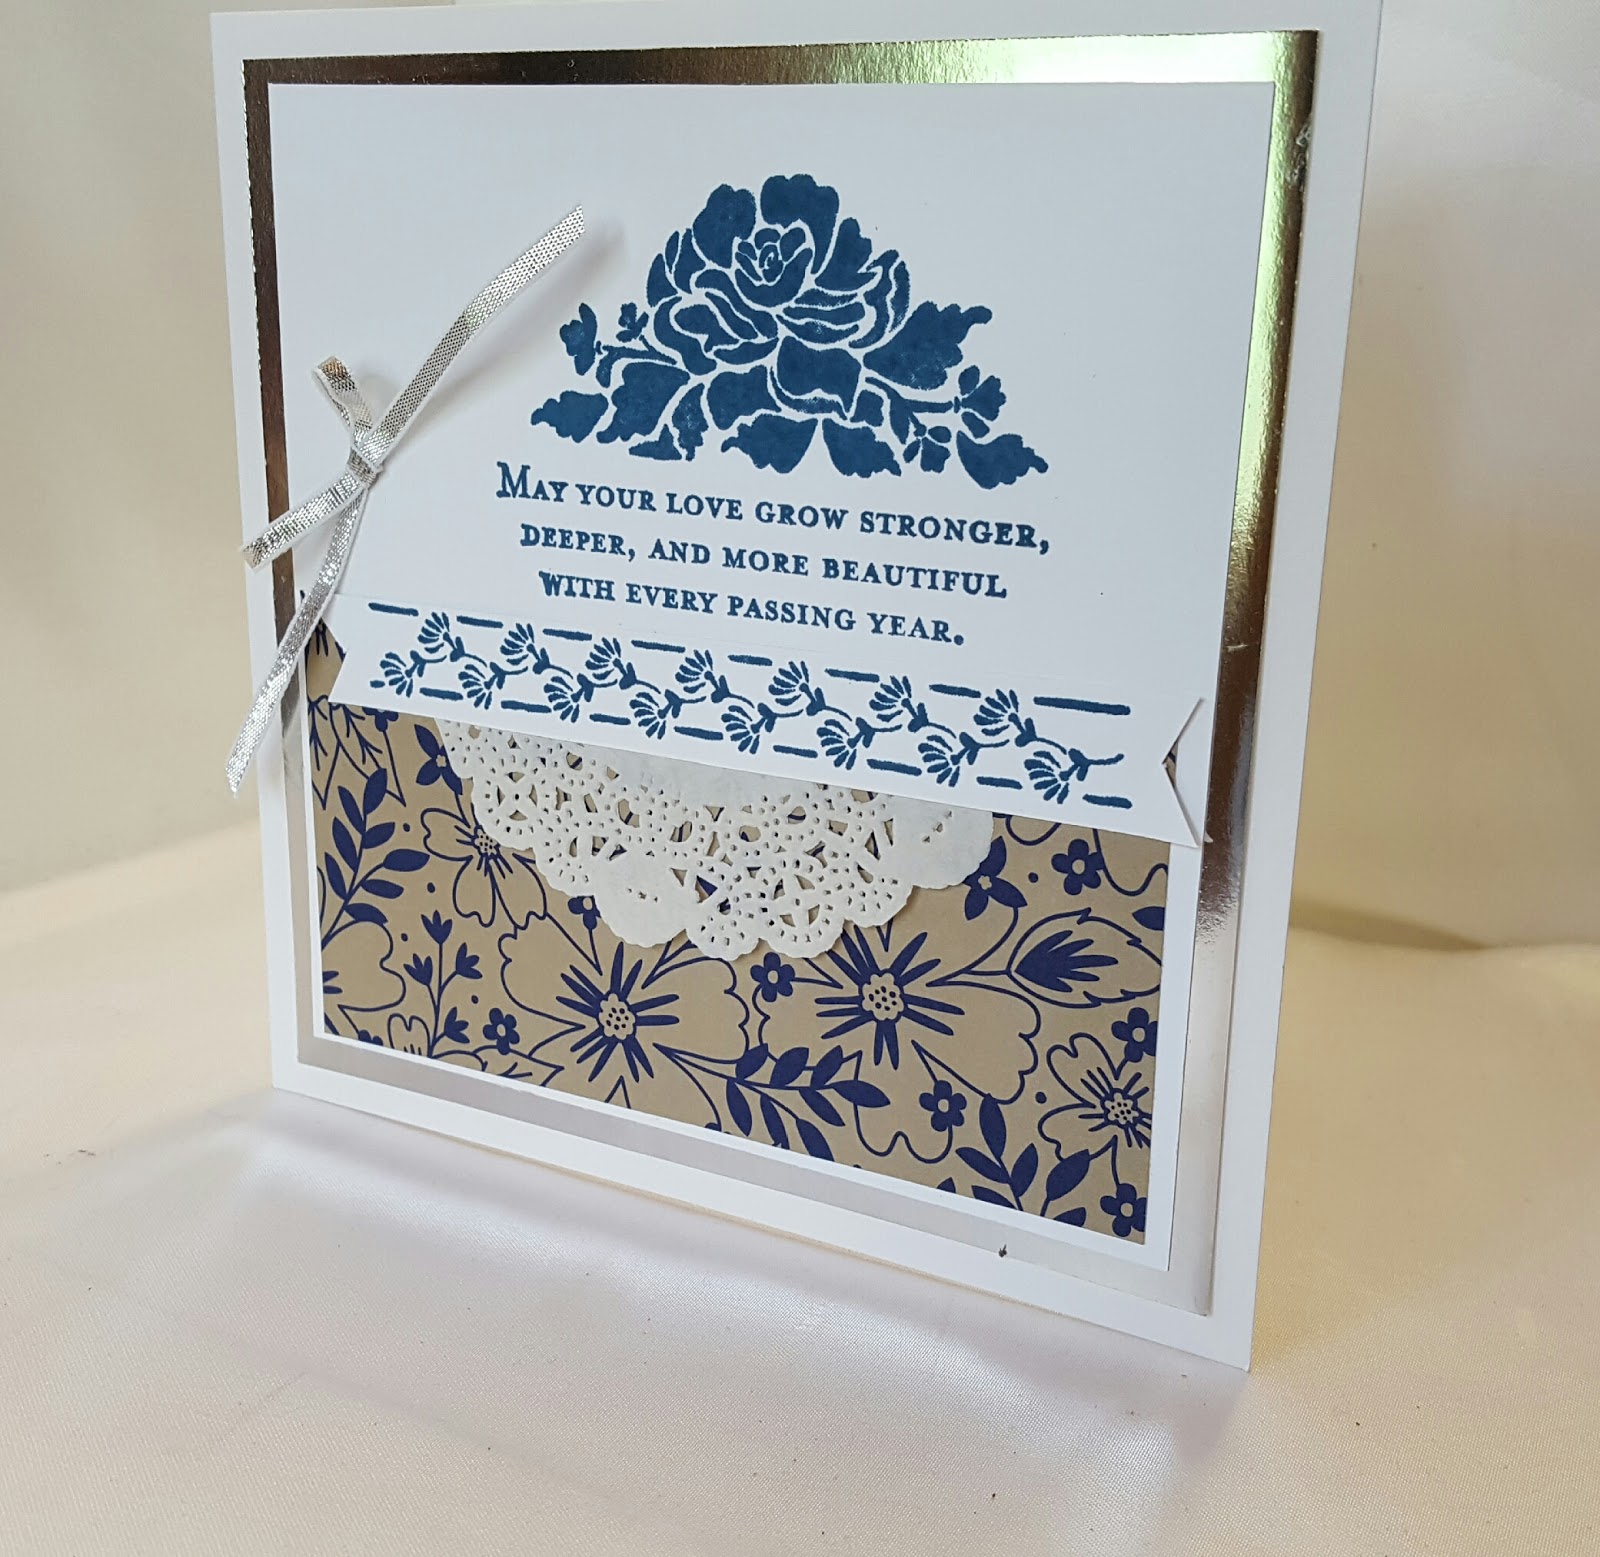
I began by using using a sponge brayer to add some subtle colour to the background with Dapper Denim Ink, to tie in the two halves of the card.

I used a combination of the Floral Phrases Stamp Set  and the Timeless Love Stamp Set to get the sentiment I wanted on the card front.
I also stamped  a sentiment inside the card

The designer Series Paper is called Moroccan & is why I chose to use Gold Ribbon to tie the two halves of the card together, and finally, used lots of teeny Basic Pearls to get more texture into the Card.

Feel free to CASE any of my creative projects (Copy & Paste Everything)


PRODUCTS USED TODAY

STAMP SETS
Floral Phrases - 141767
Timeless Love - 139408

CARDSTOCK
A4 Thick Whisper White -  140490

DESIGNER SERIES PAPER
Moroccan - 141645

INK PADS
Memento Black - 132708
Dapper Denim - 141394

ACCESSORIES
Basic Pearls - 119247
1/7" Gold Ribbon - 134583

DIES 
Sunshine Wishes - 141489

ADHESIVES
Multi-purpose Liquid Glue - 110755

TOOLS
Big Shot - 143263
Magnetic Platform - 130658
Stampin Trimmer - 129722
Sponge Brayer - 141714
Paper Snips - 103579
Bone folder - 103200
Acrylic Blocks (for clear mount stamps)
C - 118486
E - 118484
H - 118490
I - 118488

Measurements:

  • Card-base, Thick Whisper White 30 x 10.5 cms; score long side at 14.9 cms; fold & Burnish
  • Designer Series Paper - Moroccan - 10.1 x 4 cms

How to Contact or Follow Me


Kim Tolton, Independent Stampin Up Demonstrator.
Card & Papercraft Tutorials
Please feel free to comment below, and ask away with any questions. You can also find me via the links below


Blog:

Online Store:

Stamping @ The Warren Craft Forum:

Email:
kim.tolton@googlemail.com

youTube


Pinterest:

Google +

Facebook:

Twitter:

Instagram:
@kim.tolton

LinkedIn:

Wednesday, 3 August 2016

Moroccan Nights Are Better Together Emboss Resist Technique using Stampin' Up! Products

Hi Folks, I hope you are having a good day, and I also hope that today's card will give you a warm fuzzy feeling with the impact of the MOROCCAN Stamp Set and the EMBOSS RESIST technique using inks from the Regals Colour Collection.

I adore these rich colours, and for me it always signals that the transition from Summer to Autumn will be on us soon, I am also a BIG fan of middle eastern culture, from food, to silks and Spices. These things were my inspiration for today's card.
I used the Layering Circles Die to add a little added interest to the card, and mat that onto a die cut circle from the same Nestable Framelits Dies; this was then popped up using Stampin Dimensionals, before mounting onto the card base

You will find the Tutorial and List of Products used today, below

I would also love to see your own version of this card, so if you are not already following my Community Pinterest board, just click on the Pinterest board on the left hand side of my blog & select Follow. I will then send you an invite to begin pining on the board. All samples MUST have some Stampin' Up! products on them, and NO Digi Stamps 
I look forward to seeing your creations

Feel free to CASE any of my creative projects (Copy & Paste Everything)


PRODUCTS USED TODAY

STAMP SET
Moroccan Nights
Better Together

INK PADS
Crushed Curry
Night of Navy
Cajun Craze
Versamark

CARDSTOCK
Night of Navy
Whisper White

FRAMELITS DIES
Layering Circles
ACCESSORIES
Metallic Enamel Dots
TOOLS
Big Shot
Magnetic Platform
Stampin Trimmer
Acrylic Block Bundle
Heat Tool
Embossing Buddy
Clear Embossing Powder
Stampin Sponge
Craft Sheet
Bone Folder
Paper Snips


ADHESIVES
Tombow Multipurpose Liquid Glue
Stampin Dimensionals

Watch the Video Below

Tutorial

  1. Trim a piece of Night of Navy Cardstock to 30 x 10.5 cms; Score long side @ 14.9 cms; Fold & Burnish
  2. Trim a piece of Whisper White Cardstock to 14.4 x 10.1 cms; Using Versamark, randomly stamp the largest stamp three times, re-inking with versamark each time; Dust with Clear Embossing Powder; remove excess & heat set
  3. Cut a Stampin Sponge into wedges, and sponge your first colour (crushed Curry); Repeat with the other two colours (Cajun Craze & Night of Navy) allowing the inks to blend together; Remove excess ink from the embossed images using a piece of Kitchen Towel; Mat onto the Card Base
  4. Stamp one of the Lanterns onto a scrap of Whisper White Cardstock using Night of Navy Ink Pad; Die Cut using the Layering Circles Framelits Dies, and then a scallop circle (next size up) using the same Framelits dies pack, & night of Navy Cardstock, layer up the topper using Stampin Dimensionals
  5. Stamp your sentiment onto a strip of Whisper White Cardstock  measuring 2 x 10.1 cms, using the Night of Navy Ink Pad. Mount onto your card front, and add your layered topper
  6. Finish by adding some Metallic Enamel Shapes for a bit of bling

How to Contact or Follow Me

Kim Tolton, Independent Stampin Up Demonstrator.
Card & Papercraft Tutorials
Please feel free to comment below, and ask away with any questions. You can also find me via the links below


Blog:

Online Store:

Stamping @ The Warren Craft Forum:

Email:
kim.tolton@googlemail.com

youTube


Pinterest:

Google +

Facebook:

Twitter:

Instagram:
@kim.tolton

LinkedIn:

Friday, 17 June 2016

Floral Phrases Dapper Denim & Silver Foil Anniversary Card Stampin' Up! UK

It was my middle sons 2nd Wedding Anniversary this week, and I knew exactly which Stamp Set I was going to use ... and that would be 

FLORAL PHRASES

This is one of the stamp sets new to this years Annual Catalogue, and I fell in love with it, the moment I set eyes on it. And of course, I just HAD to HAVE it he he

I went with Dapper Denim, just because I adore this warm Blue. Blue's have a tendency to be a little cool, but not this one. It sits nicely between Night of Navy and Marina Mist.

I coupled it with this Dapper Denim paper from the Affectionately Yours Suite, as it co-ordinates so well with today's colour scheme, and really sets off the Silver Foil Mat.
The Doily  gives extra interest, and I stamped the floral accent onto onto a long narrow banner that I popped up on Stampin Dimensionals to give some added lift, and finished with some Silver Ribbon.
Tutorial is below


Feel free to CASE any of my creative projects (Copy & Paste Everything)


STAMP SET
FLORAL PHRASES

CARDSTOCK
THICKER WHISPER WHITE
SILVER FOIL

INK PADS
DAPPER DENIM

ACCESSORIES
1/8" SILVER RIBON
DELICATE WHITE DOILY

DESIGNER SERIES PAPER
AFFECTIONATELY YOURS

TOOLS
STAMPIN TRIMMER
ACRYLIC BLOCK BUNDLE
BONE FOLDER
PAPER SNIPS

ADHESIVES
FAST FUSE
STAMPIN DIMENSIONALS
MINI GLUE DOTS

 The beauty of Stampin' Up!'s range of products, is that it is fully co-ordinated, and their range of ink pads, cardstock etc, is so wide , that you could make this card in any colour-scheme you or your customer wants ... what more could you want?
Just make sure to follow Stampin' Up!s Angel Policy
so take a peek at the BETTER THAN EMAIL Stamp Set whilst browsing my online store...

Tutorial

  1. Trim a piece of Thicker Whisper White Cardstock to 15 x 30 cms (6" sq)'; Score at 15 cms; fold & Burnish
  2. Trim a piece of Silver Foiled Cardstock to 14 x 14 cms
  3. Trim a piece of regular Whisper White Cardstock to 13.4 x 13.4 cms
  4. Trim a piece of Affectionately Yours Designer Series Paper to 13 x 4 cms and adhere to the lower section of the Whisper White Cardstock
  5. Trim a piece of Delicate White Doily and mount over the Designer Series Paper
  6. Using Dapper Denim Ink Pad, and the Large Floral Stamp, Stamp the art piece to the upper portion of the cardstock
  7. Stamp the Floral Flourish stamp into a scrap of Whisper White Cardstock measuring 13 x 2 cms, and using Paper Snips, create Banner Ends, add Stampin Dimensionals to the back and mount on the card front so it overlaps the doily
  8. Finally, add a silver ribbon bow

How to Contact or Follow Me


Kim Tolton, Independent Stampin Up Demonstrator.
Card & Papercraft Tutorials
Please feel free to comment below, and ask away with any questions. You can also find me via the links below


Blog:

Online Store:

Stamping @ The Warren Craft Forum:

Email:
kim.tolton@googlemail.com

youTube


Pinterest:

Google +

Facebook:

Twitter:

Instagram:
@kim.tolton

LinkedIn: