google-site-verification: google70410e9e92d4fda2.html

Monday, 3 November 2014

Stamp Set Showcase Week 16 (7) Bright & Beautiful

Welcome Back to the last day of this weeks Stamp Set Showcase

BRIGHT AND BEAUTIFUL


And today I have an Aperture Card for you.

If I followed the guidance of a fellow blogger, if you follow me on the various Google+ communities that I subscribe to, you should no longer see the duplicates of my posts  when you visit my Google + profile. I hope you will take the time to have a more thorough browse through my postings now those duplicate posts are gone!


So here goes for the tutorial on todays card.

Begin by making your card blank by trimming a piece of Whisper White cardstock to 15cms x 30cms. Using your scoring too/board, score the long side (at the top of the board) at 15cms. Fold the score line and burnish with your bone folder.

Open your card out so it says flat on the table. You are now going to randomly stamp the front of the card blank using Gold Encore ink and the small and medium stars int he stamp set.

.
Next, you will take your Stars Framelits, and take the framelit that is one size larger than the medium star in the stamp set, and using the magnetic platform, centre your framelit onto the front of the card blank and die cut the star shape by running the card blank and the framelit through your Bog Shot. Remove the die cut star and use for another project.

You are now going to heat emboss the medium star on a scrap of Whisper White cardstock as follows:

Mount the medium star stamp onto an acrylic block
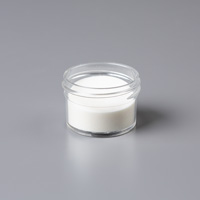
Ink up with Versamark and before stamping, ink the stamp with Bermuda Bay ink, stamp onto the scrap of cardstock and sprinkly on Clear Embossing Powder, shake off the excess powder and also give one sharp rap with your fingers ont he back of the cardstock to remove any remaining loose powder.
Melt the powder using your Heat Tool. 
When cooled, die cut the embossed star (that fits the stamp) plus a second star front Whisper White cardstock of the same size as the star stamp.

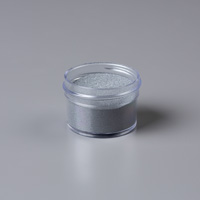
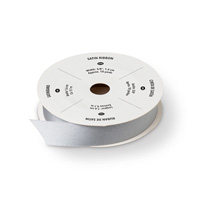
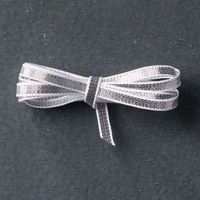
Attach a piece of Silver 1/8" ribbon to the centre of the star, then attach the second star to the back of the embossed star to hide the silver ribbon. Using Glue Dots, attach the ribbon to the inside top and botton of the card, this will leave a little loseness for the Star to swizzle a little. Trim the ends of the ribbon, so the inside looks neat

Next trim a piece of Vellum to 14.5 cms x 14.5 cms
Use the same combination of Versamark and ink (This time using Versamark and then island indigo ink)  to stamp the sentiment from the stamp set centrally on the Vellum. Set with the Heat Tool. Attach this to the inside back of the card using Glue Dots.
This should give you a hint of the sentiment of the inside of the card as any draught causes the star to swizzel.


Finally, Stamp your sentiment using the same technique as the inside of the card (Versamark, Island Indigo Ink & Clear Embossing Folder)


If you would like to join my community board on my Pinterest account to post your own photo's
ping me your email address and I will add you

kim@stampinupatthewarren.com

If you would like to ask any questions on techniques or products, or anything else related to my blog posts, please feel free to ask away

Happy Stamping
Kim xxx

Contact me to order:
Telephone/Txt: 07759587004
Email: kim@stampinupatthewarren.com

Or Order Online 24/7

Or Click on the image of the products used below and it will take you straight to my online store
Table built using Product Table Builder by The Crafty Owl - Independent Stampin' Up! Demonstrator.

Sunday, 2 November 2014

Stamp Set Showcase Week 16 (6) Bright & Beautiful

Good Morning Good People!

I have a wonderful mash up today for you, using not one, but two of this years Seasonal Stamp Sets

BRIGHT & BEAUTIFUL 

&

ORNAMENTAL PINE.

The later will be one of the forthcoming Stamp Set Showcase weeks, which is how today's card came into being.

I was prepping for one of my Christmas Card Stamp Camps, and was trying out different colour combo's and techniques to make this stamp set one of my WOW projects, and after a play on my Grid Paper, I went for a try on a scrap of Whisper White cardstock, I loved the result. The full project looks stunning (you will have to watch out for that in coming weeks) but I so loved the trial piece that I just had to find a way to incorporate it into another card, and this is it he he

If you like the taster, them pop over to my online Store and purchase your set to be sure you have it at the ready to CASE some of my cards


And here is the tutorial

Begin by making your A6 Card Blank by trimming a piece of Whisper White cardstock to 14.8cm x 21cm. Using your Scoring Tool, Score the long side at 10.5cms, fold and burnish the fold with your bone folder. 
You are now going to randomly stamp the from of your card blank using Encore ink and the medium and small stars in the Bright & Beautiful Stamp Set.
Trim another piece of Whisper White cardstock to 14.3cm x 8cms
Ink Up the Ornamental Stamp - just the Pine stamp in Versamark ink, then before stamping, use Soft Suede ink to ink the branch part of the stamp, and Mossy Meadow for the pine portion of the stamp, trying not to contaminate your ink pads with the different inks.
Stamp onto the cardstock you have just trimmed to size. Cover with Clear Embossing Powder, taop off the excess and heat with your Heat Tool.
Clean the pine stamp, and over stamp just the green portion of the stamp with Old Olive ink, and carefully wipe off any excess ink over the previously embossed image. This will provide some tonal changes in the pine image.
Now stamp the hook stamp in Black Stazon ink, and them ink up the Bauble Stamp in first Versamark and then Blackberry Bliss ink, and stamp onto the cardstock so the bauble looks like it is hanging on the hook.

Ink the edges of the cardstock using a sponge dauber and Gold Encore Ink.
Stamp your Sentiment of choice to the cardstock. I have used a retired stamp that I purchased at a huge discount in the CLEARANCE RACK so do keep a close eye on this to get yourself some real bargains!
Mat this onto a piece of Red Glimmer Paper measuring 14.8cms x 8.5cms using Stampin Dimensionals to pop it up, Apply Stampin Dimensionals to the back of the Glimmer Paper and attach to the Card Blank

Now go have some fun creating your own versions


I would love to see you own creations so if you would like to join my community board on my Pinterest account, to post your own photo's
ping me your email address and I will add you to the Board
email:
kim@stampinupatthewarren.com


If you would like to ask any questions on techniques or products, or anything else related to my blog posts, please feel free to ask away

Happy Stamping
Kim xxx

Contact me to order:
Telephone/Txt: 07759587004
Email: kim@stampinupatthewarren.com

Or Order Online 24/7

Or Click on the image of the products used below and it will take you straight to my online store
Table built using Product Table Builder by The Crafty Owl - Independent Stampin' Up! Demonstrator.


Saturday, 1 November 2014

Stamp Set Showcase Week 16 (5) Bright & Beautiful


Welcome to a new weekend

I hope you have lots if nice things planned. Perhaps you are preparing for your Fireworks Party? Do let me know?

Me, well I will be preparing nest week's Blogs posts which means a day of crafting 
And I so love getting a day to myself to craft, and also prepare for this weeks card craft classes.
But for the moment, here is todays card make from 

BRIGHT & BEAUTIFUL STAMP SET

And todays card is made using Vellum


 Begin by making your card blank by trimming a sheet of A4 Whisper White cardstock to 14.8cms x 21cms. Score the long side at 10.5cms, fold along the score line and burnish the fold with your bone folder.


Next, trim a piece of Whisper White cardstock to 10cms x 14.3cms.
Using your Versamark ink pad, ink up the Lucky Stars Textured impressions Embossing Folder (TIEF) on the side with the Sizzix logo with Versamark ink I(i.e. using the TIEF into a Stamp) Now ink up the TIEF using Coastal Cabana ink.. Insert the piece of trimmed Whisper White cardstock into the TIEF and run through your Big Shot.
Remove the cardstock  from the TIEF and sprinkle the cardstock with Clear Embossing Powder. Tap off the excess powder , and then give one sharp rap on the back of the cardstock to remove loose powder.
Heat with the heat tool until the embossing powder has melted. You should be left with indented(debossed)stars that are blush coloured and a glossy finish to the cardstock.

Next, Stamp all three stars from the Stamp Set onto Vellum as follows using Versamark ink and sprinkle with Silver Embossing Powder.and heat with the Heat tool until the embossing powder has melted

Now for a bit of sponging to the starts at follows:

Large Star -Tempting Turquoise
Medium Star -  Bermuda Bay
Small Star - Versamark & Coastal Cabana

Die cut the Vellum Stars using the Stars Framelits.

Layer up the Stars using Stampin Dimensionals between each layer and the bottom layer.
Wrap around some  5/8" Silver Satin Ribbon and tie a bow.

Stamp the Season Greetings Sentiment onto a scrap of Whisper White cardstock using Tempting Turquoise Ink. Die cut using the Apothecary Accents Framelits Collection.
Finish by sponging the edges of the sentiment die and cut, and add a Basic Rhinestone tot he centre of the smallest vellum star.

Another card finished to add to your card stash


If you would like to join my community board on my Pinterest account to post your own photo's

ping me your email address and I will add you

kim@stampinupatthewarren.com


If you would like to ask any questions on techniques or products, or anything else related to my blog posts, please feel free to ask away

Happy Stamping
Kim xxx
Contact me to order:
Telephone/Txt: 07759587004
Email: kim@stampinupatthewarren.com

Or Order Online 24/7
Or Click on the image of the products used below and it will take you straight to my online store
Table built using Product Table Builder by The Crafty Owl - Independent Stampin' Up! Demonstrator.

http://www.stampinupatthewarren.stampinup.net