google-site-verification: google70410e9e92d4fda2.html

Sunday, 5 April 2015

Stamp Set Showcase 2015 For The New Two (6)

Now, I know Sale A Bration is over, but many of you will have had the opportunity to earn the Free Sheer Perfection Designer Vellum Stack whilst the promotion was running, and I thought I would share with you some of the fun ways you can add colour to your projects.
To help you out, I have also added a video clip to give you more inspiration,

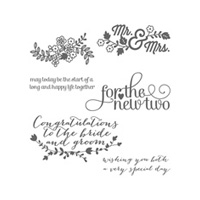
I combined the Sheer Perfection Vellum with  the For The New Two stamp set in the Current Spring/Summer Catalogue.

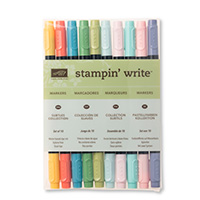
I have used the Subtles Stampin Write Markers and the Sweet Dreams Designer Buttons and Painted Blooms Cotton Twine


Begin by making a 5" square Whisper White Card Blank
Trim  2 contrasting pieces of  the Sheer Perfection Vellum. Colour the patterns on the vellum using the Stampin Write Markers, leaving approximately 1/3 of the patterns without colour.
Layer them up and attach to your Card Blank using  some SNAIL adhesive.


Stamp the 'For the New Two' stamp onto Whisper White cardstock using Black Stazon ink.
Die cut the sentiment using the best fitting Oval Framelit
Add Stampin Dimensionals to the reverse of the die cut and attach on top of the card front.
Thread one of the Sweet Dreams Designer Buttons with Painted Blooms Twine and tie a bow. Attach to the card front using a Glue Dot.

And that is it ... simple as that .... Do take time to watch the short video and I would love you to share your version of this card on my Stampin Up At The Warren Community Board
See below for details.
Most of all, have some fun


If you would like to join my Pinterest community board where you will be able to post your own Stampin Up creations. Simply email me and I will add you to the board
kim@stampinupatthewarren.com

If you would like to ask any questions on techniques or products, or anything else related to my blog posts, please feel free to ask away
Happy Stamping
Kim xxx

Contact me to order:
Telephone/Txt: 07759587004
Email: kim@stampinupatthewarren.com

Or Order Online 24/7
                                                                                               
Or Click on the image of the products used below and it will take you straight to my online store
Table built using Product Table Builder by The Crafty Owl - Independent Stampin' Up! Demonstrator.

Saturday, 4 April 2015

Stamp Set Showcase 2015 Six Sided Sampler

Good Day to you all, I hope you are having a wonderful Easter break?
Me, Well I feel like I have done 10 rounds with Mike Tyson!
I can hear you asking why?? WEll, the reason is I had my spinal cord stimulator replaced (simply put, it is an internal TENS machine that emits pulses along my nerves to interrupt my brains perception of my severe chronic pain following a spinal injury almost 10 years ago.
The surgery went well with a few hiccups - firstly because there was so much scar tissue, that they went beyond the epidural space into the dura (layer of the spinal cord) so I have a banging headache from the tiny leakage of cerebrospinal fluid
But the good news, is that the new stimulator is working well and last night, despite 4 separate surgical wounds, I had the best nights sleep in over 3 months! yeh!

The cards are going to be simple for a while as I am under strict instructions to take it easy for the next 3 months, with no lifting, reaching above my head, pushing, pulling, bending, twisting or driving, So my hopes for an enhanced recovery programme is not to be. The reason, is that it will take around 3 months for the tissue inside my spinal column to allow the electrodes to become implanted, and will make them less prone to migrate in the future (which is what happened with one of the leads with my old system).

But, today is a good day, a couple of days post op, not so doped up, and I was able to get into my workshop for a couple of hours and trim some cardstock and plan and stamp a few simple cards.

As I recover, I will return to a more diverse projects.

Now, how am I going to break it to my hubby, that he is going to have to do any die cuttiing and/or dry embossing when preparing my swaps for the UKs Regional Event in May?? I think i have some serious buttering up to do he he ..

And so on to todays card.
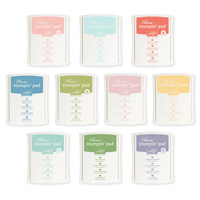
I am using the Six Sided Sampler stamp set and I have used the 2024-2016 In Colour Classic Ink Pads onto Whisper White Cardstock. The Stylish little sentiment has been stamped using Blackberry Bliss ink.


Begin by trimming a piece of Whisper White cardstock  to 13.8 cms x 9.5 cms
Stamp a variety of the Hexagonal stamps  to create a pattern on the Whisper White cardstock. Stamp an additional couple of Hexagonals onto scraps of Whisper White cardstock.

you could swap the In-colour collection of inks and cardstock for any of the other 5 Colour Collections i.e.
 2013-2015 In Colour Collection
Regals Collection
Subtles Collection
Brights Collection
Neutrals Collection

Just so you get that co-ordinated look and feel of the product.


Next, Punch out those extra Hexagonals using the Hexagonal Punch. Apply a couple of Stampin Dimensionals to the reverse of each and attach onto your card front.
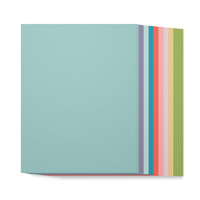
Stamp your 'Hello' sentiment and mat the card front onto a piece of Lost Lagoon Cardstock measuring 14.3 cms x 10 cms using a teeny amount of Tombow Multi-Pirpose Liquid Glue.
And there you have it, one simple but stylish card for pretty much all ocassions

Now it is your turn to have a go ... do share you photo's via my Stampin Up At The Warren Pinterest Board, bu t you will need to ping me an email so I can send you an invite.

If you would like to join my Pinterest community board where you will be able to post your own Stampin Up creations. Simply email me and I will add you to the board
kim@stampinupatthewarren.com

If you would like to ask any questions on techniques or products, or anything else related to my blog posts, please feel free to ask away
Happy Stamping
Kim xxx

Contact me to order:
Telephone/Txt: 07759587004
Email: kim@stampinupatthewarren.com

Or Order Online 24/7
                                                                                               

Or Click on the image of the products used below and it will take you straight to my online store
Table built using Product Table Builder by The Crafty Owl - Independent Stampin' Up! Demonstrator.

Wednesday, 1 April 2015

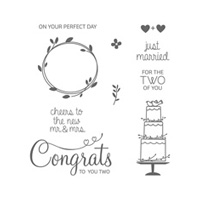
Stamp Set Showcase 2015 Your Perfect Day

Todays card is CASED from the Impressions Magazine
This is the magazine for Stampin Up Demonstrators and provides us with inspiration for projects, with additional Projects available via the Demonstrator Website
This was one of my favourite projects from the March 
 Magazine.
The card features the HEarts Framelits, Bitty Banner Thinlets and the  
Your Perfect Day Stamp Set
From the 
 Spring/Summer Stampin Up! Catalogue
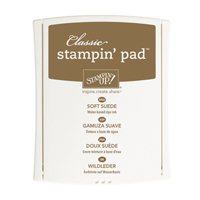
I used the Subtles colour pallet, including the co-ordinating Classic Ink PAds, Designer Series Paper Stack, Stampin Write Markers, 1/4" Blushing Bride Cotton Ribbon, plus the Soft Suede Classic Ink Pad, that I used to stamp the Congratulations sentiment.

You will need a 6" (15 cm) square White Card Blank
Begin by trimming a piece of Whisper White cardstock to 14.5 x 145 cms
Next trim a piece of Pastels Designer Series Paper to 14.5 cms x 14.5 cms

Then select the Heart Framelit that gives you the best fit for your sentiment stamp allowing a little excess space around the edge of the stamp.
Place the  DSP on top of Whisper White panel, and using Soft Suede Classic Ink Pad and stamp your sentiment in the negative space (i.e. stamp onto the Whisper White cardstock through the void where the heart was die cut.)
Cut a Tea Lace Doily into quarters and using a little Tombow Multi-Purpose Liquid Glue to the 'V; section of the heart, so it looks like a bit of a lace camisole peeking through.
Apply Stampin Dimensionals to the reverse of the DSP panel and adhere the to Whisper White Panel that you stamped with the sentiment.
Next stamp the "to you two" sentiment onto a piece of Blushing Bride cardstock using Soft Suede ink.
Die cut this sentiment using the curvy Bitty Banners Banner.
Adhere to the card front using a little Tombow.

Onto some scrap cardstock, stamp some of the wee flowers and punch them out using the Itty Bitty Accents Punch pack . Use the Subtles Stampin Write Markers to colour in the wee little flowers and the hearts on the sentiment. Using Glue Dots, attach the flowers to the card front.
Finally, tie a piece of 1/4" Blushing Bride cotton ribbon in a bow, and using a couple of Glue Dots, attach the bow to the card front.Then attach the card front to the card blank using a little Tombow.


I hope you have enjoyed todays card, and CASE away with your own version

If you would like to join my Pinterest community board where you will be able to post your own Stampin Up creations. Simply email me and I will add you to the board

If you would like to ask any questions on techniques or products, or anything else related to my blog posts, please feel free to ask away
Happy Stamping
Kim xxx

Contact me to order:
Telephone/Txt: 07759587004

Or Order Online 24/7
                                                                                               
Or Click on the image of the products used below and it will take you straight to my online store
Table built using Product Table Builder by The Crafty Owl - Independent Stampin' Up! Demonstrator.