
Todays card is CASED from the Impressions Magazine
This is the magazine for Stampin Up Demonstrators and provides us with inspiration for projects, with additional Projects available via the Demonstrator Website
This was one of my favourite projects from the March
Magazine.
The card features the HEarts Framelits, Bitty Banner Thinlets and the
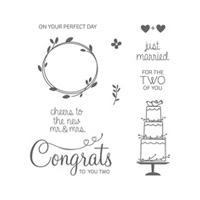
Your Perfect Day Stamp Set
From the
Spring/Summer Stampin Up! Catalogue
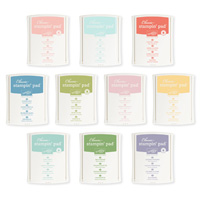
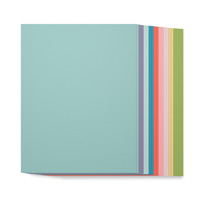
I used the Subtles colour pallet, including the co-ordinating Classic Ink PAds, Designer Series Paper Stack, Stampin Write Markers, 1/4" Blushing Bride Cotton Ribbon, plus the Soft Suede Classic Ink Pad, that I used to stamp the Congratulations sentiment.

You will need a 6" (15 cm) square White Card Blank
Begin by trimming a piece of Whisper White cardstock to 14.5 x 145 cms
Next trim a piece of Pastels Designer Series Paper to 14.5 cms x 14.5 cms

Then select the Heart Framelit that gives you the best fit for your sentiment stamp allowing a little excess space around the edge of the stamp.
Place the DSP on top of Whisper White panel, and using Soft Suede Classic Ink Pad and stamp your sentiment in the negative space (i.e. stamp onto the Whisper White cardstock through the void where the heart was die cut.)
Cut a Tea Lace Doily into quarters and using a little Tombow Multi-Purpose Liquid Glue to the 'V; section of the heart, so it looks like a bit of a lace camisole peeking through.
Apply Stampin Dimensionals to the reverse of the DSP panel and adhere the to Whisper White Panel that you stamped with the sentiment.
Next stamp the "to you two" sentiment onto a piece of Blushing Bride cardstock using Soft Suede ink.
Die cut this sentiment using the curvy Bitty Banners Banner.
Adhere to the card front using a little Tombow.
Onto some scrap cardstock, stamp some of the wee flowers and punch them out using the Itty Bitty Accents Punch pack . Use the Subtles Stampin Write Markers to colour in the wee little flowers and the hearts on the sentiment. Using Glue Dots, attach the flowers to the card front.
Finally, tie a piece of 1/4" Blushing Bride cotton ribbon in a bow, and using a couple of Glue Dots, attach the bow to the card front.Then attach the card front to the card blank using a little Tombow.
I hope you have enjoyed todays card, and CASE away with your own version

If you
would like to join my Pinterest community board where you will be able to post
your own Stampin Up creations. Simply email me and I will add you to the board
If you would like
to ask any questions on techniques or products, or anything else related to my
blog posts, please feel free to ask away
Happy Stamping
Kim xxx
Contact me to
order:
Telephone/Txt:
07759587004
Email: kim@stampinupatthewarren.com
Or Order
Online 24/7
Or Click on the
image of the products used below and it will take you straight to my online
store
 |  |  |  |  |
 |  |  |  |  |
 |  |  |  |  |
 | 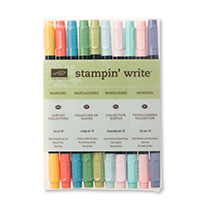 |  |
Table built using Product Table Builder by The Crafty Owl - Independent Stampin' Up! Demonstrator.
No comments:
Post a Comment