google-site-verification: google70410e9e92d4fda2.html

Friday, 3 June 2016

Elegant Dots Dry Embossed Build A Birthday CASE Card Stampin' Up! UK

  
Welcome to a Fabulous Friday
Today is a super Quick card that I CASED )copy & Share Everything) from the new Annual Catalogue from Stampin' Up!
I have changed it up, as I use the creative ideas within the catalogue (of which there are just SO many), for those days when time is short, or I simply do not have a creative idea in my head for a particular stamp set)
I then make the card my own, by changing it up, so it is not a complete replica of the original. And that means you guys get two creative ideas for the price of one.

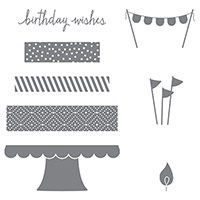
You can find the original Build A Birthday design on Page 25 of the catalogue.
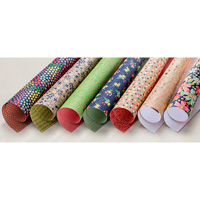
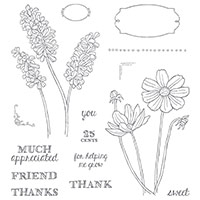
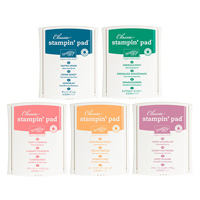
I have used the new In Colours for today's project and  I also wanted to show you a different way of creating a banner sentiment.
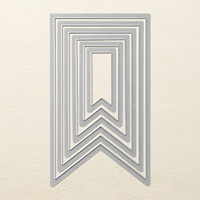
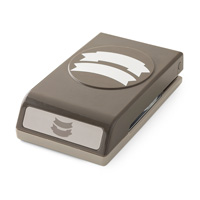
The Duet Banner Punch, which is curves, as you can see in the photo.
Now here's the thing, Photo-polymer stamps are flexible; and that means you can shape them when mounting them onto an acrylic block .... it is one of those thinking outside the box moments that tends to fly out of our heads, because we see a straight sentiment and just assume it has to be stamped as a straight sentiment.
With the sentiment I used today (included in the Build A Birthday). I mounted the stamp in a curve, to match the curve of the Banner Duet Punch. And it worked a dream!!
Have a go for yourselves, and let me know how you get on.


Feel free to CASE any of my creative projects (Copy & Paste Everything)

Click on the icons below to view/order any of the products used in today's tutorial

Table built using Product Table Builder by The Crafty Owl - Independent Stampin' Up! Demonstrator.

Tutorial

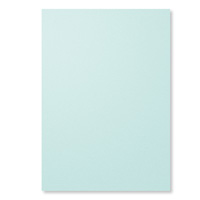
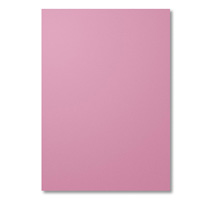
  1. Trim a piece f Mint Macaron Cardstock to 25 x 12.5 cms; score at 12.5 cms; fold & Burnish
  2. Randomly Stamp the cardstock with the large flame stamp from Build A Birthday stamp set, using Mint Macaron Ink.
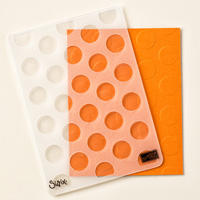
  3. Trim a piece of Sweet Sugarplum Cardstock to 10 x 10 cms; Dry Emboss using the Elegant Dots Textured Impressions Embossing Folder (TIEF) and mat onto the card front using Fast Fuse.
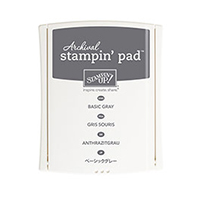
  4. Trim a piece of Whisper White Cardstock to 7.5 x 7.5 cms; stamp the Cake stand at the bottom of the cardstock using Archival Gray Ink Pad
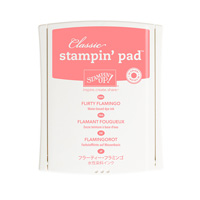
  5. Now for your cake layers - Bottom layer uses Sweet Sugarplum Ink Pad; Middle Layers is Flirty Flamingo Ink Pad, and the tip layer is Peekaboo Peach ink pad.
  6. Mount your Birthday Wishes sentiment onto an acrylic block in a curved shape;Using Archival Black Ink Pad, stamp the sentiment onto a scrap of Whisper white Cardstock, 
  7. Punch out the sentiment  using the Banner Duet Punch & mount onto the card from using Stampin Dimensional's for added lift.

If you would like a free copy of the new Annual Catalogue, please CONTACT ME with your name & Address (UK only) and I will get a copy out to you.

How to Contact or Follow Me


Kim Tolton, Independent Stampin Up Demonstrator.
Card & Papercraft Tutorials
Please feel free to comment below, and ask away with any questions. You can also find me via the links below


Blog:

Online Store:

Stamping @ The Warren Craft Forum:

Email:
kim.tolton@googlemail.com

youTube

Pinterest:

Google +

Facebook:

Twitter:

Instagram:
@kim.tolton

LinkedIn:

Thursday, 2 June 2016

Me = Greatful meets Perpetual Birthday Calendar Dry Embosed Banner Card Stampin Up UK

Well, it seems all the good weather has disappeared for a while. I am back wearing my Uggs and thicker Tops!
But do I mind? Noooo! Because the New Catalogue is live and that means all is well in the world.
I have a super card for you today. But before I tall you all about it, there is a teeny bit of Business for you ...

If you would like a complimentary Catalogue from me, and you have a UK Mailing Address


& I will get one out to you

You can also view all the new products via


And now for the card I am sharing with you today. And what I love, is that is brings some of the best products that have folled over from last years catalogue, and mised it up with some of the new.
This, for me, really highlights the lengths that the Stampin Up! Design Team go to, to ensure that all their products blend and co-ordinate with one another.

From the old catalogue I am using the Me = Greatful Stamp Set and the Perpetual Birthday Calendar Stamp Set for the artwork.
I have added the Banner Framelits and the Large Dots Textured Impressions Embossing Folder (TIEF) . I have coupled these products with some of the new Designer Series Papers (Affectionately Yours) and all 5 of the new In Colours
The fill tutorial and all my contact/social media accents can be found below.


Feel free to CASE any of my creative projects (Copy & Paste Everything)

Click on the icons below to view/order any of the products used in today's tutorial
Table built using Product Table Builder by The Crafty Owl - Independent Stampin' Up! Demonstrator.

Tutorial

  1. Make your card base by trimming a piece of Kraft Cardstock to 21 x 14.8 cms; score at 10.5 cms; fold & Burnish
  2. Trim a piece of Affectionately Yours Designer Series Paper (DSP) to 14.4 x 2 cms and mount at the top of your Card Base using Fast Fuse Adhesive
  3. Trim a piece of diagonal stripped DSP from the Neutrals 12" x 12" Paper Stack to 14.12.5 x 
  4. Trim a piece of Flirty Flamingo Cardstock to 12.5 x 6 cms and mat onto the centre of the card base beneath the Affectionately Yours DSP strip.
  5. Die cut the largest of the Banners Framelits Dies from Flirty Flamingo Cardstock using your Big Shot (best results with the Magnetic Platform); and then Dry Emboss the Banner using the Large Dots Textured Impressions Embossing Folder (TIEF). Mount onto the centre of the card base using Stampin Dimensionals for lift.
  6. Die Cut the next size down Banner Framelit using Whisper white Cardstock
  7. Stamp the Sentiment at the top of this banner, and then randomly stamp using some of the floral stamps from the Perpetual Birthday Calendar Stamp Set. I have used a mixture of the new (2016-2018) In Colour Ink Pads; Mount on top of the first banner using Stampin Dimensionals again,
  8. Finish with a nice loopy bow of Linen Thread & adhere to the top of the card using a Mini Glue Dot.

How to Contact or Follow Me

Kim Tolton, Independent Stampin Up Demonstrator.
Card & Papercraft Tutorials
Please feel free to comment below, and ask away with any questions. You can also find me via the links below


Blog:

Online Store:

Stamping @ The Warren Craft Forum:

Email:
kim.tolton@googlemail.com

youTube


Pinterest:

Google +

Facebook:

Twittert:

Instagram:
@kim.tolton

LinkedIn:


Wednesday, 1 June 2016

Helping Me Grow Emboss Resist Stampin Up UK

In the words of Meg Ryan
YES! YES! YES!
Yes .... Today is the day that the new Stampin' Up! Catalogue Goes Live .... Yeh Ha!
Our launch day nearly didn't get going as the gales from a couple of nights ago left us with heavy run off from the fields, and no electricity since the night before last!
The mobile phones and Kindles ran out of power so we were reading by candle light. Thank goodness for the BBQ and the camping stoves ... 

But, as we slept through the night, the power came on at some point early this-morning
So here I am, Bright and cheery to share the Launch of the new Catalogue
Look at the inspiration on the catalogue front cover. And if you think the cover is full of inspiration, just wait until you see inside!! 
The catalogue is Packed Full with creative ideas and projects.

Today I am sharing with you one of those Ideas, that I turned into my own version
Ypu can find the Helping Me Grow Stamp Set on page 40 of the catalogue.

You can find the tutorial below
if you click on the product icons below, you will be transported to my online store where you can browse and.or place your order.
If you need help choosing items, or ordering, you will find my contact details at the bottom of today's blog post, or the Contact Me Tab at the top of the blog

Table built using Product Table Builder by The Crafty Owl - Independent Stampin' Up! Demonstrator.


So here is today's project.
An Emboss Resist  Card that is SO simple to make, but looks so pretty


Feel free to CASE any of my creative projects (Copy & Paste Everything)

Tutorial

  1. Trim a piece of Flirty Flamingo Cardstock to 30 x 10.5cms; score at 14.8cms; fold & burnish
  2. trim a piece of Soft Mint Macaron Cardstock to 14.4 x 10.1 cms & dry Emboss using  your Big Shot. Mat onto the Card Front
  3. Trim a piece of Whisper White Cardstock to 14 x 9.7 cms & stamp the Flower from Helping Me Grow Stamp Set using Versamark Ink Pad; Dust with White Embossing Powder & Heat Set
  4. Sponge the flower heads using the Flirty Flamingo Ink Pad; Then sponge the surrounding areas using the Minti Macaron Ink Pad
  5. Add a strip of Flirty Flamingo Ruched Ribbon to the card front
  6. Stamp the sentiment and label using Versamark Ink Pad onto a scrap of Whisper White Cardstock and Die Cut using the Magnetic Platform with your Big Shot.
  7. Sponge the label with residual ink on the sponges, and mount onto the cardfront using Stampin Dimensionals 
  8. Finish with a bow using Whisper White Thicker Bakers Twine

How to Contact or Follow Me

Kim Tolton, Independent Stampin Up Demonstrator.
Card & Papercraft Tutorials
Please feel free to comment below, and ask away with any questions. You can also find me via the links below
Blog:

Online Store:

Stamping @ The Warren Craft Forum:

Email:
kim.tolton@googlemail.com

youTube


Pinterest:

Google +

Facebook:

Twittert:

Instagram:
@kim.tolton

LinkedIn: