google-site-verification: google70410e9e92d4fda2.html

Thursday, 17 March 2016

Hostess Happy Birthday Everyone with Flowering Flourishes Stampin Up! UK

For a few weeks, I am having to reduce how often I can do my blogs and videos, as we continue to have repeated disruption to our internet connections. I feel at a loss, but I would rather do this, and make sure the internet is reliable again, rather than letting you guys down.

So today I have a super quick and super easy feminine Birthday Card for you ... I am participating with a Hashtag  Project,  #imbringingbackbirthdays

This is a campaign to get us all posting birthday cards via the Royal Mail, rather than posting digitally.

So, if you would like to receive a blank handmade birthday card, then send me a message with your name and address, and I will get them out to you.

The one thing I ask, is that you direct 5 people to my blog, Facebook page YouTube channel etc, and let them know I will send them cards too, if they would like one. So feel free to pass the message on!
You will find all my details at the bottom of today's blog post or on the Contact Me Tab on this blog
_______________________________________________________________________________


As you scroll down today's blog post, you will find :

  • icons of all the products used to create today's card - click on them to visit my 
  • online store;
  • A Video Tutorial
  • & a typed tutorial

Feel free to CASE any of my creative projects (Copy & Paste Everything)

Click on the icons below to view/order any of the products used in today's tutorial
Table built using Product Table Builder by The Crafty Owl - Independent Stampin' Up! Demonstrator.


Watch The Video Below


Tutorial

  • Trim a piece of Perfect Plumb Cardstock to 21 x 10.5 cms; Score the long side at 10.5 cms; fold and burnish
  • Trim a piece  of Whisper White Cardstock to 14.4 x 10.1 cms
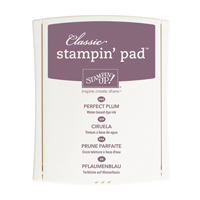
  • Using the Flowering Flourish' Stamp Set, and the Perfect Plum Ink Pad, stamp a flourish in one corner, using the Stamping Off The Page Technique in the Video
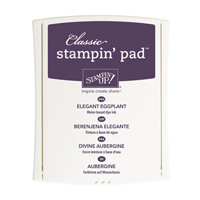
  • Repeat this with the opposite corner using Elegant Eggplant Ink Pad this time.
  • Wrap around Bakers Twine a couple of times and tie a loopy bow
  •  (I used the Bakers Twine Combo from the Spring/Summer Catalogue)
  • Embellish with some of the It's My Party Enamel Dots
  • Mat onto your card base

How to Contact or Follow Me


Kim Tolton, Independent Stampin Up Demonstrator.
Card & Papercraft Tutorials
Please feel free to comment below, and ask away with any questions. You can also find me via the links below


Blog:

Online Store:

Stamping @ The Warren Craft Forum:

Email:
kim.tolton@googlemail.com

youTube


Pinterest:

Google +

Facebook:

Twittert:

Instagram:
@kim.tolton

LinkedIn:


Monday, 14 March 2016

Guy Greetings From Land To Sea By The Tide Masking Technique, Stampin Up! UK


Today's card was featured briefly in a recent video talking about my submissions as part of a selection process with Stampin Up!
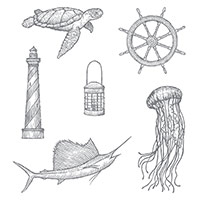
Today I  have this super masculine card made with a combination of stamp sets, and a Masked sentiment. I have gone with a colourscheme that mimics the colours ofsea, and therefore the Retiring 2014 - 2016 In Colours were perfect for the job. I added in some Basic Black and Basic Gray to get those under water images of the Turtles and seahorses.

As always there is an accompanying Video. For the time being I am reducing my video's to 3 times weekly. Hopefully, BT will be able to resolve the errors on our broadband connection. As soon as that happens, I will return to 5 video's per week.
_______________________________________________________

As you scroll down today's blog post, you will find :

  • icons of all the products used to create today's card - click on them to visit my 
  • online store;
  • A Video Tutorial
  • & a typed tutorial

Feel free to CASE any of my creative projects (Copy & Paste Everything)

Click on the icons below to view/order any of the products used in today's tutorial

Table built using Product Table Builder by The Crafty Owl - Independent Stampin' Up! Demonstrator.

Watch The Video Below

Tutorial
  1. Trim a piece of Lost Lagoon Cardstock to 21 x 14.8 cms; score long side at 10.5 cms; fold & Burnish
  2. Trim a piece of Whisper White Cardstock to 14.4 x 10.1 cms
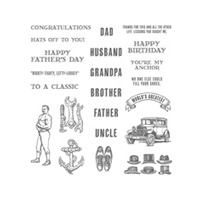
  3. Stamp your sentiment in the bottom left of the cardstock using Archival Basic Black Ink Pad, using a black & a sentiment from Guy Greetings Stamp Set journalling Marker and a steel rule, draw a line above, and below the sentiment
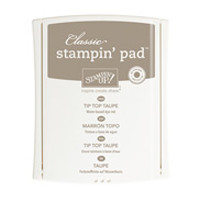
  4. Cut down some Post It Notes, retaining the sticky strips; use the sticky trips to mask the sentiment between the two lines  and stamp your card from using a combination of the In Colour inks pads, plus Basic Black and Basic Gray ink pads. Add some medallion stamps using Tip Top Taupe ink pad,  ... use stamps from the By The Tide & From Land To Sea stamp sets. Remove the Mask
  5. Mount the stamped panel onto your card base.
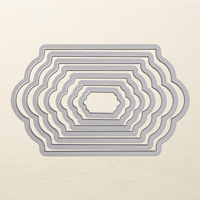
  6. Onto a scrap of Whisper White Cardstock, stamp a combination of the stamps used above, with the co-ordinating ink pads. Then die cut using the Lots of Labels Framelits Dies. Cut off the scallop top of this panel
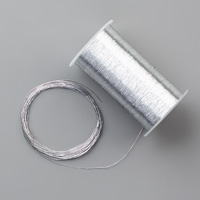
  7. Die cut the next size up Framelit using Blackberry Bliss Cardstock, remove the top scallop edge and mount the stamped label onto the Blackberry Bliss label (you may need to trim off more  of the label to get a snug mat.'Wrap around some Silver Metallic Thread, then mount the label onto the card front using Stampin Dimensionals.


How to Contact or Follow Me


Kim Tolton, Independent Stampin Up Demonstrator.
Card & Papercraft Tutorials
Please feel free to comment below, and ask away with any questions. You can also find me via the links below


Blog:

Online Store:

Stamping @ The Warren Craft Forum:

Email:
kim.tolton@googlemail.com

youTube


Pinterest:

Google +

Facebook:

Twittert:

Instagram:
@kim.tolton

LinkedIn:


Saturday, 12 March 2016

Friendly Wishes Work of Art Bohemian Card with a Stamping Off Technique

The card I am sharing with you today uses a Stamping Off Technique. Put simply, stamping off means you ink up your stamp, and then stamp onto scrap paper before stamping onto the cardstock, without re-inking the stamp.
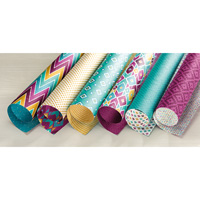
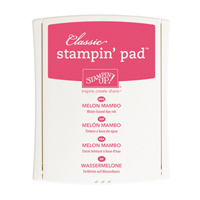
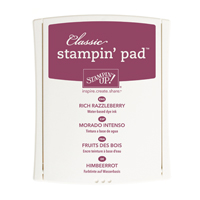
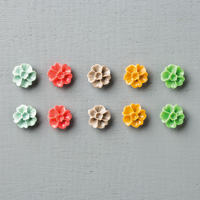
In this example, I used the Friendly Wishes Stamp Set to stamp the main image onto Shimmery White Cardstock using the Archival Basic Black Ink Pad, and then used a combination of Melon Mambo & Rich Razzelberry Classic Ink Pads (both from the Brights Colour Collection) with the stamping off technique to over-stamp the sentiment using the smaller faux watercolour stamp, from the Work of Art Stamp Set. The bohemian Designer Series Paper co-ordinated with all the other colours in the Brights Collection from Stampin Up. The card was decorated with some open loops of Silver Thread and a Blossom Accent (resin flower).
___________________________________________________________________________

_________________________

As you scroll down today's blog post, you will find :

  • icons of all the products used to create today's card - click on them to visit my 
  • online store;
  • A Video Tutorial
  • & a typed tutorial

Feel free to CASE any of my creative projects (Copy & Paste Everything)

Click on the icons below to view/order any of the products used in today's tutorial
Table built using Product Table Builder by The Crafty Owl - Independent Stampin' Up! Demonstrator.

Watch The Video Below

Tutorial

.  Trim a A4 piece of Melon Mambo cardstock to 10.5 x 29.8 cms; score the long side at 17.8 cms; fold and burnish

2.  Trim a piece of Bohemian Designer Series Paper (DSP) to 14.4 x 10.1 cms and attach to the card front.


3.  Trim a piece of Shimmery White  Cardstock to 9.8 cms x 7.3 cms; Stamp the cardstock with the Friendly Wishes Stamp using Archival Basic Black Ink pad. Ink up the smaller faux watercolour stamp from A Work of Art stamp set, using Melon Mambo ink pad, stamp off onto scrap paper and stamp the top third of the Friendly Wishes sentiment; repeat this process and this time once you have stamped off onto the scrap paper, over stamp the bottom third of the sentiment. Finally, repeat again, but this time using Rich Razzelberry Ink and stamp the middle portion of the Friendly Wishes sentiment after stamping off onto scrap paper.


4.  Mat (layer) the stamped cardstock onto a piece of Old Olive Cardstock measuring 9.8 x7.3 cms; Apply a strip of Fast Fuse or Tear & Tape adhesive to the back of the panel, and attach some large loops of Silver Metallic Thread over the adhesive; apply some stampin dimensionals to the back of the panel and adhere to the top left of the card base.


5.  Finish by adding an In Colour Blossom Accent using a drop of Chrystal Effects
How Contact or Follow Me


Kim Tolton, Independent Stampin Up Demonstrator.
Card & Papercraft Tutorials
Please feel free to comment below, and ask away with any questions. You can also find me via the links below


Blog:

Online Store:

Stamping @ The Warren Craft Forum:

Email:
kim.tolton@googlemail.com

youTube


Pinterest:

Google +

Facebook:

Twittert:

Instagram:
@kim.tolton


LinkedIn: