
Today is the end of our Second Week of Stampset Challenges.
So here is the final project using
KINDA ECLECTIC stamp set
And the Project is a Note Card Holder that holds 8 note cards & envelopes. They are all made from Kraft Cardstock. Have a read of my blogs this week for guidance on overstamping the Typeset Designer Series Papers.
You will need a hot melt Glue Gun for best results. I have a fabulous Bosch cordless one that takes mini glue sticks, so you can be precise with the glueing.

Begin by trimming an A4 sheet of Kraft Cardstock to 27cms x 12cms, and with the long side of the cardstock at the top of your metric scoring board, score at 12cms. Rotate the cardstock by 180 degrees and score again at 12cms.
Next cut two pieces of Kraft Cardstock to 13cms x 9cms.
With the long side at the top of the scoring board, score at 1cm, 2cm,10cms, 11cms & 12cms
Rotate the cardstock wo the short side is at the top and score at 1cm, & 2cms
Burish all score lines with a bone folder. you will need to snip to form a couple of tabs to score lines at the bottom of the 'pouch pocket'. Use the glue gun to adhere the 2 pouches to the cardstock. Centralise each pocket between the outside edge of the card and the central (spine) score lines. Leave to completely cool.

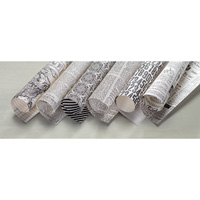
Next, read this weeks blogs for information on overstamping the Typeset DSP, and then stamp a 12" x 12" sheet of DSP and overstamp it with a combination of:
Sunburst stamp - Hello Honey ink pad
Leaf stamp - Mossy Meadow ink pad
Berry stamp - Blackberry Bliss ink pad.
Trim the DSP to:
Two pieces of 8.5cms (W) x 6cms (H) (front of pouch pockets)
One piece 5cms (W) x 11.5cms (inside spine)
two pieces 11.5cms x 11.5cms (front and back cover)
One piece 11.5cms (H) x 2cms (W) (Back Spi
Stamp the sentiment Stamp onto the front of one of the Pocket pieces of DSP in Mossy Meadow cardstock. Sponge the edges of all DSP in Blackberry Bliss ink.
Add some cut down burlap ribbon, and some Venetian Crochet Trim to decorate the front covery and use the glue gun to adhere some of the Venetian lace to the front and back covers to tie the folder to close.

Now for the note cards.
The quickest and easiest way, is to have a set of Stampin Up's Note Cards & Envelopes that now come in Crumb Cake. So just right for this project. And all you need to do is dress the front of the cards with the rest of the overstamped Typeset DSP, some Burlap Ribbon and some Venetian Crochet Trim.
What a fab little gift this would make!
Happy Stamping
Kim xxx
Let me know how you get on with making your own note card holder.
 |  |  |  |  |
 |  |  |  |  |
 |  |  | 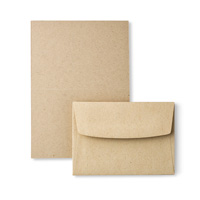 |
Table built using Product Table Builder by The Crafty Owl - Independent Stampin' Up! Demonstrator.
Are you planning a Wedding? A Party? A Baby Shower? Or a Birthday? and want something Handmade and Bespoke?
If the answer is 'YES' then contact us:
Phone: 08432896848
Text: 07759587004
OR ORDER ONLINE 24/7


No comments:
Post a Comment