Welcome to Day three of this weeks Showcase Challenge
And today we have another card creation using the featured LABEL LOVE stamp set,
plus another stamp set suitable for using with Blendabilities Pens (are you getting this weeks sub-theme yet?)
the second stamp set is Forever Florals
A beautiful collection of floral stamps .... you may just see more this week .... but I haven't decided as yet, since of the four projects left for this week, I need one for a 3D project, and another for a tag/gift packaging
If you have any requests for styles or specific stamp sets or specific projects, then drop me a line and I will see what I can do ...
Todays card is using my favourite stamp from the Label Love stamp set ... and that is the ornate Mr & Mrs stamp ... LOVE IT!!
I have gone with a Rich Razzelberry monochrome theme today.
I normally go with softer cleaner looks for wedding cards, but when I was playing with this new stamp wet when it arrived with my Stampin Up order earlier this week, I thought It might just suit a wedding theme ... and I think it works, I also added in a touch of Everything Eleanor stamp set with the flourish stamp, but you could substitute any flourish stamp and it would work.
To start todays project,make your card blank by trimming a piece of Whisper White cardstock to 30cms x 15cms, score the long side at 15cms, fold and burnish,
Trim another piece of Whisper White cardstock to 14cms x 14cms.
Stamp the Forever Florals stamp with Black Memento Ink, repeatedly, stamping some off the edge of the cardstock to give a more natural look. Then stamp the flourish in the top right if the stamped cardstock.
Next you need to get out your Rich Razzelberry Blendabilities pen set. Begin with the light shade and colour in the chrysanthemum stamp using the brush tip. Then add highlights with the medium shade of pen, and finally add some shadow.contrast by using the dark pen in the set. Then go over the all the images again with the light pen to blend the colours together.
Stamp a few of the small flowers using rich Razzelberry ink onto scraps of whisper white cardstock. Colour these with the light blendability pen for the petals, and the mediym shade for the centre of the flower. Pop them onto Stampin Dimensionals and adhere to 3 of the flourishes,
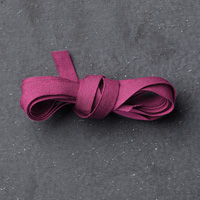
Tie a co-ordinating ribbon in a bow. Mount onto a piece of Blackberry Bliss cardstock to trimmed to 14.5cms x 14.5cms. Add plenty of Basic Rhinestones for sparkle.
Stamp the Mr & Mrs stamp in Blackberry Bliss ink. Punch out with the Artisan punch. Punch an additional 2 labels using Blackberry Bliss cardstock, To make these into a frame for the stamped label, you need to cut the first Blackberry Bliss Artisan label down the middle on the vertical, repeat with the second piece of cardstock but cut it on the horizontal this time. Adhere the matching pieces to the back of the stamped label using Tombow Multi pPurpose Glue, pop up on Stampin Dimensionals and stick to the top left of the topper. Adhere the topper to the card blank.
And you are finished ... Well Done!
Happy Stamping
Kim xxx
Table built using Product Table Builder by The Crafty Owl - Independent Stampin' Up! Demonstrator.
Contact us for details of our Bespoke Handmade Greetings Cards, Wedding Invites, Favours, Gift Boxes etc
Telephone: 08432896848
Text: 07759587004
Or Order Online 24/7


No comments:
Post a Comment